

Windows Server 2025 Jumpbox
This guide is to connect to a Windows server through SSH (11min setup required).
I. Enable Open SHH
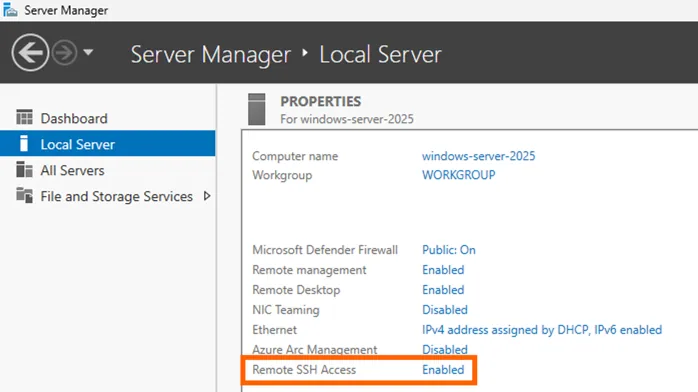
On the Windows server, open the Server Manager app, and enable Remote SSH Access.
II. Grant your Windows user access to OpenSSH Server
-
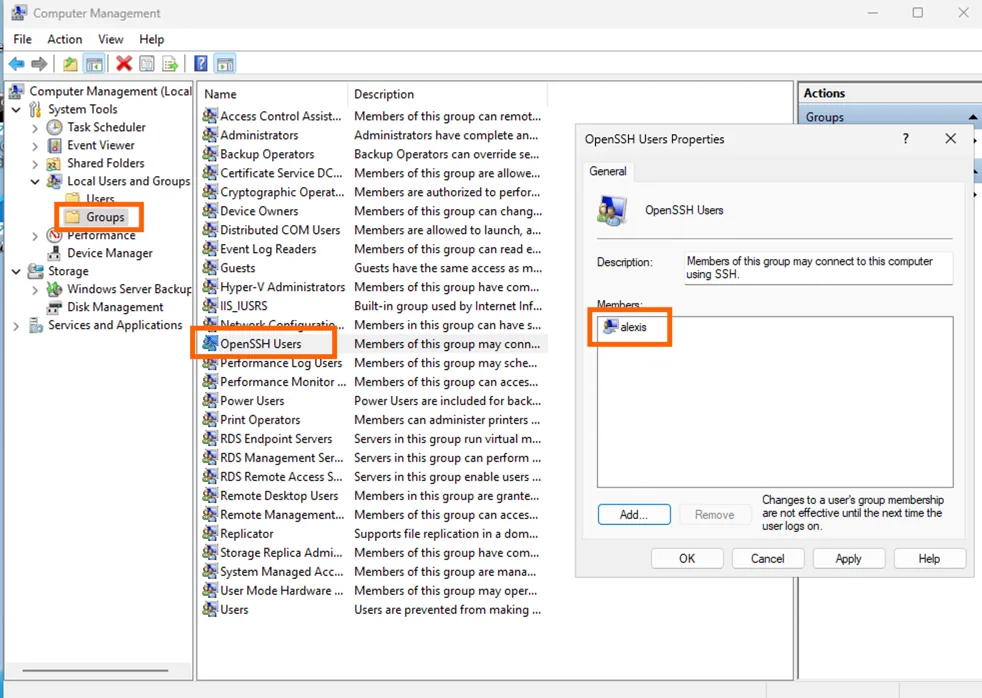
Open Computer Management application.
-
Go into Local Users and Groups > Groups.
-
Click on OpenSSH Users.
-
Add your Windows user to the list of members for the group OpenSSH Users.
III. Set Up OpenSSH Server
-
Open a terminal with Administrator role.
-
Open the OpenSSH Server config file by running:
notepad "C:\ProgramData\ssh\sshd_config" -
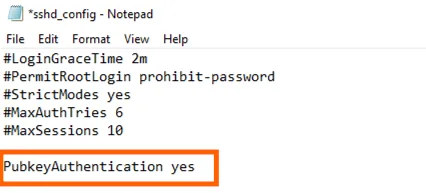
Uncomment PubkeyAuthentication.
-
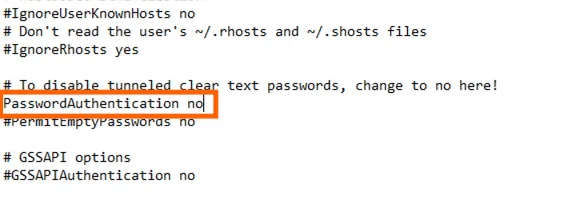
Uncomment PasswordAuthentication and set it to no.
-
Comment the 2 last lines of the file (Match Group Administrator).
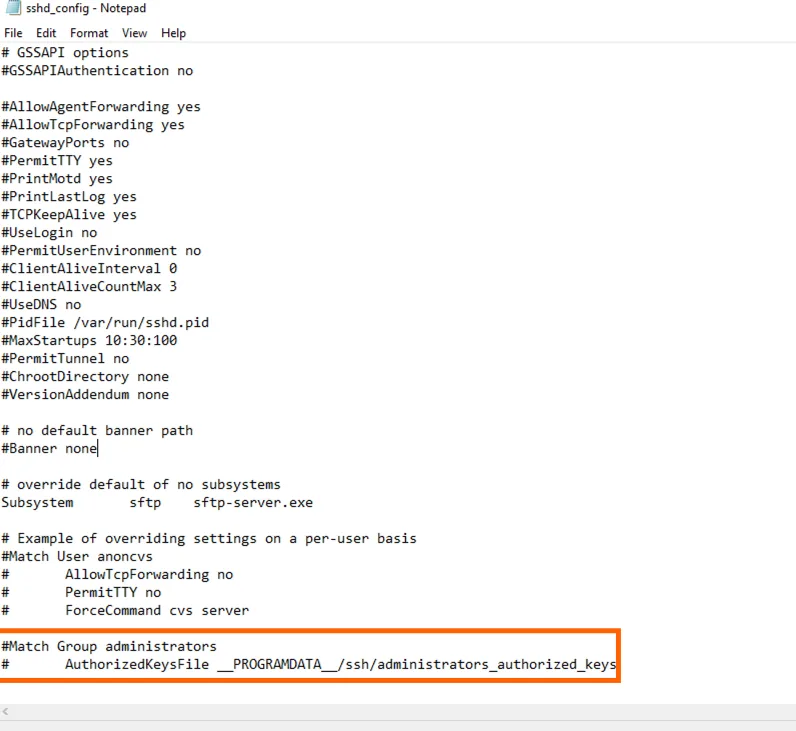
-
Save and quit the file. If you cannot save, you most certainly did not open the terminal as an Administrator, you need to open a new terminal with Administrator rights and redo the configuration changes done in this section.
-
In the Computer Management window, go to Services and Applications > Services.
-
Select the OpenSSH Server.
-
Restart the OpenSSH Server.
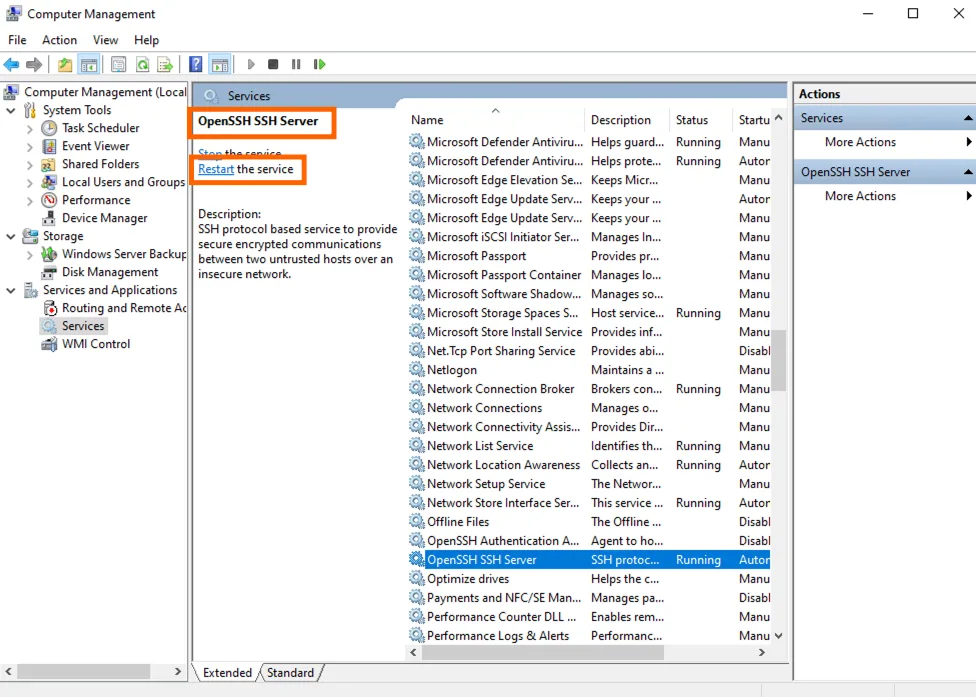
IV. Upload the Public SSH key of the client
-
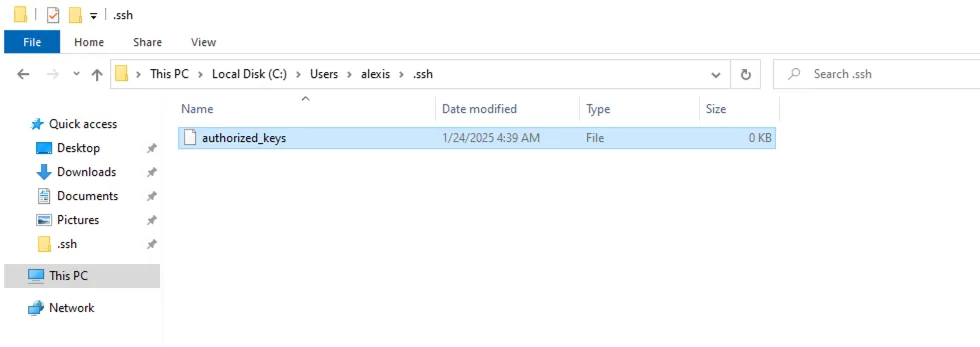
Go in Users and go in the folder associated with the user you want to connect with.
-
Create a new folder
.ssh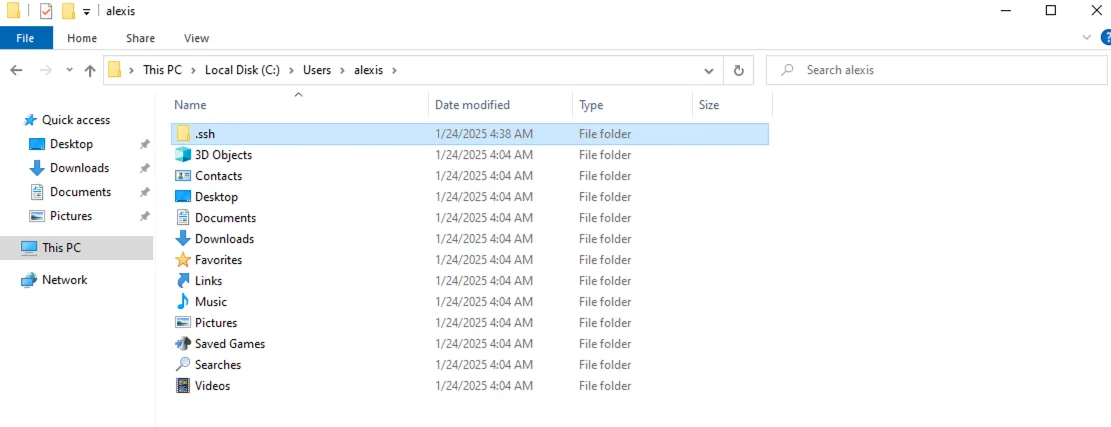
-
In this newly created folder, create an empty text file
authorized_keys -
By default, text files are created with a
.txtextension, we need to remove it.-
Click View in the header bar.
-
Tick the checkbox
File name extensions.
-
The
.txtfile extension should now be visible.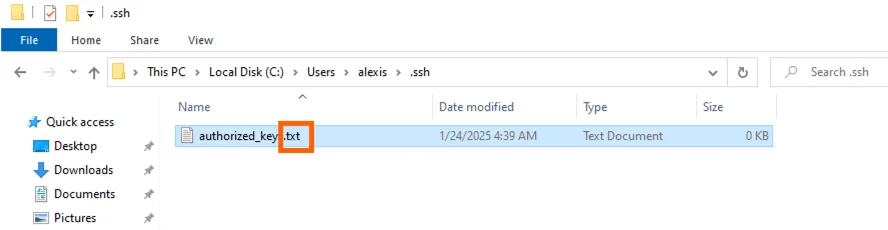
-
Rename the file to remove the file extension. You can safely ignore the warning.
-
-
Add the PUBLIC SSH key of the server that you want to grant access to this Windows server we are currently configuring. The public key is of the form:
ssh-<encryption_algorithm> <key>.
V. Open Firewall
If you are connected from outside the private network where the Windows server is locted, you need to open the firewall.
-
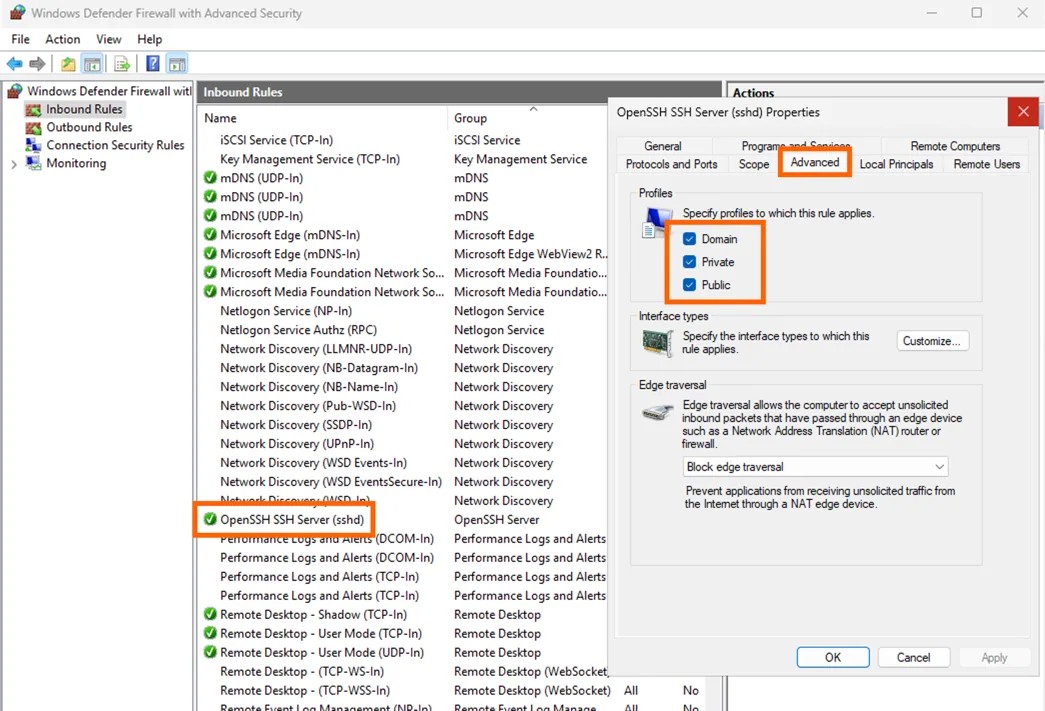
Open app 'Windows Defender Firewall with Advanced Security'.
-
In the Inbound Rules, click on 'OpenSSH Server'.
-
In the Advanced section, select all the checkboxes.
VI. Test
Try connecting through SSH to the windows instance we just setup:
ssh -i <path_to_ssh_private_key_of_client> <ssh_user>@<windows_server_public_ip>where:
-i <path_to_ssh_private_key_of_client>: Specifies the private key file for authentication of the client, not of the windows machine. The private key file should be readable and writable only by its owner and should be of the form:
-----BEGIN PRIVATE KEY-----
          ...
          ...
-----END PRIVATE KEY-----ssh_user: the Windows User for which you uploaded the client public key. In the screenshots above it is 'alexis'.<windows_server_public_ip>: The public IP address of the Windows server.
You should now have been able to access this Windows server through SSH 🎉
If you are blocked or have any question, feel free to reach out to us at hello@stacksync.com we're happy to help!
Troubleshooting of common errors
Permissions 0644 for <path_to_ssh_private_key_of_client> are too open. It is required that your private key files are NOT accessible by others. This private key will be ignored.
-> You need to let only the owner of the file read and write to that file.
Run this: chmod 600 <path_to_ssh_private_key_of_client>
'export' is not recognized as an internal or external command, operable program or batch file.
-> This is an error due to your client terminal, try using the default terminal of the client machine. This error typically happen when using Warp as terminal.
Permission denied (publickey,keyboard-interactive).
-> You most certainly missed one of the above steps of that tutorial, or the public ssh key uploaded on the Windows server does not correspond to the private ssh key of the client.
timeout error.
-> The Windows server is not listening to the client IP and the port you are trying to connect to (SSH default port is 22). Make sure you whitelisted the client IP.