

Accessing a Private GCP Database via a Jumpbox
(7 min read)
Accessing a private Cloud SQL instance is a common challenge in cloud-based architectures. Exposing your database directly to the internet poses significant security risks — which is why using a jumpbox (bastion host) within a private subnet is an established best practice.
This guide walks you through configuring and using an SSH tunnel via a jumpbox to connect to your private Cloud SQL instance on Google Cloud.
By following these steps, you’ll be able to securely manage your database while keeping it isolated and protected within your private network.
-
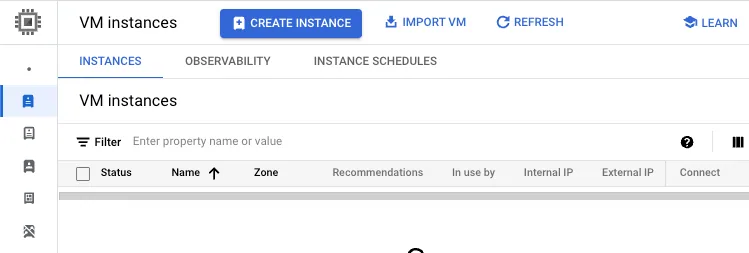
In the GCP Console, navigate to Compute Engine → VM instances, then click “Create Instance.”
-
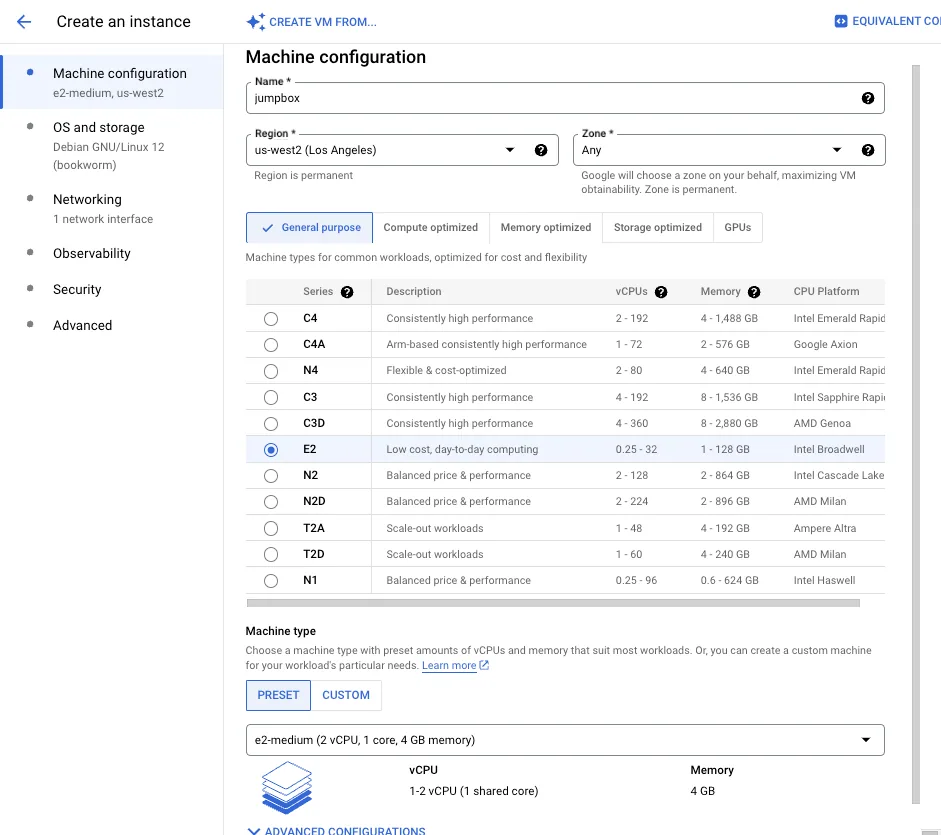
You can use the default machine type (2 vCPU, 4 GB RAM) — there’s no need to modify the default configuration, as it provides sufficient resources for the jumpbox.
-
For each client that requires access to the Jumpbox, add their public SSH keys under the Managed Access section in the Security tab.
Always add SSH keys through the GCP Console or CLI — do not edit the
.ssh/authorized_keysfile directly on the VM.
GCP periodically overwrites this file automatically, so manual edits will be lost.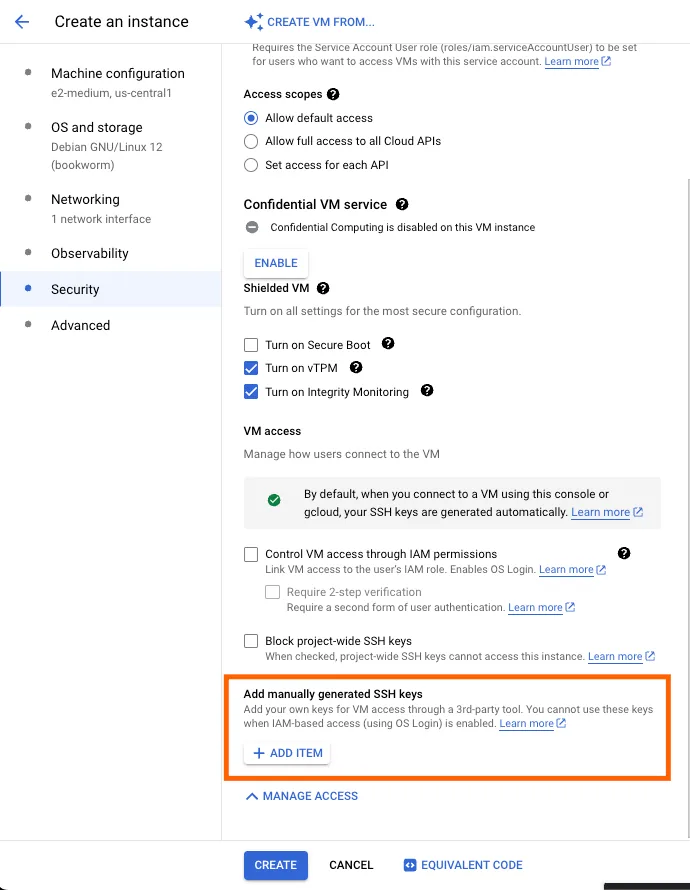
-
Click “Create” to launch the instance.
-
Connect to your Jumpbox using SSH.
The SSH username corresponds to the user portion of your SSH key.For example, if your public key looks like:
ssh-rsa AAAAB3... hello@example.comthen connect using:
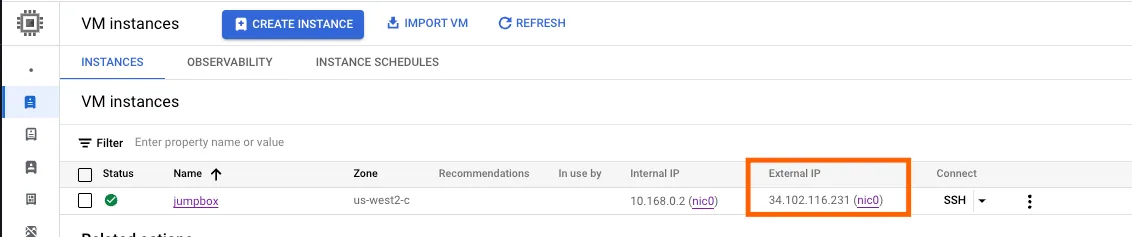
ssh hello@<jumpbox_public_ip>The public IP address (also called the External IP in GCP) is visible on the VM Instances page in the Compute Engine section.
-
In the Cloud SQL console, open your database configuration page to find the Private IP address listed on the main overview tab.
If a private IP hasn’t been allocated yet, edit the instance and enable Private Service Access.
The setup is straightforward — you can safely proceed with the default suggested configuration.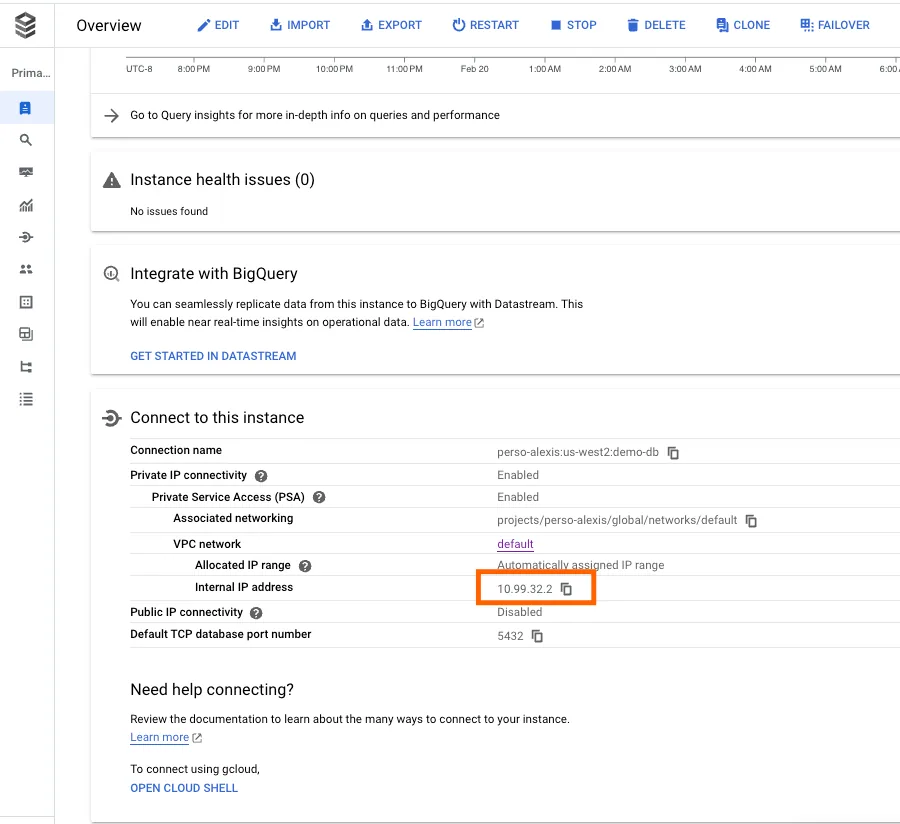
-
From your Jumpbox VM, verify that the database is reachable by running the following commands:
# Install telnet if not already installed
sudo apt install telnet -y

# Test the connection to your database
telnet <db_private_ip> <db_port>
Database port reference:
- PostgreSQL →
5432 - MySQL →
3306 - SQL Server →
1433
Expected output:
hello@jumpbox:~$ telnet <db_private_ip> <db_port>
Trying <db_private_ip>...
Connected to <db_private_ip>.
Escape character is '^]'.
If the command only shows:
Trying <db_private_ip>...and does not connect, it means the database is unreachable.
Double-check the following:- You’re using the correct private IP and port.
- The Jumpbox subnet has a valid route to the database subnet.
- Firewall or security group rules allow inbound traffic from the Jumpbox.
- PostgreSQL →
-
To strengthen security, limit SSH access to your Jumpbox by allowing only trusted IP addresses.
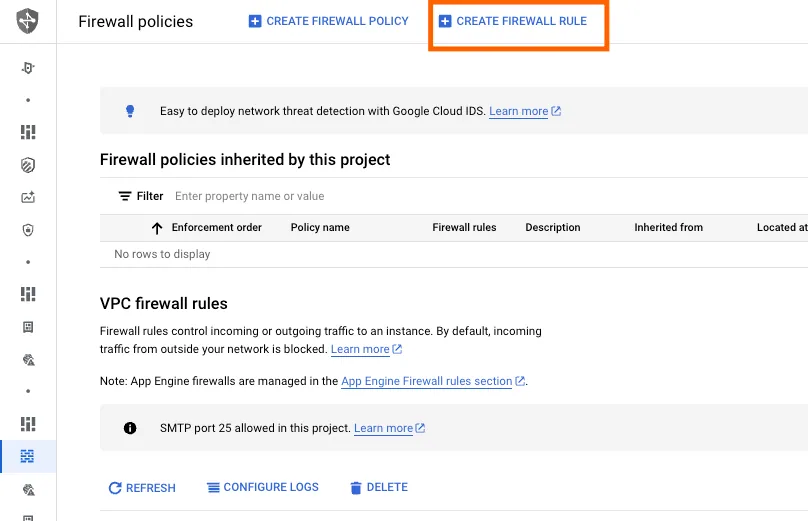
Go to the Firewall Policies section in the GCP Console, and create a new firewall rule that permits inbound SSH traffic only from your approved IP list.
-
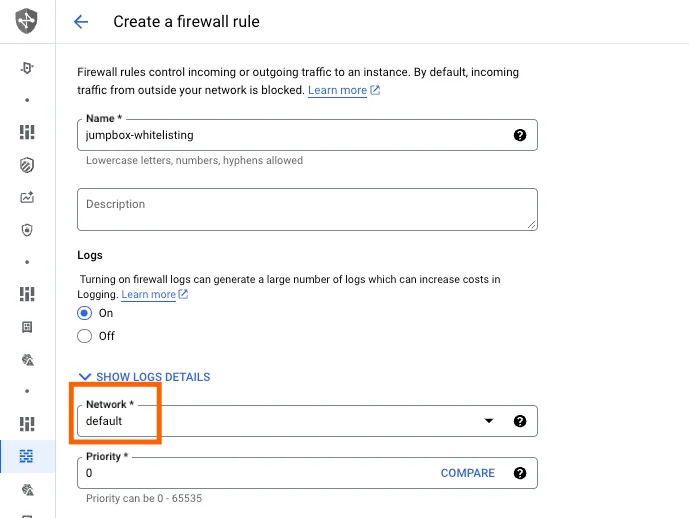
Select the network (VPC) where your Jumpbox instance is running to apply the firewall rule to the correct environment.
-
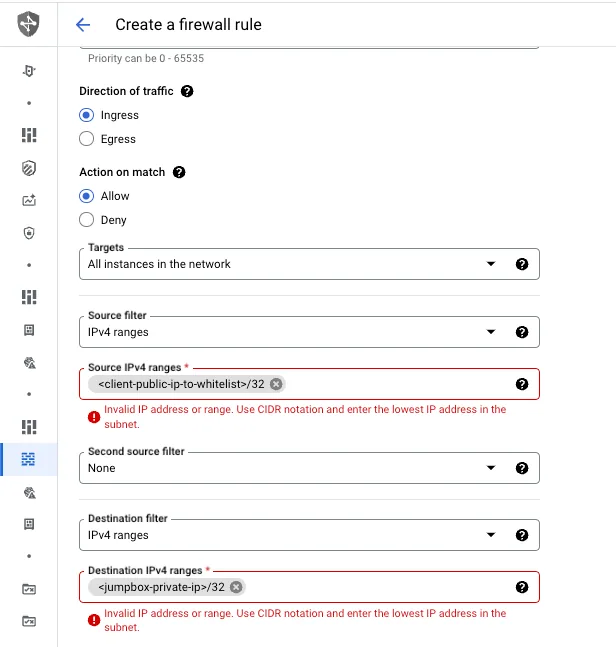
To grant a client access to your Jumpbox, whitelist their public IP in your firewall rule.
Configure the rule with the following parameters:- Priority:
0(highest priority) - Direction of traffic:
Ingress - Action on match:
Allow - Source IPv4 ranges:
<client_public_ip_to_whitelist>/32 - Destination IPv4 ranges:
<jumpbox_private_ip>/32
This ensures that only the specified client IP can initiate SSH connections to your Jumpbox.
- Priority:
-
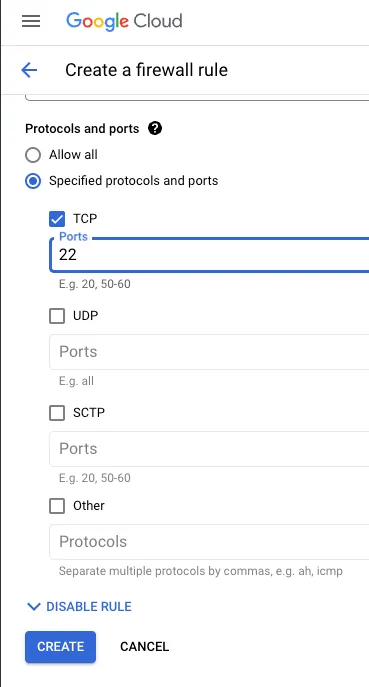
Allow access exclusively through SSH by whitelisting port 22, the default SSH port.
All other ports and protocols should be explicitly denied to prevent unauthorized access.Once these settings are configured, click “Create” to finalize the firewall rule.
-
Now that access from the client’s public IP is allowed, you should block all other incoming traffic to the Jumpbox.
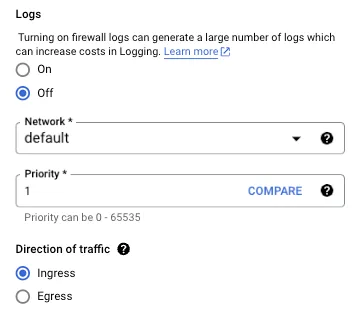
Create a new firewall rule using the same network (VPC) as in the previous step, and configure it as follows:
- Priority:
1(lower priority than the allow rule) - Action: Deny all inbound traffic from any other IP address
This ensures that only the whitelisted client can connect to the Jumpbox, while all other sources are securely blocked.
- Priority:
-
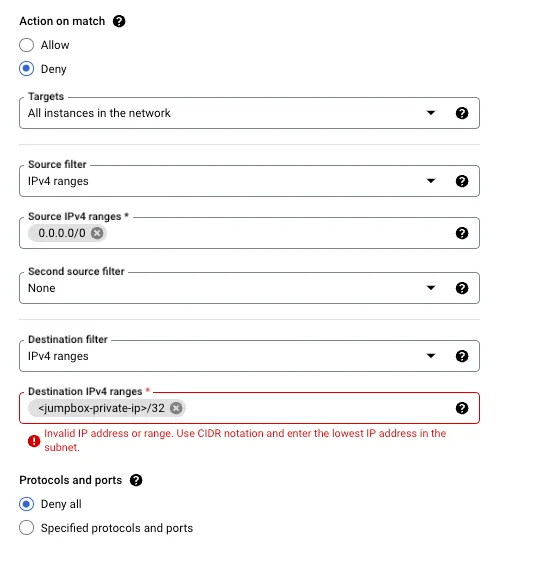
Set the Source IPv4 range to
0.0.0.0/0to deny access from all IP addresses.
Ensure that all protocols and ports are disabled to completely block unwanted traffic.Once configured, click “Create” to finalize the firewall rule.
-
Next, confirm that the Jumpbox is reachable only from the whitelisted client(s).
Try connecting via SSH from any other machine — the connection should time out, indicating that access is correctly restricted to authorized IPs only.
🎉 Congratulations!
You’ve successfully allowed an external client to securely access your private Cloud SQL database through the Jumpbox.
If you need any assistance or have questions, feel free to reach out at hello@stacksync.com — our team is always happy to help!