
> For the complete documentation index, see [llms.txt](https://docs.stacksync.com/llms.txt). Markdown versions of documentation pages are available by appending `.md` to page URLs; this page is available as [Markdown](https://docs.stacksync.com/agentic-workflows/agentic-workflows-quick-start.md).

# Agentic Workflows Quick Start

Welcome to Stacksync Agentic Workflows!

Agentic Workflows go beyond simple automation, they allow you to build intelligent, multi-step processes that can reason, branch, and act based on real-time data. Combine triggers, actions, logic, and AI to automate complex business operations end-to-end.

{% embed url="<https://www.youtube.com/watch?v=CoqVSClHhqg>" %}

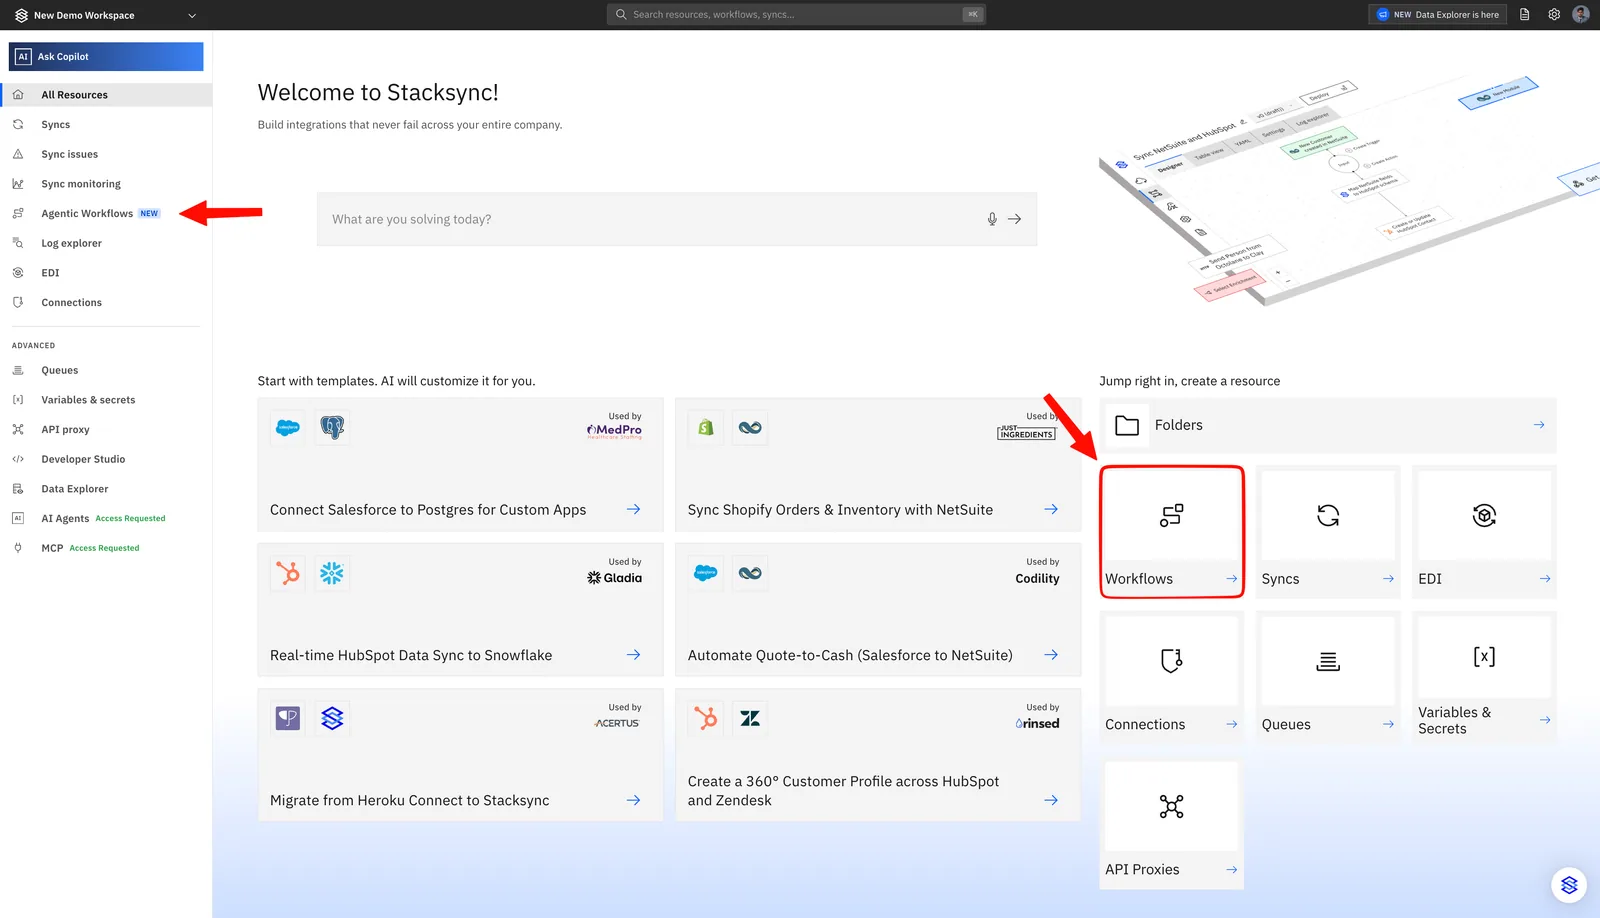
#### 1. Select "Agentic Workflows" under "All Resources"
<figure><img src="https://3389950191-files.gitbook.io/~/files/v0/b/gitbook-x-prod.appspot.com/o/spaces%2FO4RFXIz4V8iqghJ3JVSs%2Fuploads%2FIPc0uSmsR1iC6vGE0CEJ%2FSCR-20260527-muxw.png?alt=media&amp;token=35b09211-aec9-459f-a7a6-803d8e17ad7f" alt=""><figcaption></figcaption></figure>

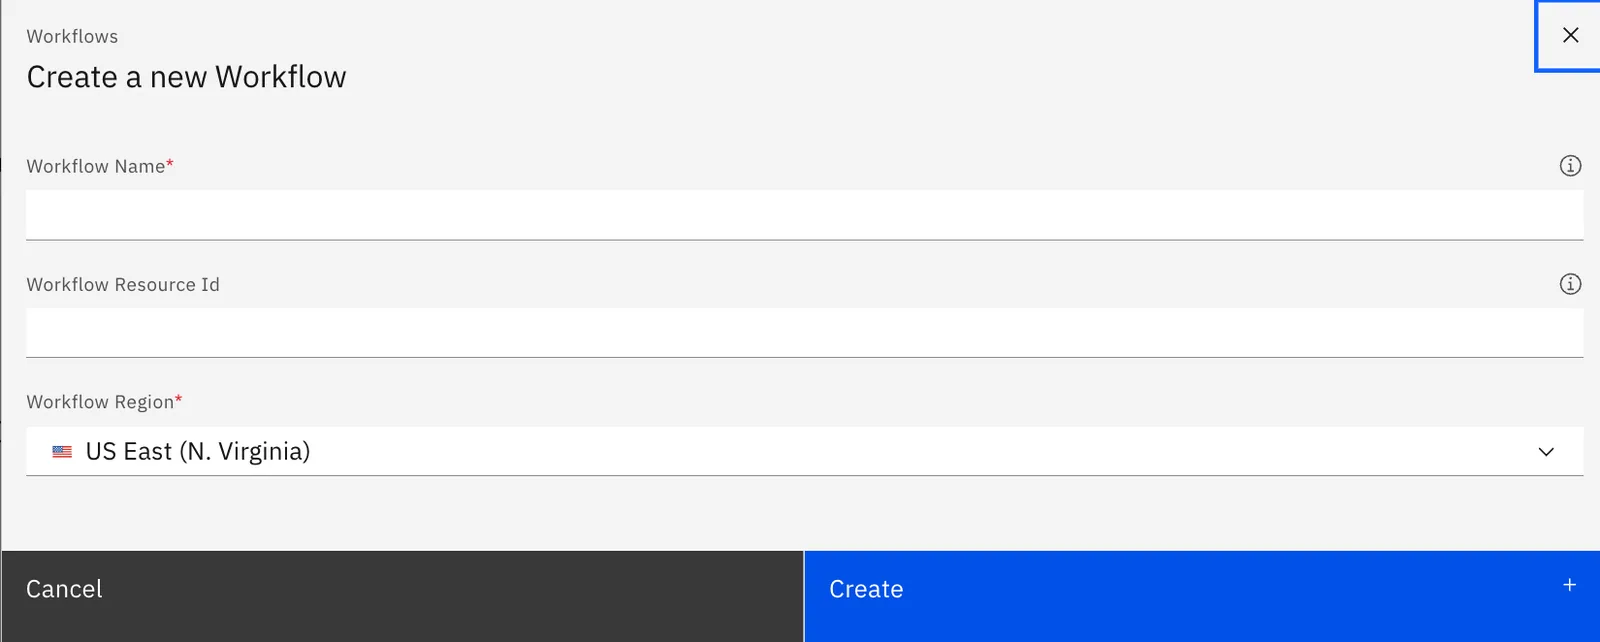
#### 2. Create a workflow by adding a unique name and choosing the region.

We recommend you choose the region closest to you and / or the server(s) and service(s) the Workflow will be interacting with.
<figure><img src="https://3389950191-files.gitbook.io/~/files/v0/b/gitbook-x-prod.appspot.com/o/spaces%2FO4RFXIz4V8iqghJ3JVSs%2Fuploads%2Fgc9GkIj4jNTXyZ5VpfGQ%2FSCR-20260527-mybc.png?alt=media&amp;token=7c4e0454-50df-4002-ac72-7137d9c5ee39" alt="" width="375"><figcaption></figcaption></figure>

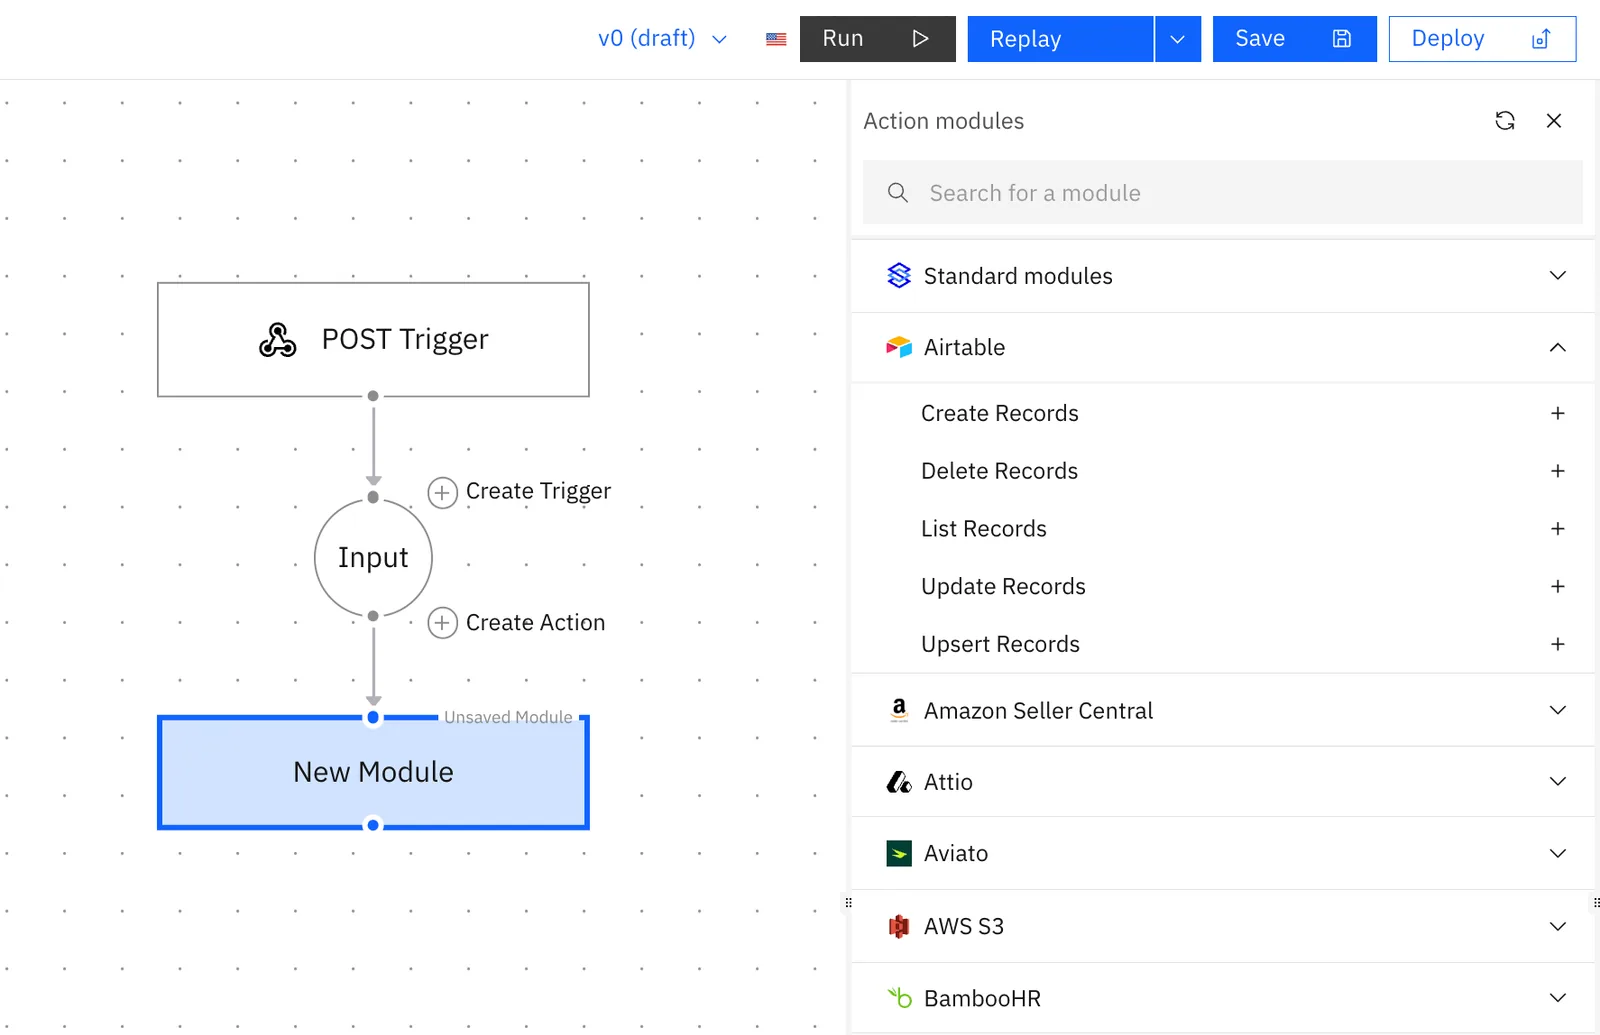
Once created you will see the Workflow designer with an empty workflow and a default POST Trigger. This trigger may be used to run your workflow from a terminal or through an API request.

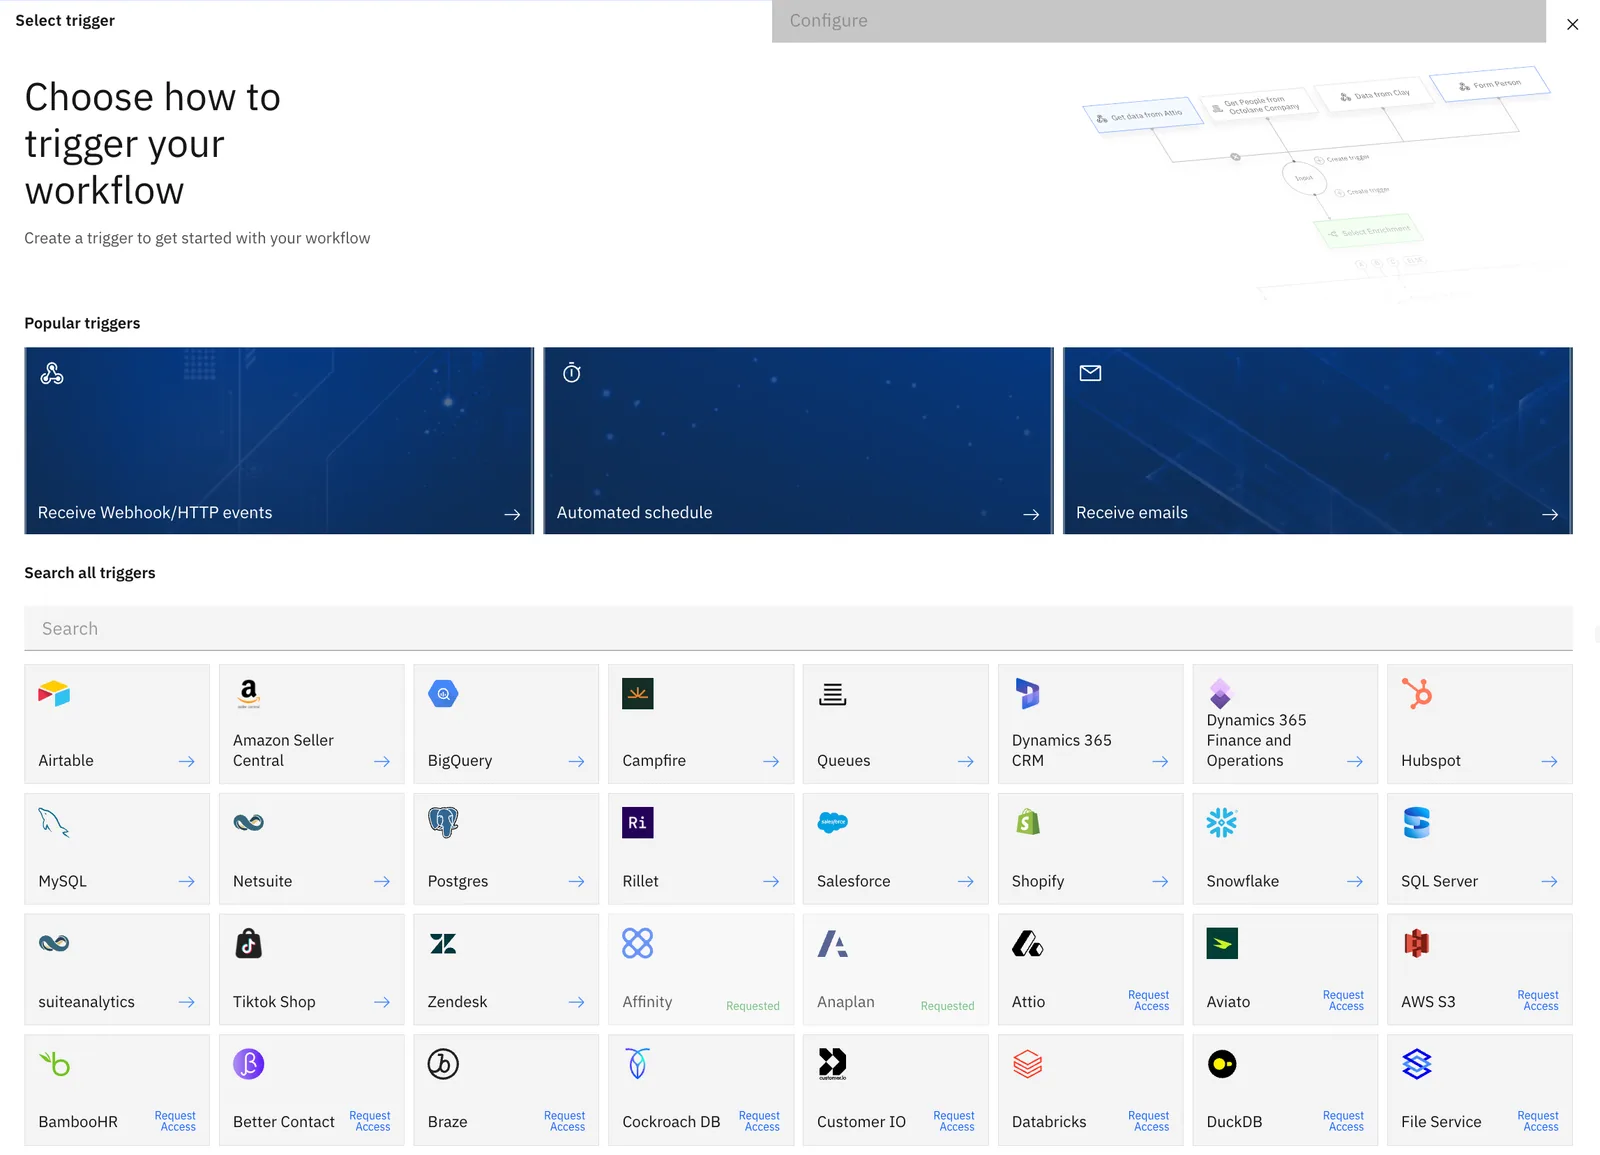
#### 3. Create your Trigger

You will see a menu with all of the currently available Trigger types. By default the POST trigger is already configured
<figure><img src="https://3389950191-files.gitbook.io/~/files/v0/b/gitbook-x-prod.appspot.com/o/spaces%2FO4RFXIz4V8iqghJ3JVSs%2Fuploads%2FB8y4OJ428MpbRnv6SNoH%2Fimage.png?alt=media&amp;token=ac997ae4-d643-461c-b4c0-67c42579c122" alt=""><figcaption></figcaption></figure>

#### 4. Create your first action.

Click on the :heavy\_plus\_sign: Icon to create a new action and you will see a menu with all of the currently available Action Modules.
<figure><img src="https://3389950191-files.gitbook.io/~/files/v0/b/gitbook-x-prod.appspot.com/o/spaces%2FO4RFXIz4V8iqghJ3JVSs%2Fuploads%2FNa6tti1z4Jzob9C2rT1p%2Fimage.png?alt=media&amp;token=f117b235-1e4a-4738-8cdb-7f1fb27b2a5a" alt=""><figcaption></figcaption></figure>

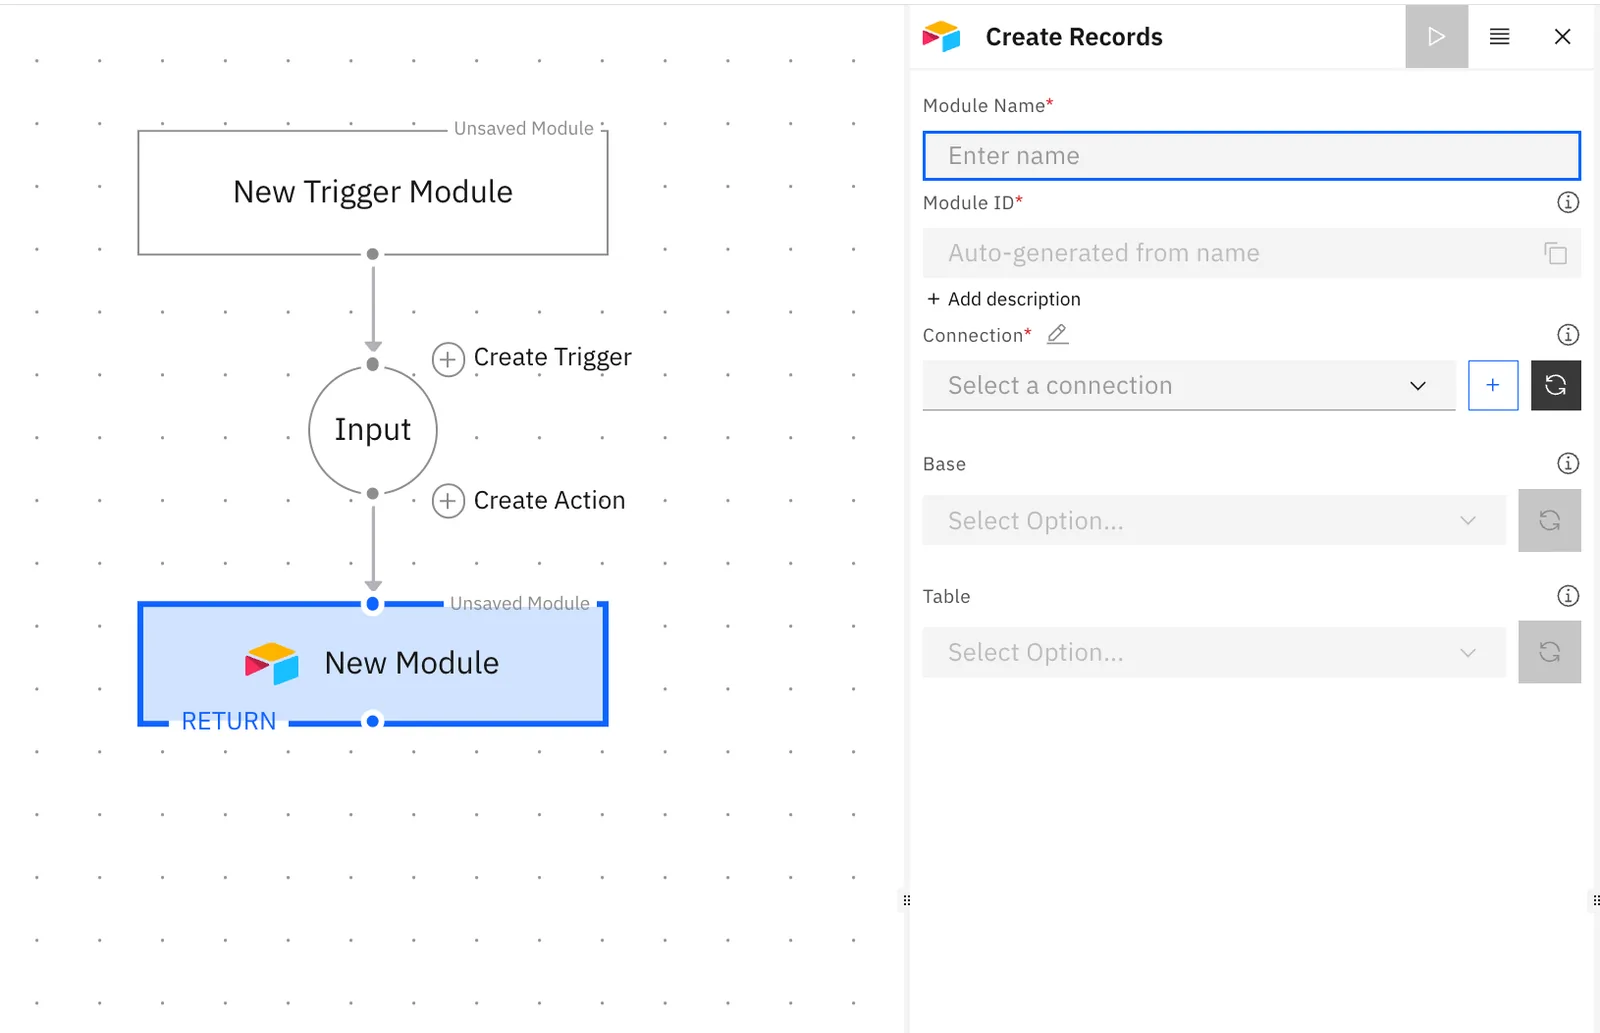
In this example we will be using the "Create Record(s)" module of Airtable.  Stacksync allows you to create batches of records with one simple to use action.

#### 5. Configure your action.

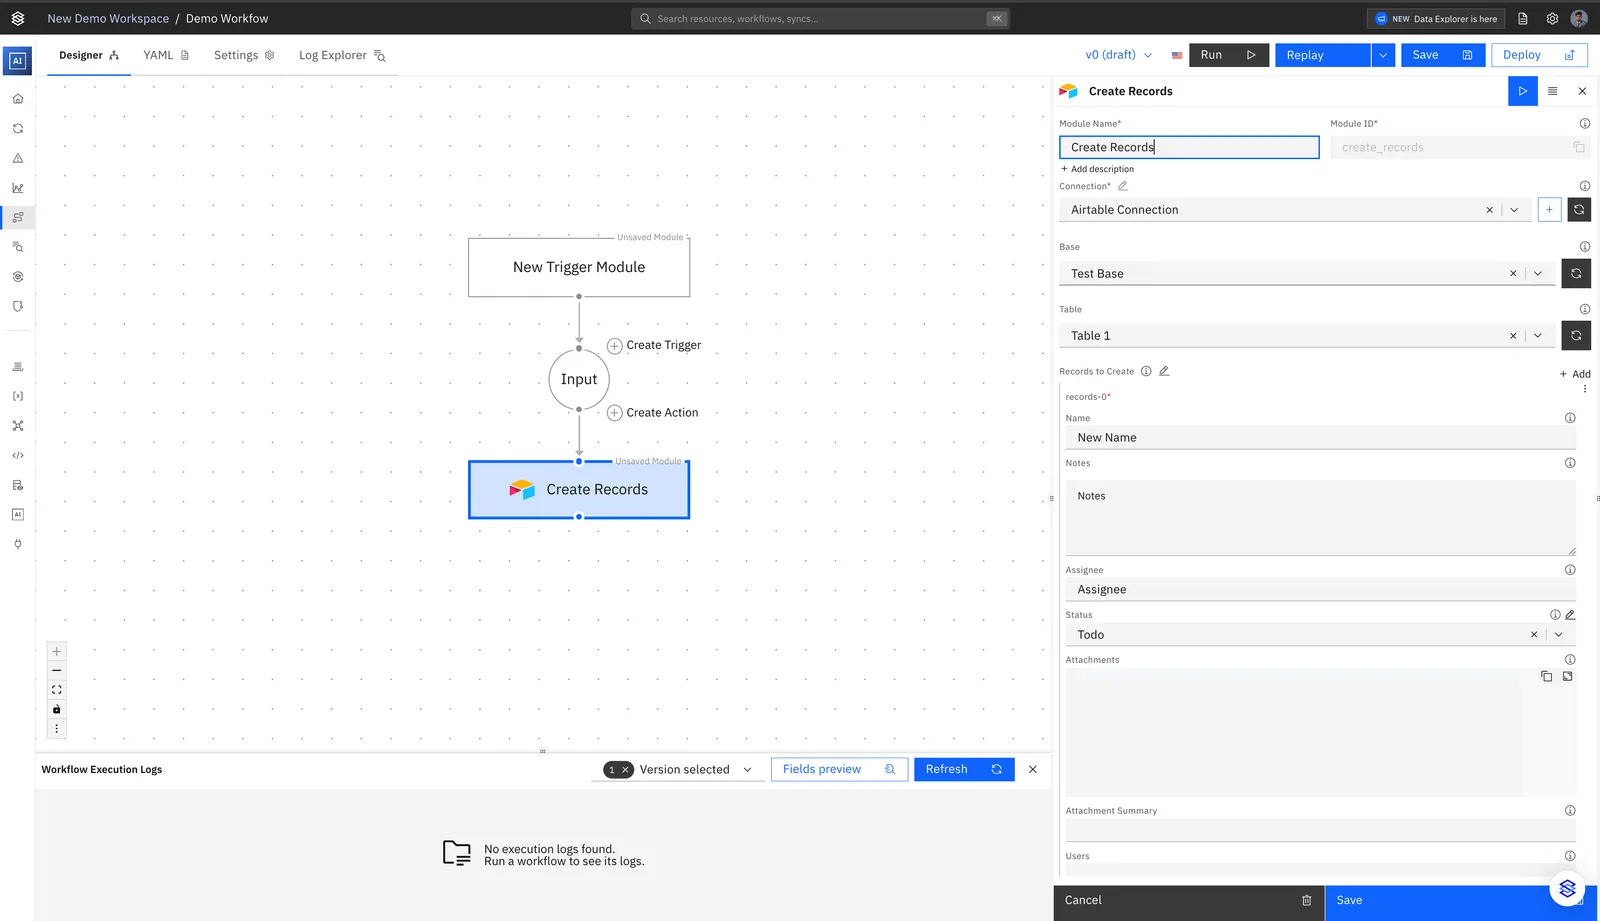
After having set a preferred Display Name for your Action, you will need to add a **Connection**. If you have currently have no connections simply click on ":heavy\_plus\_sign: Add New Connection".

<figure><img src="https://3389950191-files.gitbook.io/~/files/v0/b/gitbook-x-prod.appspot.com/o/spaces%2FO4RFXIz4V8iqghJ3JVSs%2Fuploads%2FfQHaZJbzrKwBPPVhCOEs%2Fimage.png?alt=media&amp;token=39298377-0313-4169-9058-ead5e2a7b898" alt=""><figcaption></figcaption></figure>

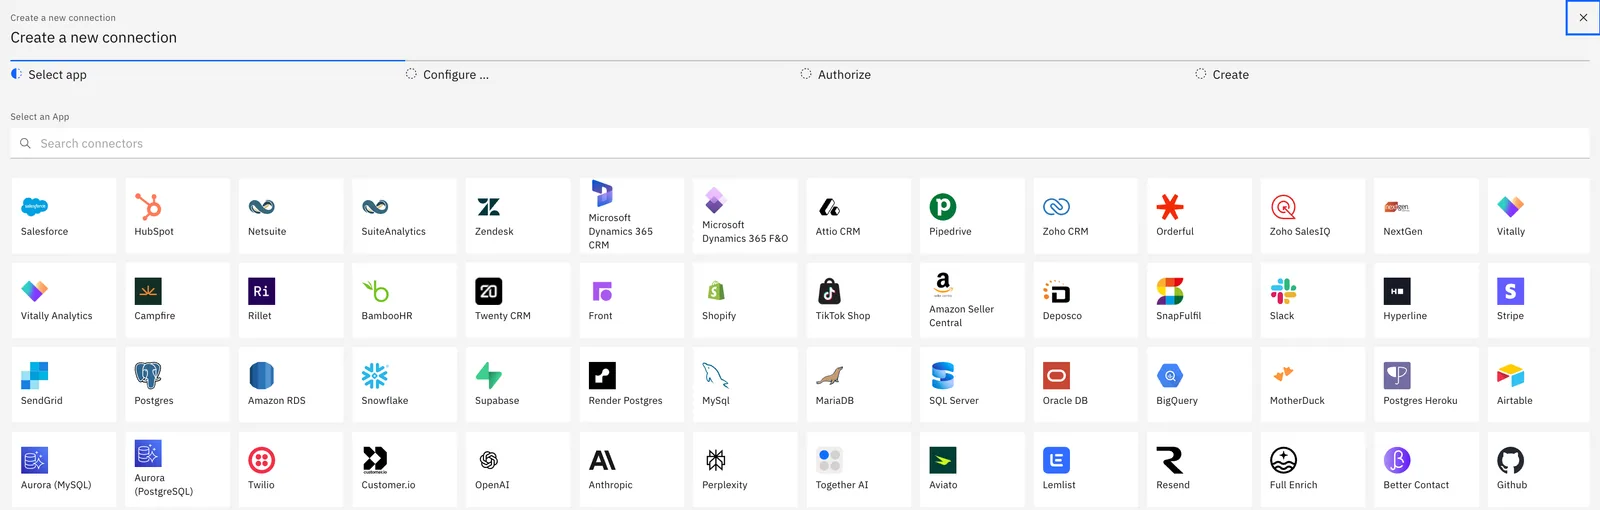
After clicking on "Add new connection" you'll be redirected to the page to Create a Connection.
<figure><img src="https://3389950191-files.gitbook.io/~/files/v0/b/gitbook-x-prod.appspot.com/o/spaces%2FO4RFXIz4V8iqghJ3JVSs%2Fuploads%2FaOGUy71BgPhCk64dyZB5%2Fimage.png?alt=media&amp;token=83c820c7-5837-4329-86e1-6845f7884834" alt=""><figcaption></figcaption></figure>

Follow the instructions for your selected Application. Once you have finished adding your connection, go back to your Workflow's page.
<figure><img src="https://3389950191-files.gitbook.io/~/files/v0/b/gitbook-x-prod.appspot.com/o/spaces%2FO4RFXIz4V8iqghJ3JVSs%2Fuploads%2FyUcIYMYpFTysAPSQd6pW%2Fimage.png?alt=media&amp;token=2d4ce363-64c7-4d96-8340-7a2b10308172" alt=""><figcaption></figcaption></figure>

#### 6. Run and Deploy your workflow!

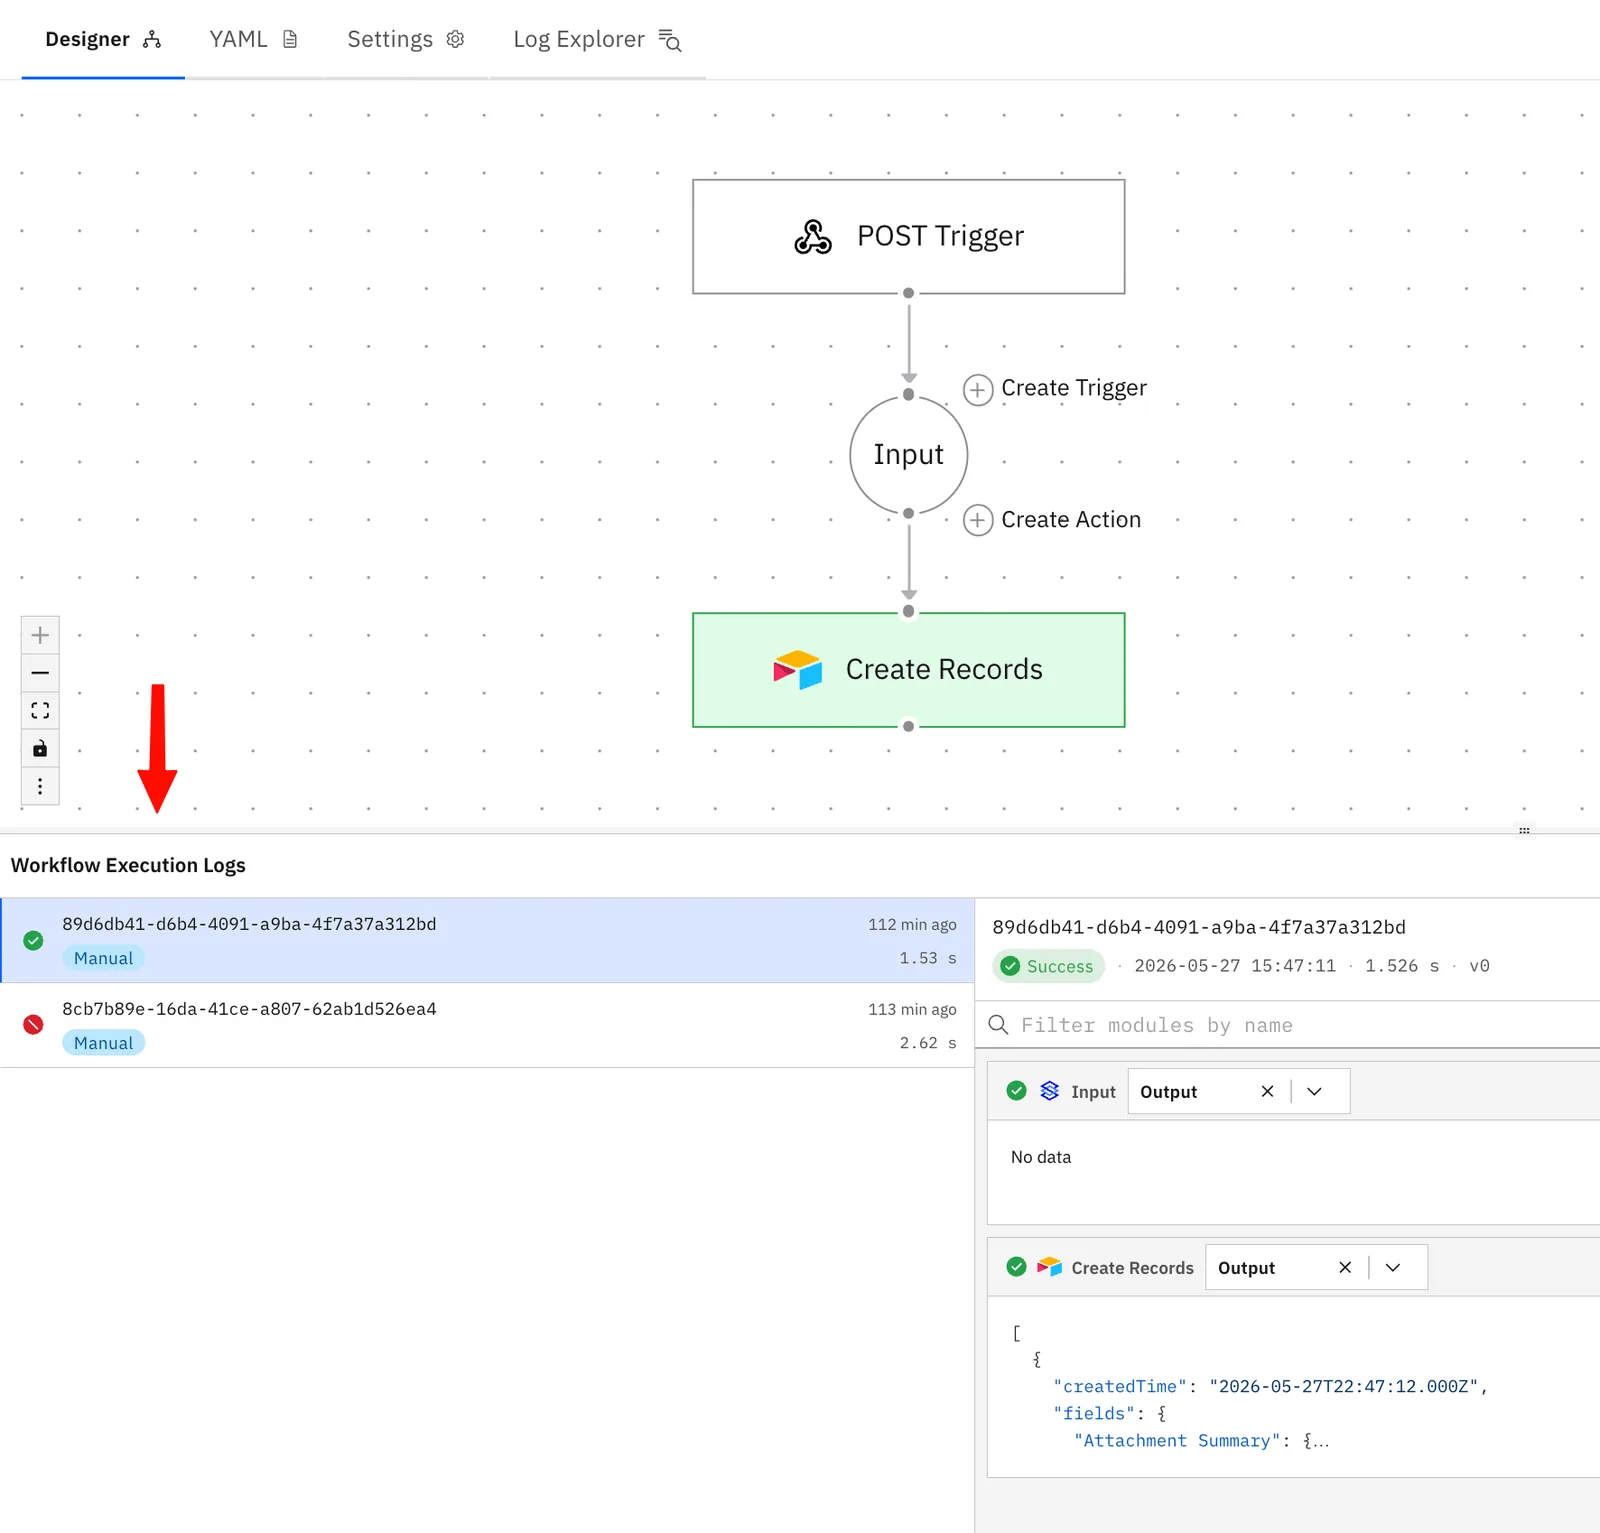
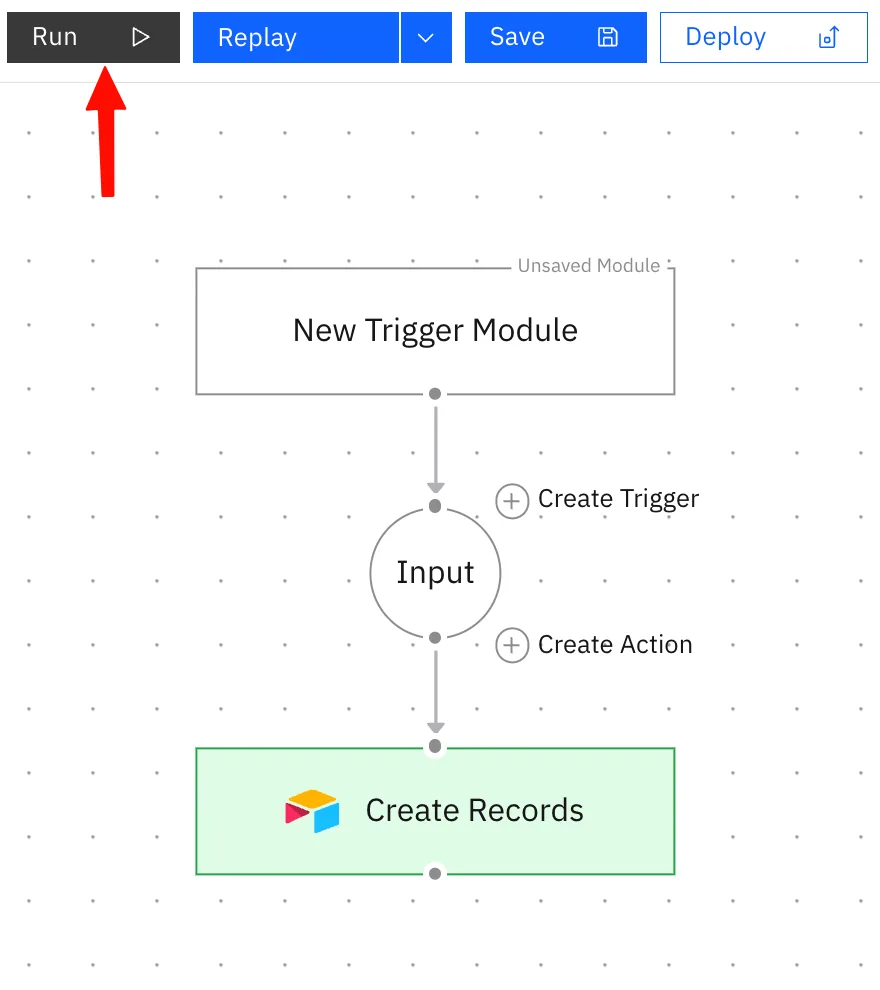
Click "Run" to trigger the workflow manually using the POST trigger. A green execution status confirms the workflow completed successfully.
<figure><img src="https://3389950191-files.gitbook.io/~/files/v0/b/gitbook-x-prod.appspot.com/o/spaces%2FO4RFXIz4V8iqghJ3JVSs%2Fuploads%2F1Di9ksCrtPgWtKQ8JZaT%2Fimage.png?alt=media&amp;token=90c005e6-260c-49b0-9fed-96f9ecc265dd" alt=""><figcaption></figcaption></figure>

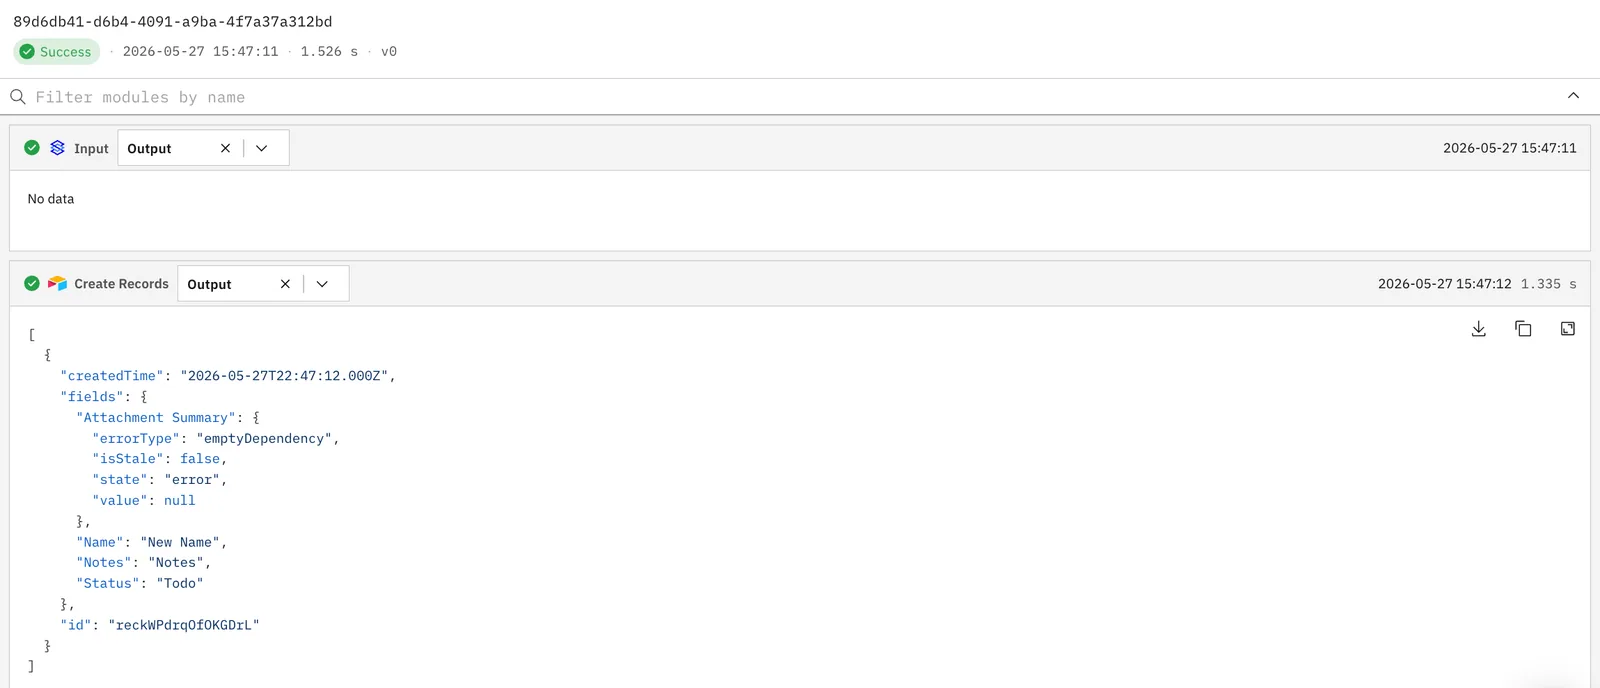
#### 7. Monitor your execution logs.

<figure><img src="https://3389950191-files.gitbook.io/~/files/v0/b/gitbook-x-prod.appspot.com/o/spaces%2FO4RFXIz4V8iqghJ3JVSs%2Fuploads%2FiLFOf1vLoPEMlC0ndsd0%2Fimage.png?alt=media&amp;token=dea60b9f-04ec-4b66-abcb-6f3a2062a741" alt=""><figcaption></figcaption></figure>

<figure><img src="https://3389950191-files.gitbook.io/~/files/v0/b/gitbook-x-prod.appspot.com/o/spaces%2FO4RFXIz4V8iqghJ3JVSs%2Fuploads%2F6NfbdsbkQBdQISDT3QBY%2Fimage.png?alt=media&amp;token=c41b4344-439d-45c7-a56f-82888ef19fb8" alt=""><figcaption></figcaption></figure>