# Authorize Shopify

> In 4 minutes, authorize your Shopify app and start syncing data with Stacksync.

Source: https://docs.stacksync.com/connectors/shopify/authorize-shopify

## Requirements

* You need to be the Shopify administrator

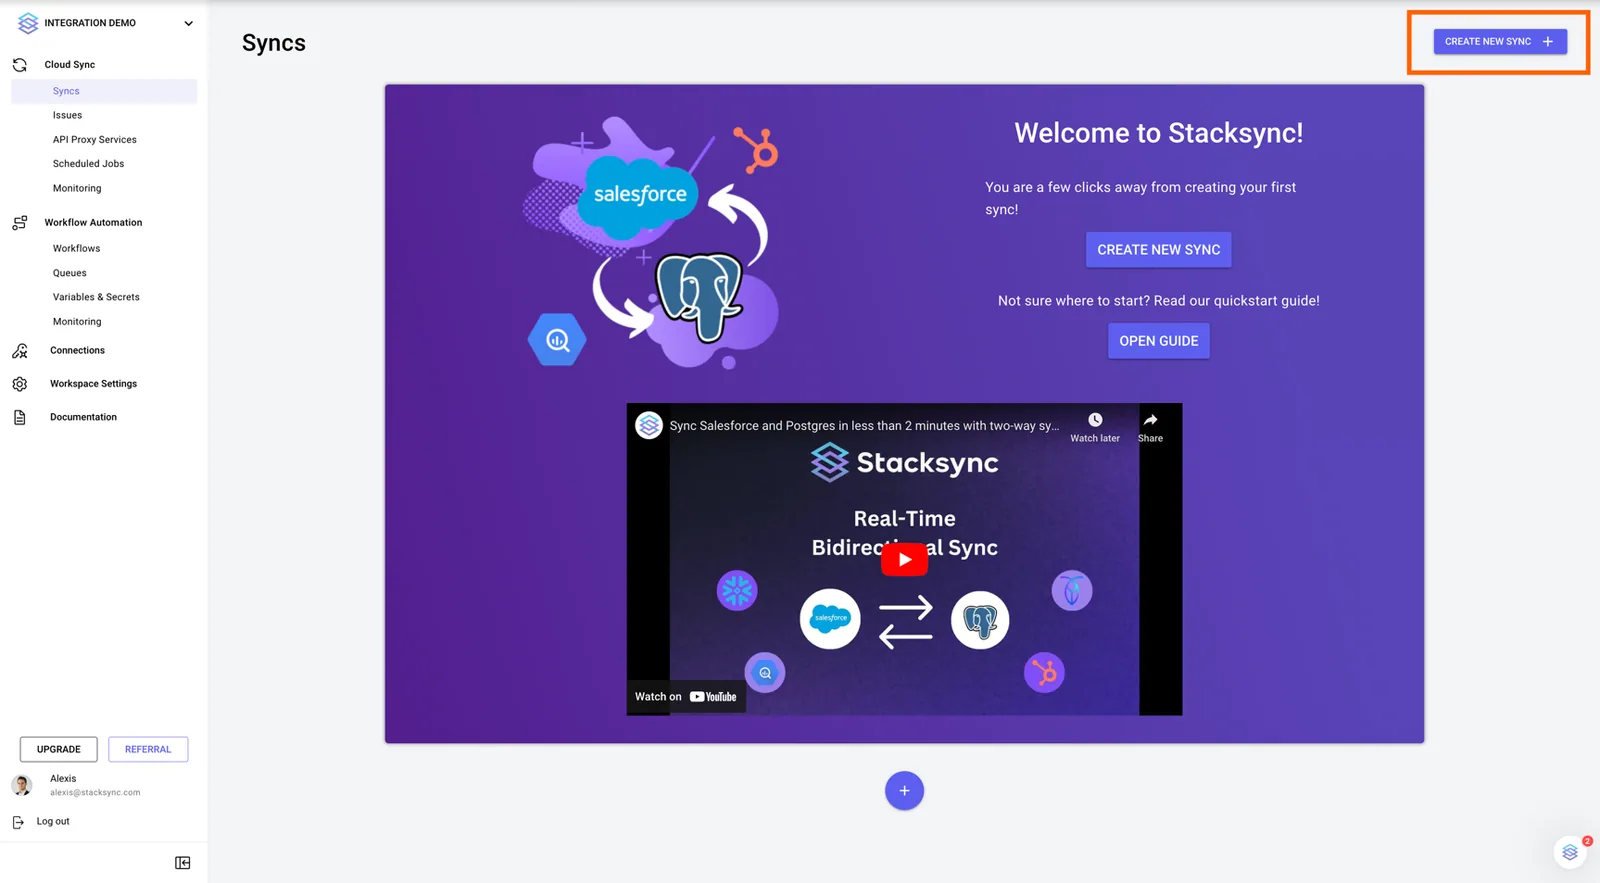
## 1. Click on create a new sync

<figure>
  <img src="/images/connectors/stacksync-syncs-create-new-sync.webp" alt="Stacksync Syncs page welcome screen with the &#x22;Create New Sync&#x22; button highlighted in the top right." width="1600" height="883" loading="lazy" decoding="async" />

  <figcaption />
</figure>

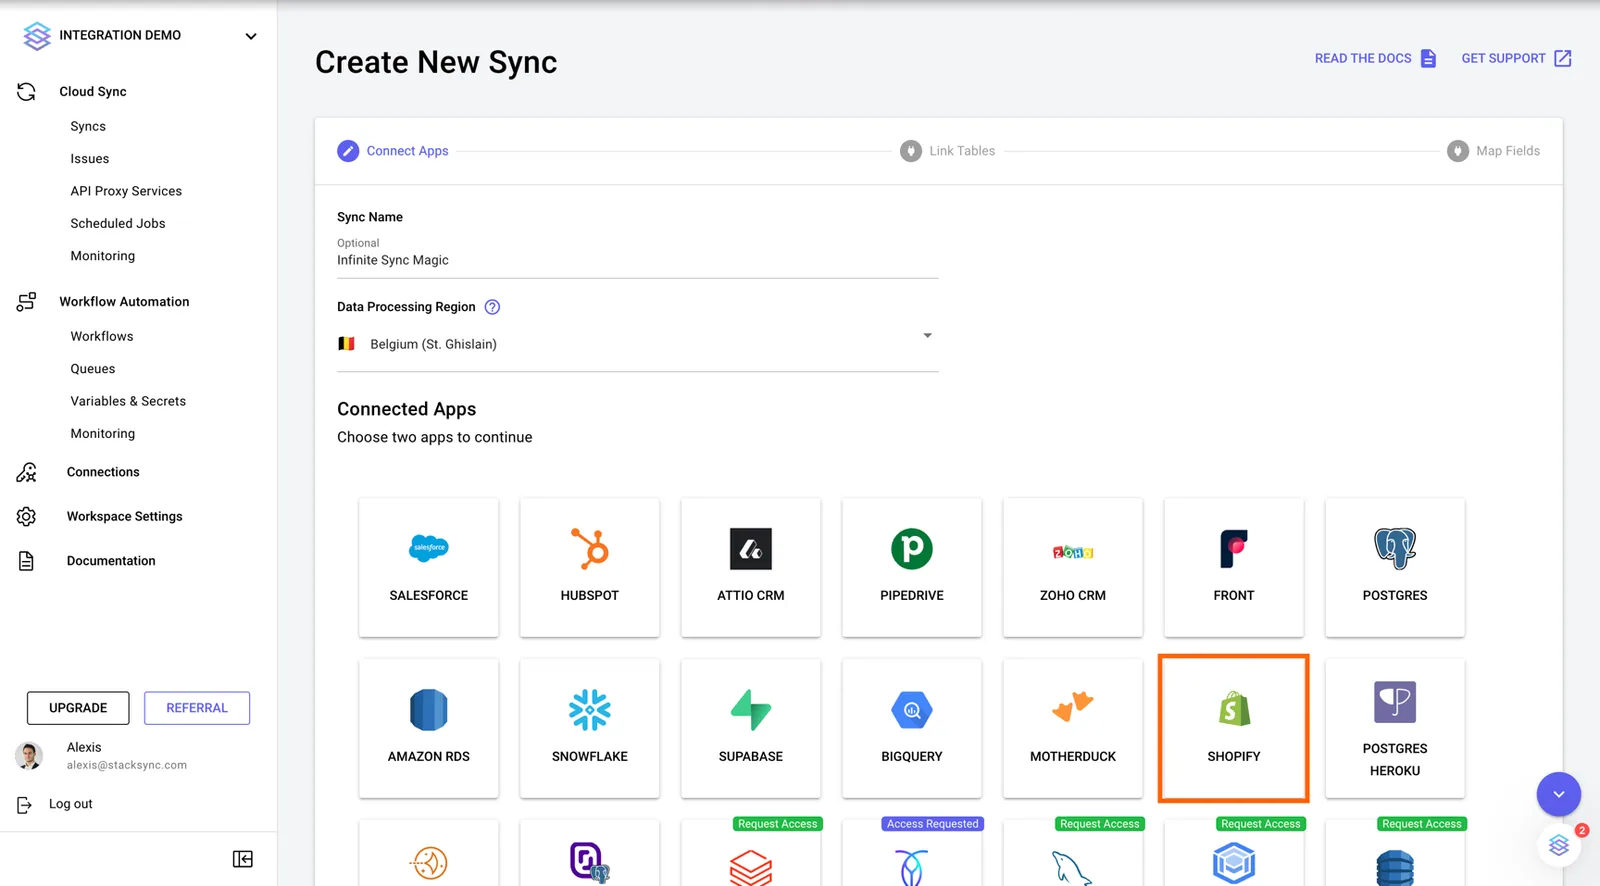
## 2. Click on the Shopify logo

<figure>
  <img src="/images/connectors/create-sync-select-shopify.webp" alt="Stacksync Create New Sync page, Connect Apps step, with the Shopify app tile highlighted." width="1600" height="886" loading="lazy" decoding="async" />

  <figcaption />
</figure>

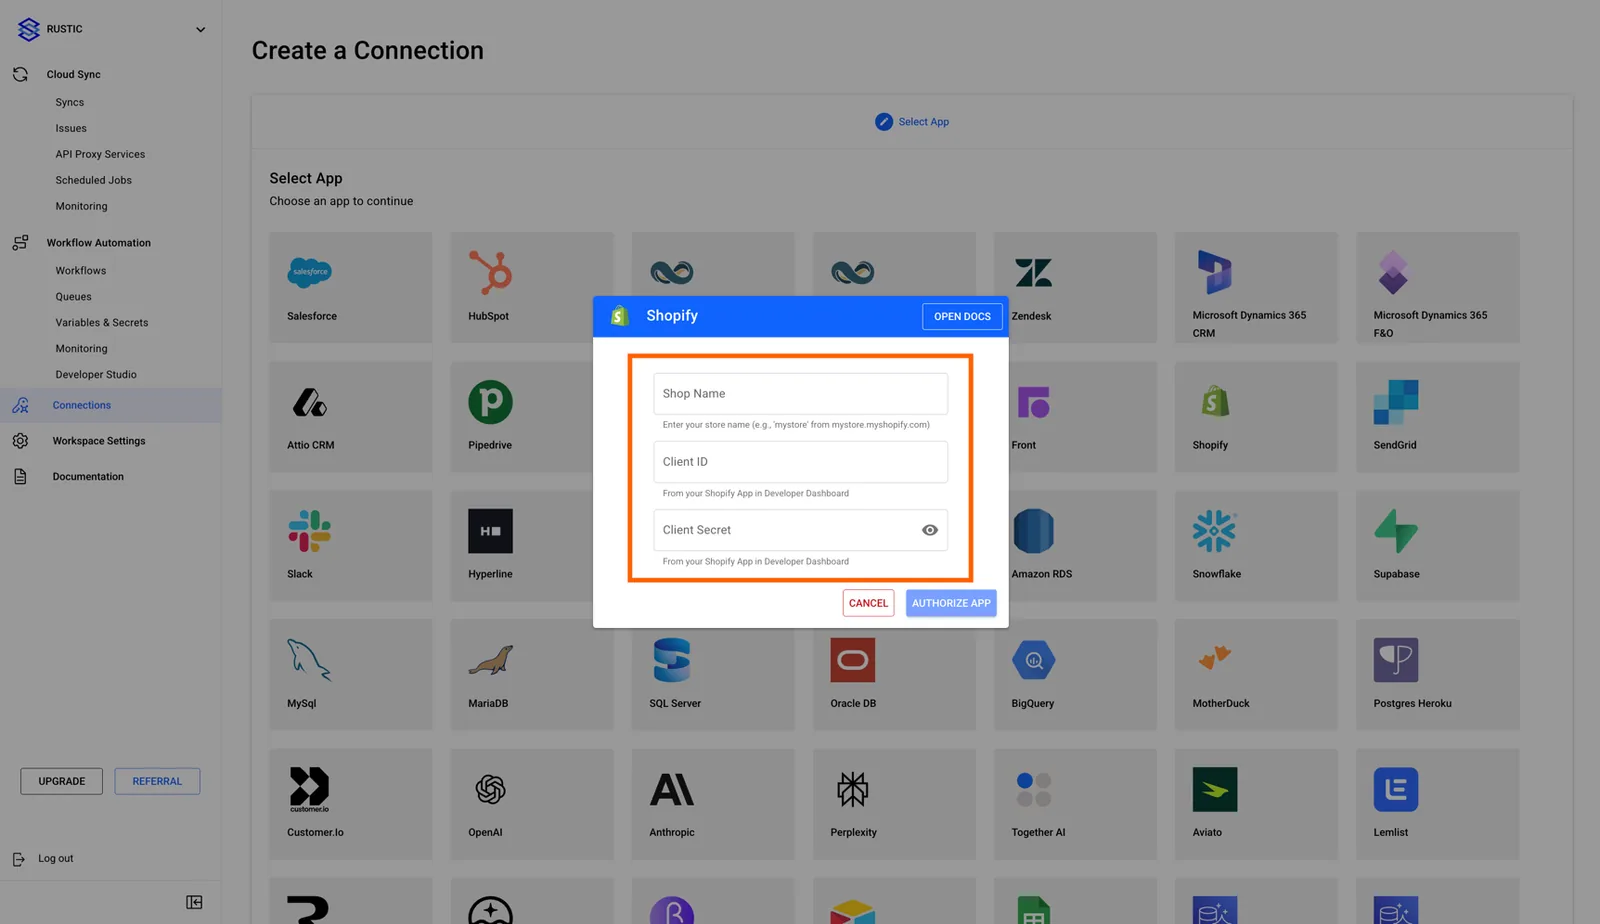
## 3. Create a new Shopify connection

In the following steps, you will log in to your Shopify account to retrieve the following:

* Shop name
* Client ID and Secret<br />

  <figure>
    <img src="/images/connectors/shopify-connection-credentials-form.webp" alt="Stacksync Shopify connection dialog with Shop Name, Client ID and Client Secret fields highlighted and an &#x22;Authorize App&#x22; button." width="1600" height="924" loading="lazy" decoding="async" />

    <figcaption />
  </figure>

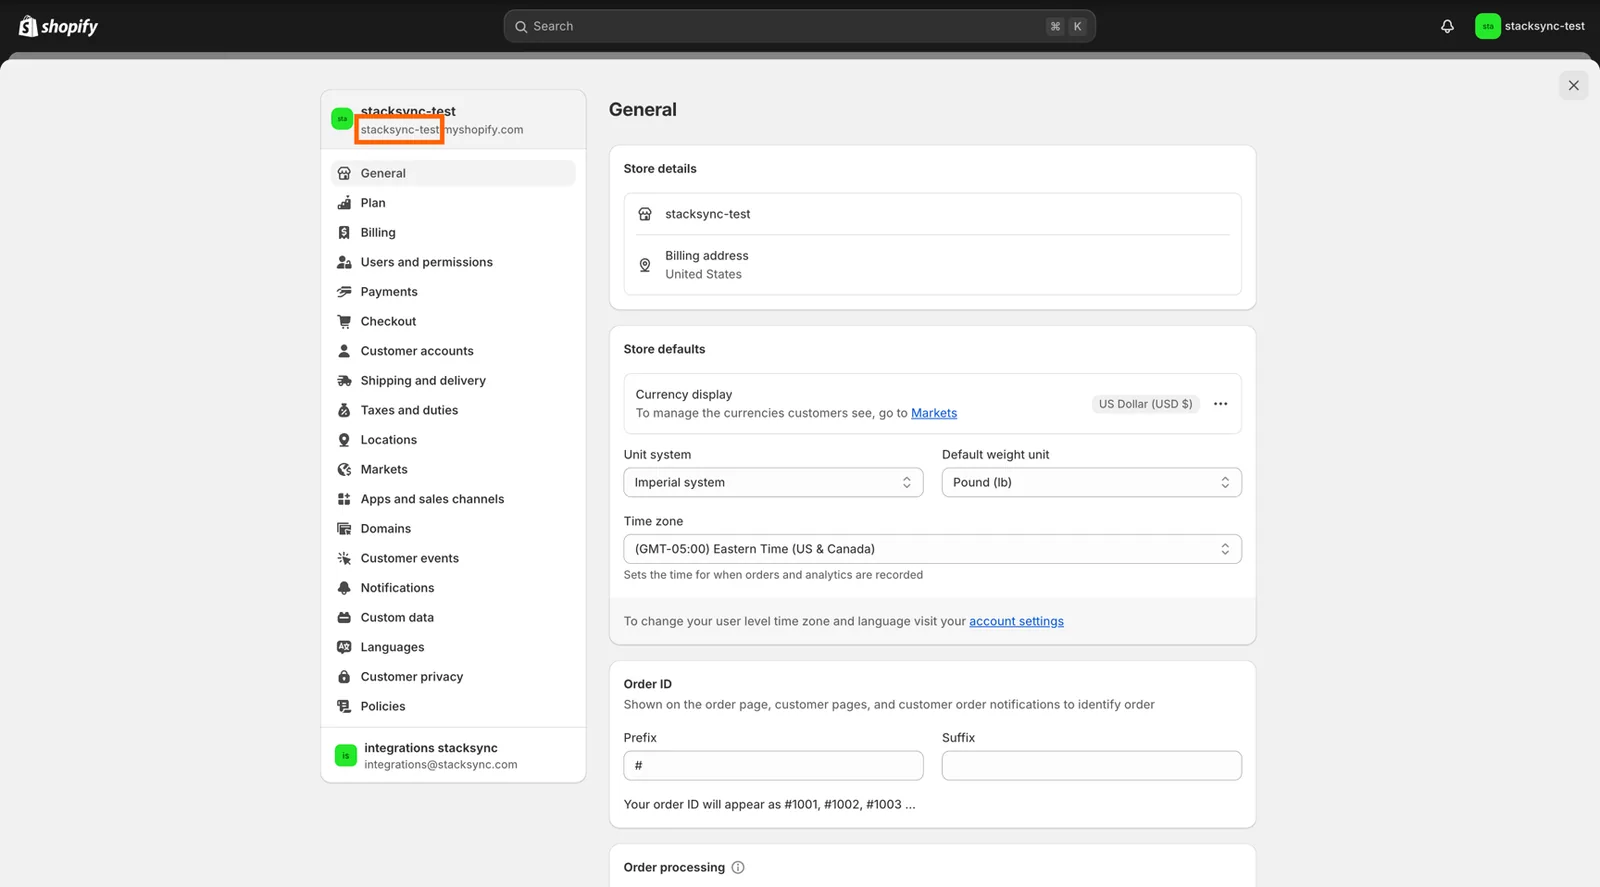
## 4. Find your shop name

You can find your shop name in the settings of your shop on the top left of the page. It is part of your shop domain `<shop_name>.myshopify.com`.

<figure>
  <img src="/images/connectors/shopify-settings-shop-name.webp" alt="Shopify admin General settings with the shop name portion of the myshopify.com domain highlighted." width="1600" height="887" loading="lazy" decoding="async" />

  <figcaption />
</figure>

## 5. **Generate Client ID and Client Secret:**

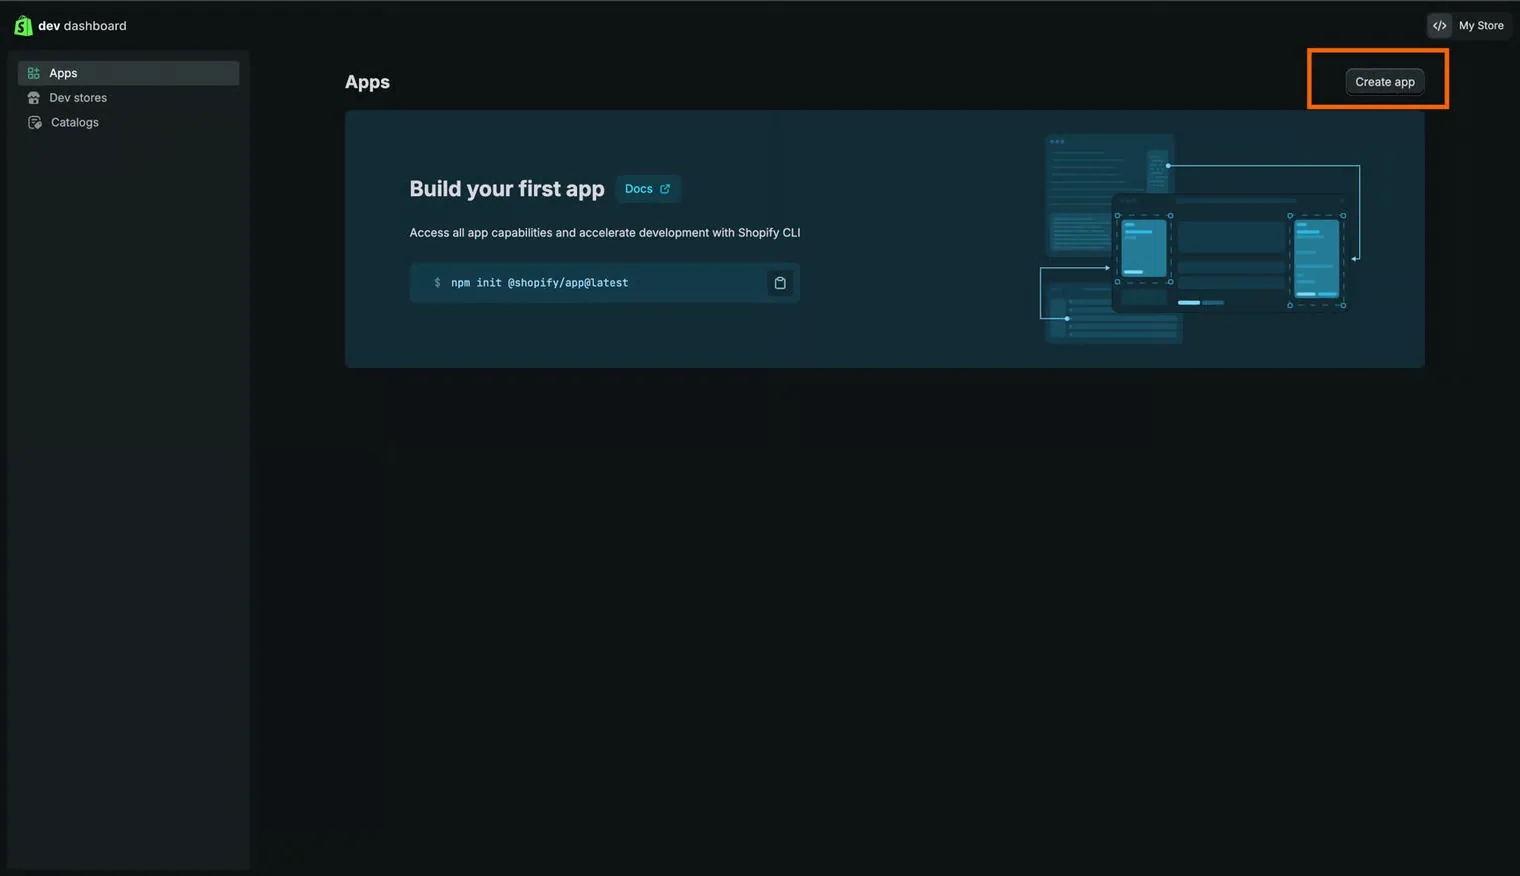
1. **Go to Shopify Dev Dashboard:** [**https://dev.shopify.com/dashboard**](https://dev.shopify.com/dashboard)
2. **Select "Create App"**<br />

   <figure>
     <img src="/images/connectors/shopify-dev-dashboard-create-app.webp" alt="Shopify Dev Dashboard Apps page with the &#x22;Create app&#x22; button highlighted." width="1520" height="876" loading="lazy" decoding="async" />

     <figcaption />
   </figure>
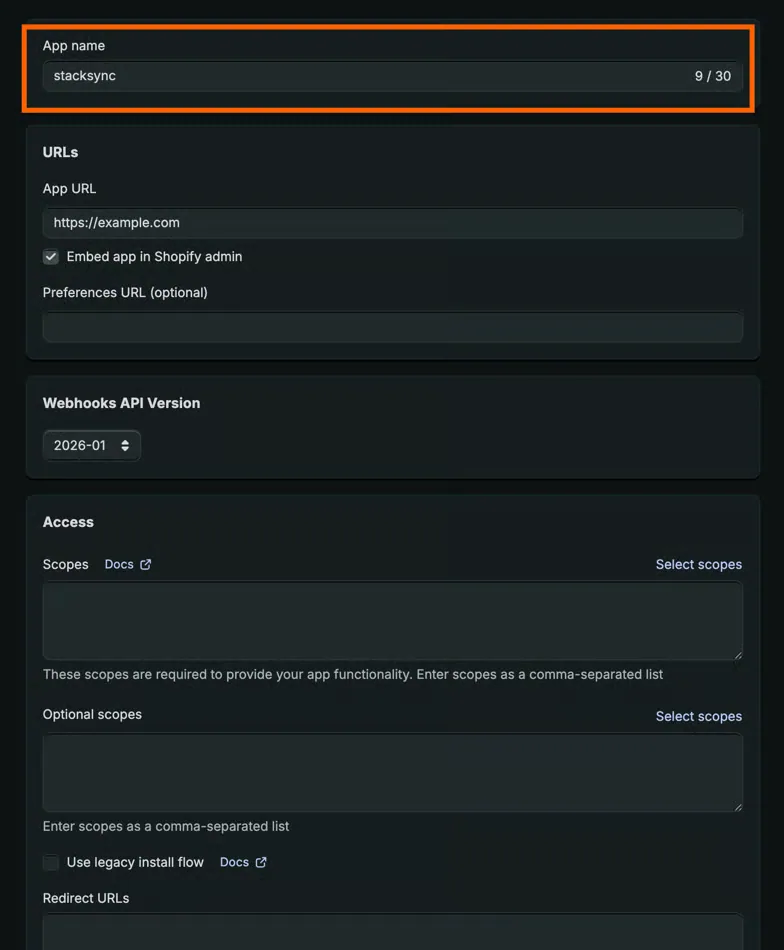
3. **Enter \`Stacksync\` as the app name**<br />

   <figure>
     <img src="/images/connectors/shopify-app-name-stacksync.webp" alt="Shopify Dev Dashboard app form with the App name field set to &#x22;stacksync&#x22; highlighted." width="784" height="950" loading="lazy" decoding="async" />

     <figcaption />
   </figure>
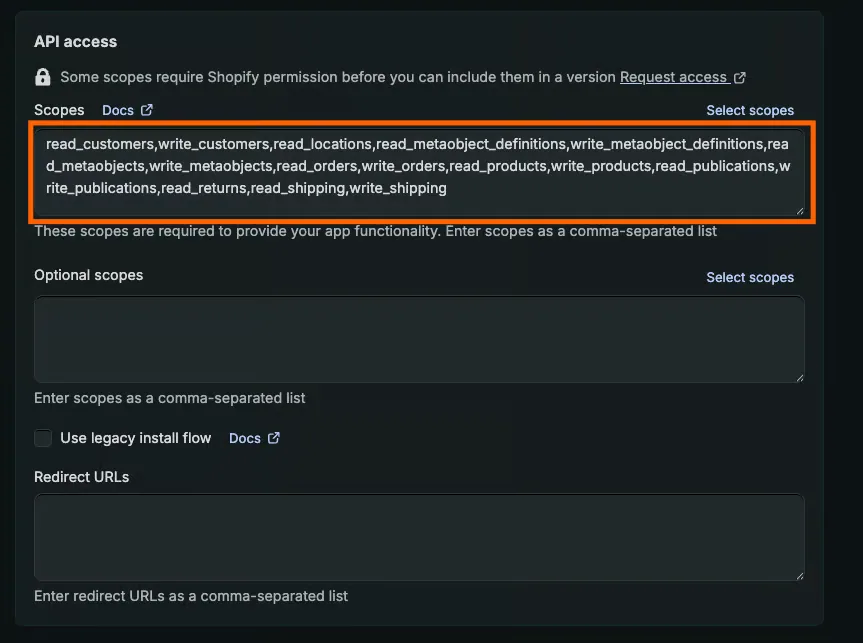
4. **Enable required API scopes for Stacksync.**

   Copy and paste these scopes:<br />

   ```
   read_customers,write_customers,read_locations,read_metaobject_definitions,
   write_metaobject_definitions,read_metaobjects,write_metaobjects,read_orders,write_orders,
   read_products,write_products,read_publications,write_publications,read_returns,
   read_shipping,write_shipping
   ```

   <figure>
     <img src="/images/connectors/shopify-app-api-access-scopes.webp" alt="Shopify app API access section with the Scopes field highlighted, listing read and write scopes like read_customers and write_orders." width="863" height="643" loading="lazy" decoding="async" />

     <figcaption />
   </figure>
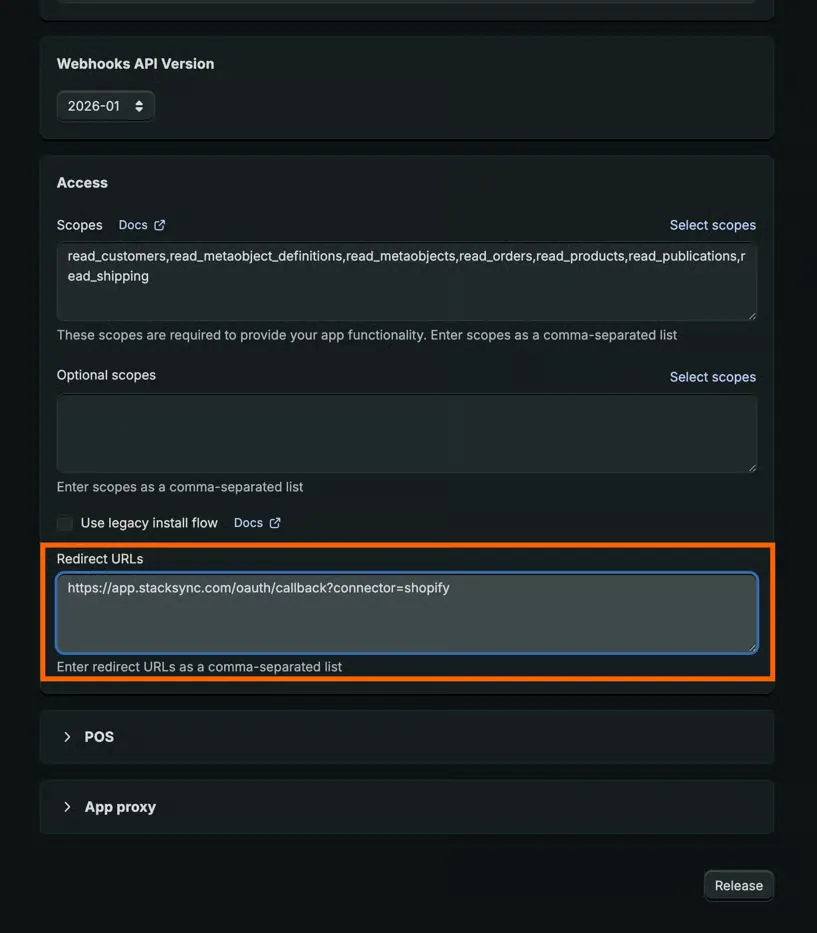
5. **Add Redirect URL:** [**https://app.stacksync.com/oauth/callback?connector=shopify**](https://app.stacksync.com/oauth/callback?connector=shopify)<br />

   <figure>
     <img src="/images/connectors/shopify-app-redirect-url.webp" alt="Shopify app Redirect URLs field highlighted with https://app.stacksync.com/oauth/callback?connector=shopify entered." width="817" height="933" loading="lazy" decoding="async" />

     <figcaption />
   </figure>
6. **Click Release**
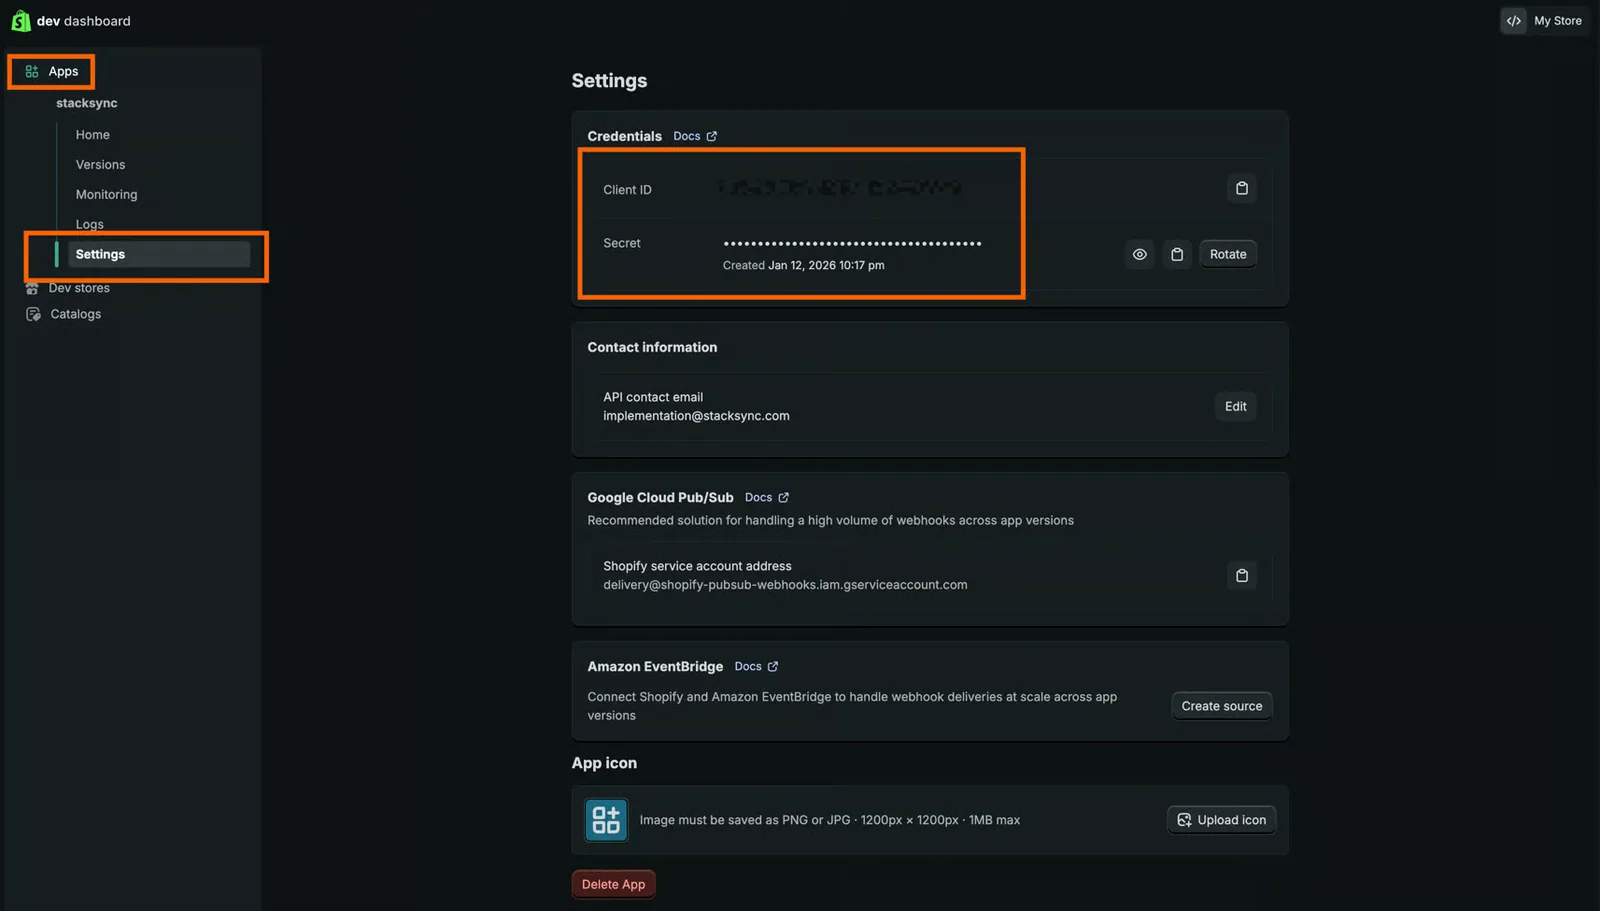
7. **Go to Apps -> Setting, Copy the Client ID and Secret**<br />

   <figure>
     <img src="/images/connectors/shopify-app-settings-client-credentials.webp" alt="Shopify Dev Dashboard app Settings page with the Credentials section (Client ID and Secret) highlighted." width="1600" height="911" loading="lazy" decoding="async" />

     <figcaption />
   </figure>
8. **You can now fill in the Stacksync form with your Shop name, Client ID and Secret.**

<figure>
  <img src="/images/connectors/shopify-connection-credentials-form.webp" alt="Stacksync Shopify connection dialog with Shop Name, Client ID and Client Secret fields highlighted and an &#x22;Authorize App&#x22; button." width="1600" height="924" loading="lazy" decoding="async" />

  <figcaption />
</figure>

You are all set! You can now use sync your Shopify data to other apps through Stacksync's syncs! 🎉