
Quickstart
This guide walks through the complete development workflow: install the CLI, authenticate, create a connector, run it locally, and deploy it to your Stacksync workspace.
Prerequisites
Before you begin, ensure you have:
- A Stacksync account with access to a workspace. You can create your account here.
- Python 3.10 or later
- macOS, Linux, or Windows
Follow the tutorial below or get started with a coding agent like Claude, Codex or any other with the prompt below:
Paste this prompt into your AI coding assistant to build a Stacksync Workflow Connector.
Stacksync is an integration platform with a workflow automation tool. Builders can use the Stacksync Connector Development Kit (CDK) to create new Stacksync Workflow Connectors.
Every connector enables to connect to a system and can have several triggers or actions called modules. One connector has one or more modules. Each module has inputs and outputs. Modules are used in a workflow to automate tasks. Once the connector is built, the user can use the Stacksync workflow builder UI to create workflows that automate tasks between different applications.

Requirements:
- Application: <application name> // ask the user for the application name if not provided.
- Operations: <operations the connector must support> // ask the user or define this from web search if the user does not know.
- API documentation: <optional official documentation URL> // can be found via web search
- Additional requirements: <optional constraints>

Follow this process:

1. Search the Stacksync documentation at https://docs.stacksync.com/developers/getting-started-with-stacksync-cli/overview and the other links available from this page. Explore thoroughly the Stacksync CLI and CDK documentation to understand how to create a connector and modules.

2. Research the application for which a connector should be built using its official API documentation. Determine the authentication method, base URL, required permissions, relevant endpoints, request and response schemas, pagination, and rate limits.

3. Check if the Stacksync CLI is already installed by running `stacksync --version`. If not, install it using the following command:

   curl -fsSL https://cli.stacksync.com/install.sh | sh

4. Check if the user is authenticated with Stacksync by running `stacksync login`. If not, authenticate using the following command (the login will ask the user to connect via the web (or API token connection option is available) and to choose which Stacksync workspace to use):

   stacksync login

5. Create the connector and enter the generated project:

   stacksync workflow-connector create "<Application Name>"
   cd <generated-project-directory>

6. Read the entire guide/ directory before changing any files.

   Treat the guide/ directory as the source of truth for the project structure, CDK usage, connector architecture, module implementation, credentials, inputs, outputs, errors, and testing. Follow it exactly.

7. Update stacksync.yml with the correct connector metadata.

8. Implement the requested operations. Create additional modules when required:

   stacksync workflow-module create "<Module Name>"

   Keep generic_api_credentials as the connection type until the user provides the application-specific connection type. To create a generic_api_credentials connection, the user has to go in the UI > connections > create connection > generic_api_credentials. The user will need to provide the API key or the information to connect to the system vua the API depending on the authentication method of the application.

9. Start the connector locally:

   stacksync workflow-connector run

   // Once the connector is running, the modules will become available to use in the Stacksync workflow builder UI. Tell the user they can refresh the workflow builder UI to see the new module appearing in the list of available modules.

10. Instruct the user on how to test each module in the Stacksync workflow builder.

11. Stop after local testing. Do not deploy unless the user explicitly asks.

Ask only for information that cannot be determined from the official API documentation or the project guides. Do not invent endpoints, schemas, credentials, connection types, or tenant-specific values.
If the user is just exploring and does not know which system they want to build a connector for, suggest the user to create a connector for a popular application such as Salesforce or Postgres.
1. Install the CLI
Install the latest version of the Stacksync CLI for your operating system.
curl -fsSL https://cli.stacksync.com/install.sh | sh2. Authenticate
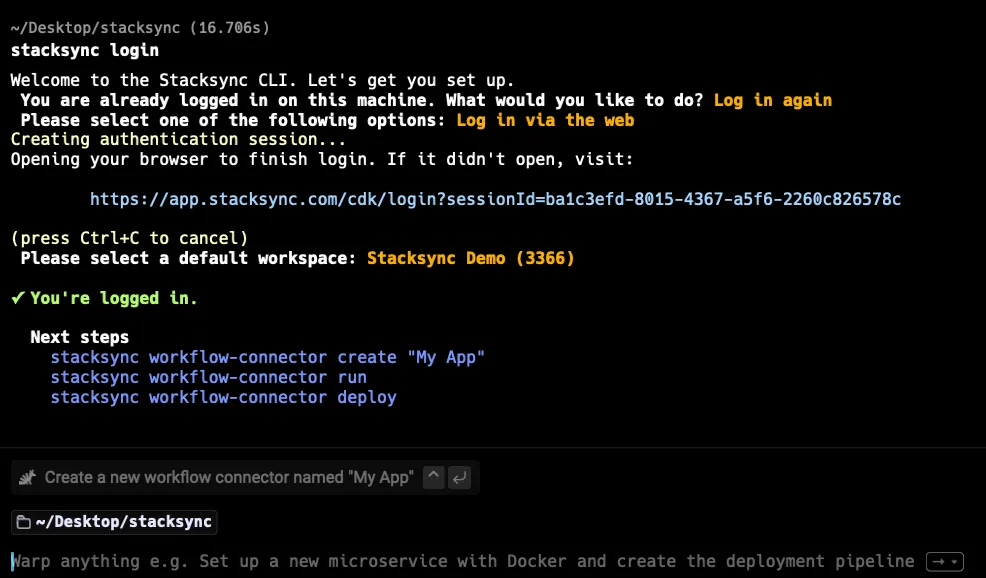
Authenticate the CLI with your Stacksync account:
stacksync loginThe CLI supports two authentication methods.
Select Log in via the web. Your browser opens to complete authentication and link the CLI to your Stacksync workspace.