

OKTA
SCIM for OKTA
The Stacksync OKTA app is currently under review by OKTA. Until the app is published on OKTA marketplace, here is a guide to synchronize your OKTA users automatically into Stacksync by creating the SCIM app yourself
This setup takes ~10min
Notes:
- This setup needs to be implemented by an OKTA ADMIN
- The SCIM integration is associated to a unique Stacksync workspace. If you have multiple workspaces (such as dev, stage and prod) you will need to set up an SCIM app for each of these Stacksync workspaces. Each workspace has independent RBAC enforcement.
Setup manual
-
On your OKTA homepage go on the admin section

-
Once you are on the admin page, go to
Applicationsand click onCreate App Integration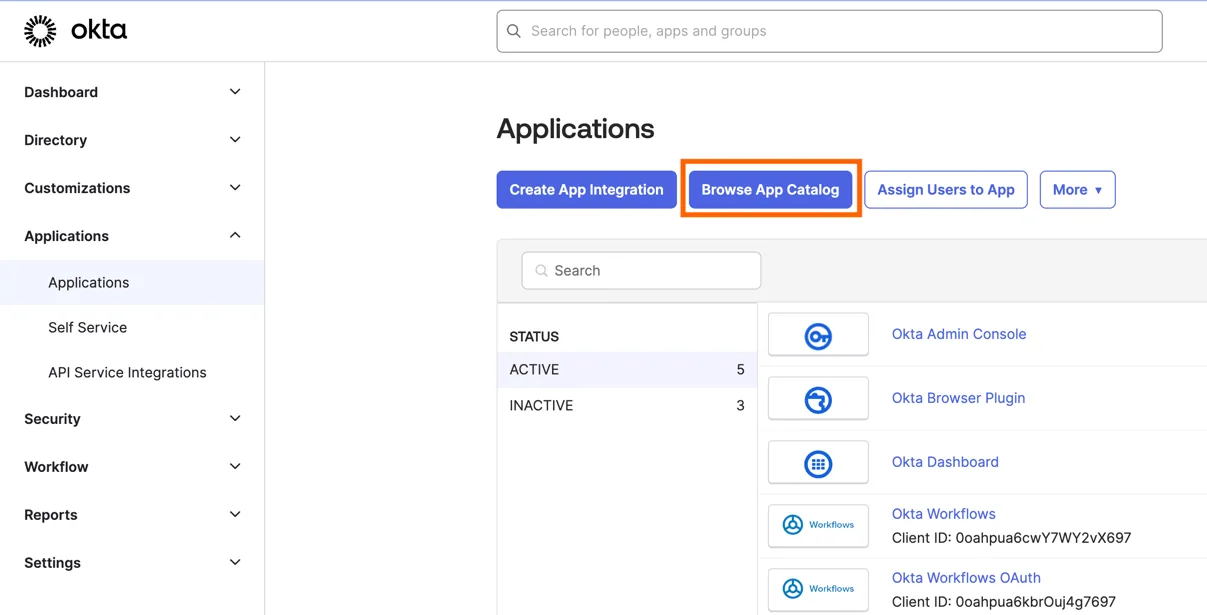
-
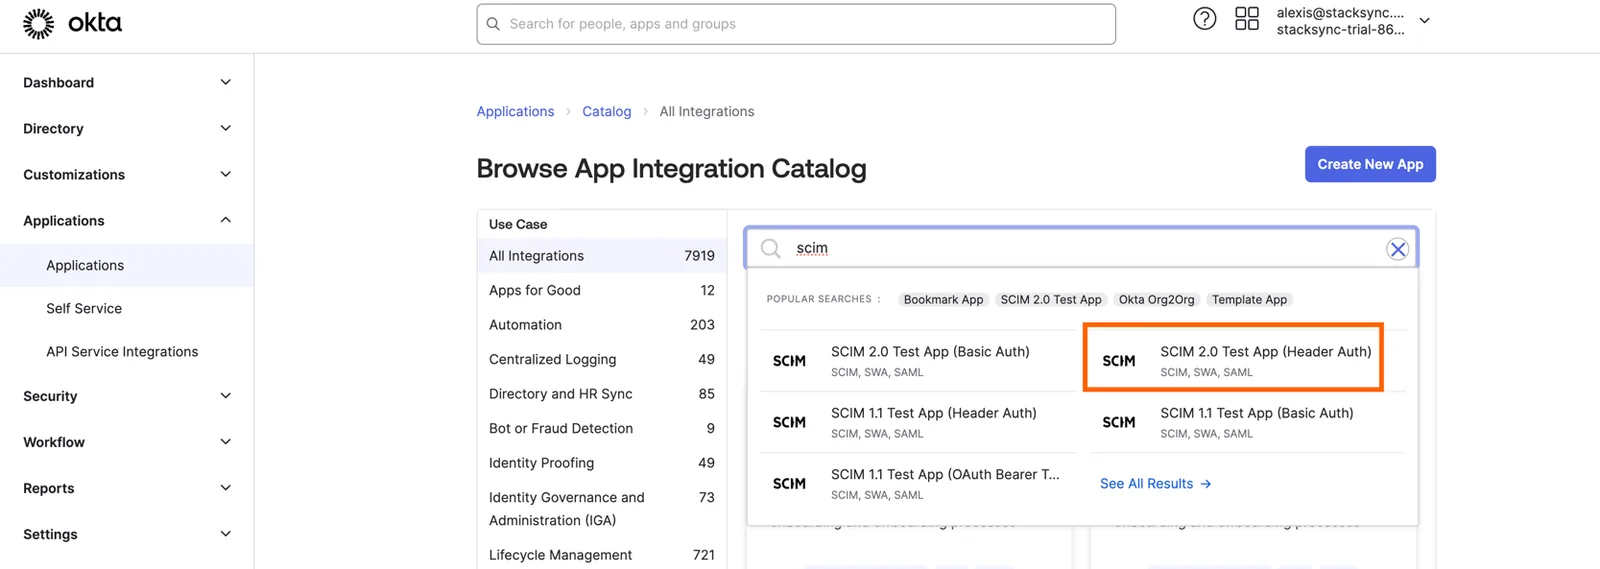
Browse for SCIM 2.0 App with Header Authentication
-
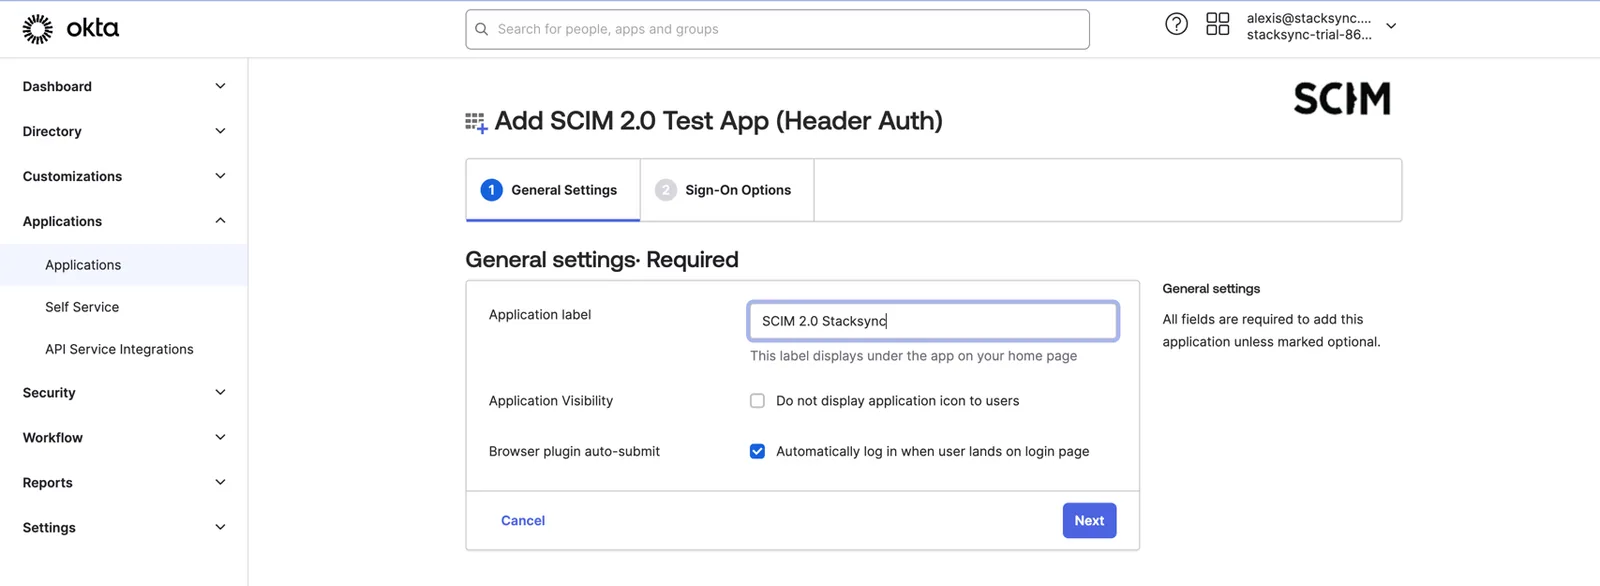
Add the application
-
In the provisioning section click on
Configure API Integration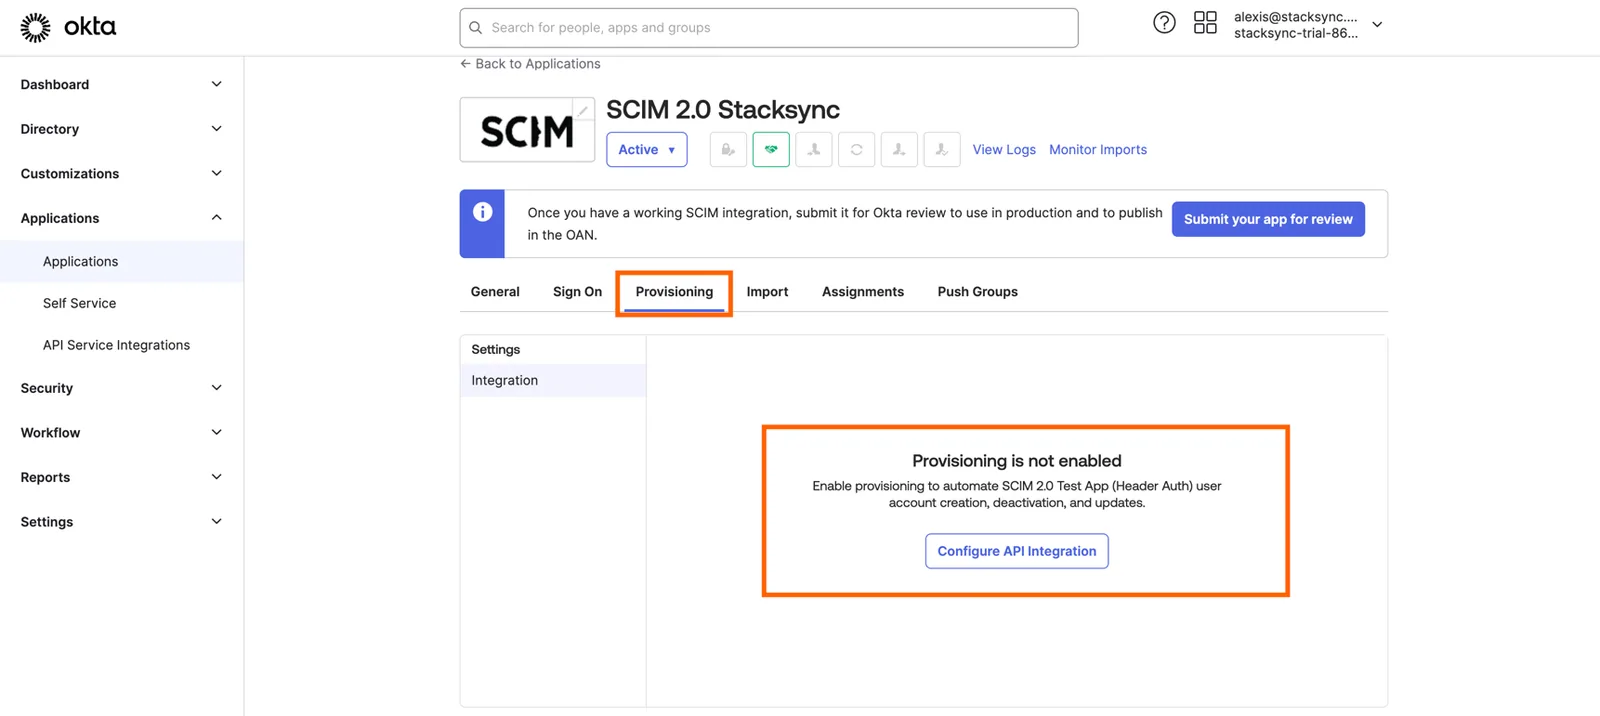
-
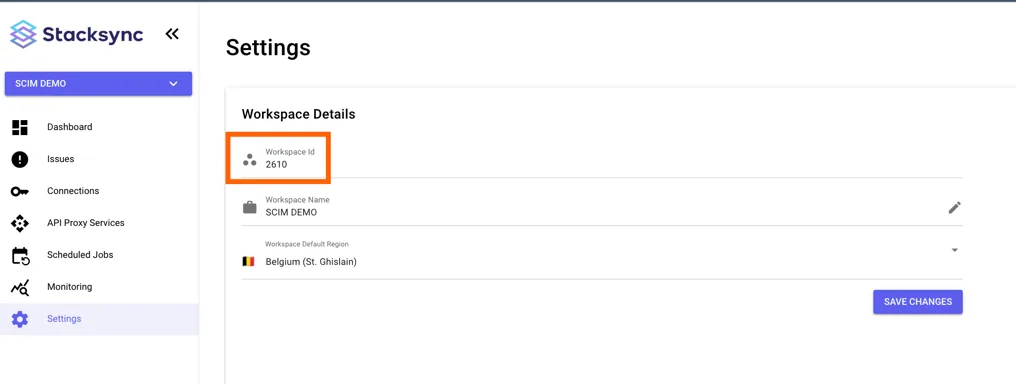
Go to the Workspace Settings page at
https://app.stacksync.comto find the informations necessary for the next steps.- Find your
workspace_idon the top of the page
-
Generate a
workspace_api_keyat the bottom of the page.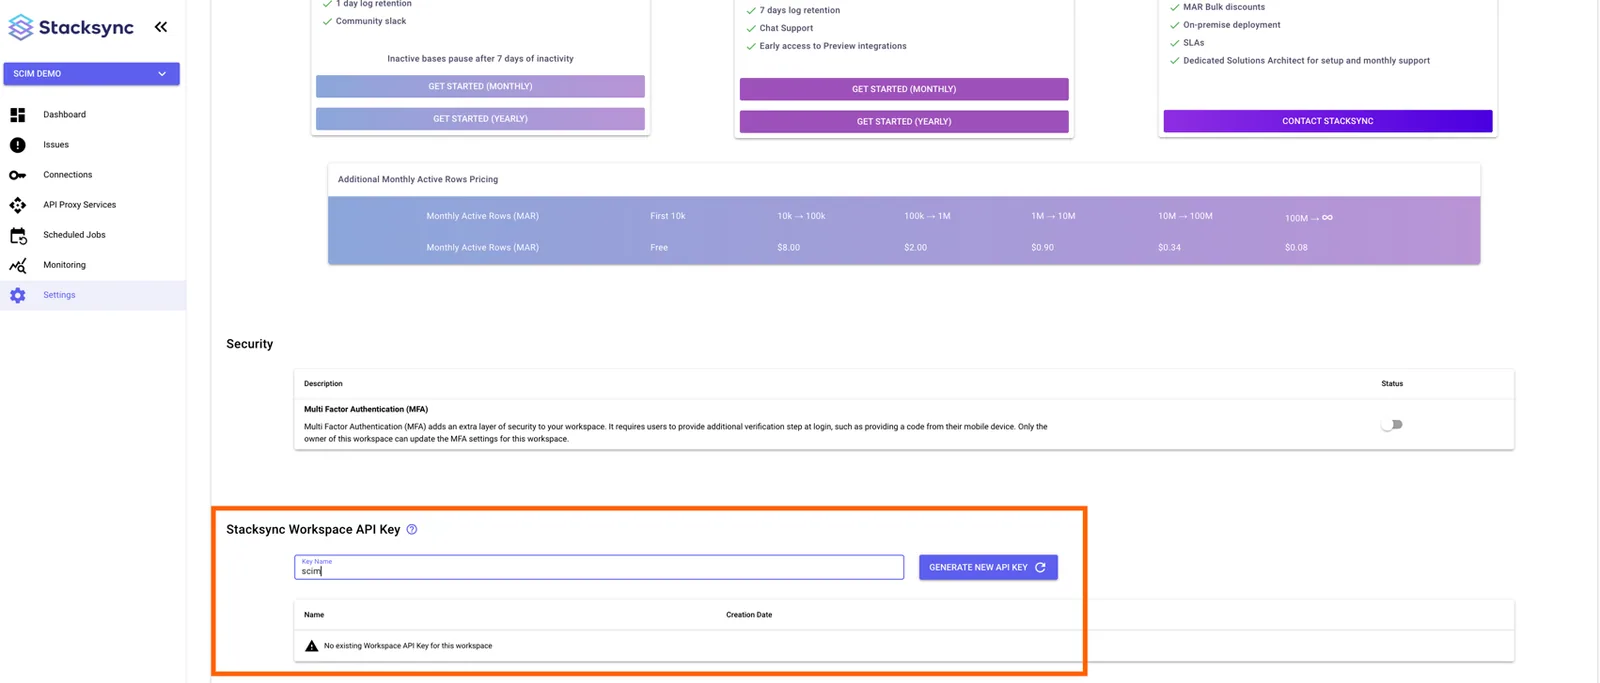
- Find your
-
Set up the API integrations using your Stacksync credentials:
-
Base URL:
https://api.stacksync.com /v1/workspace/<your_workspace_id>/scim/v2/ -
API Token:
Bearer <your_workspace_api_key>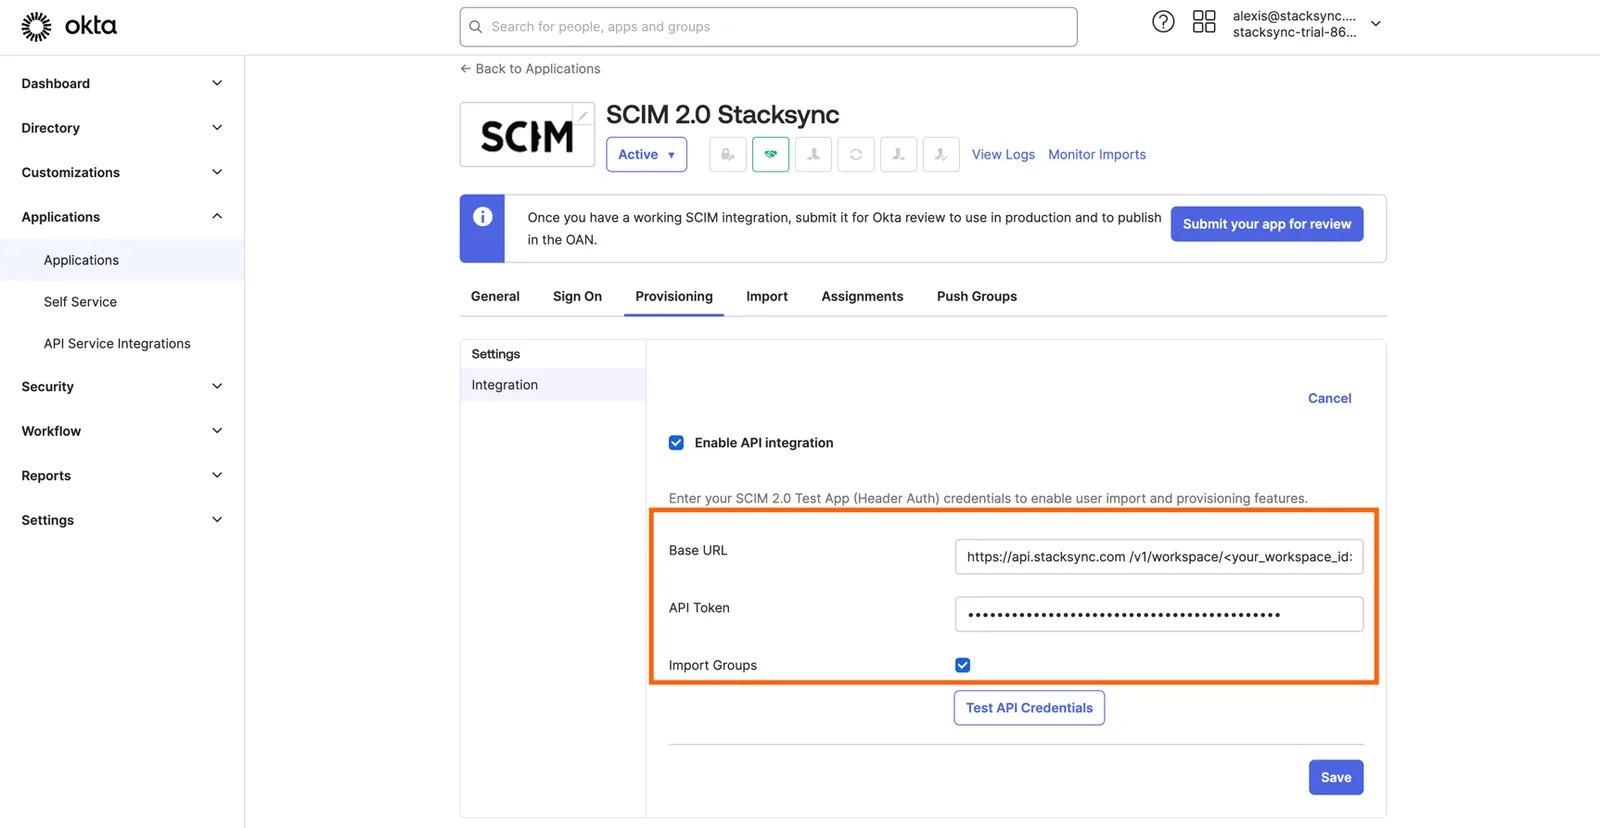
-
-
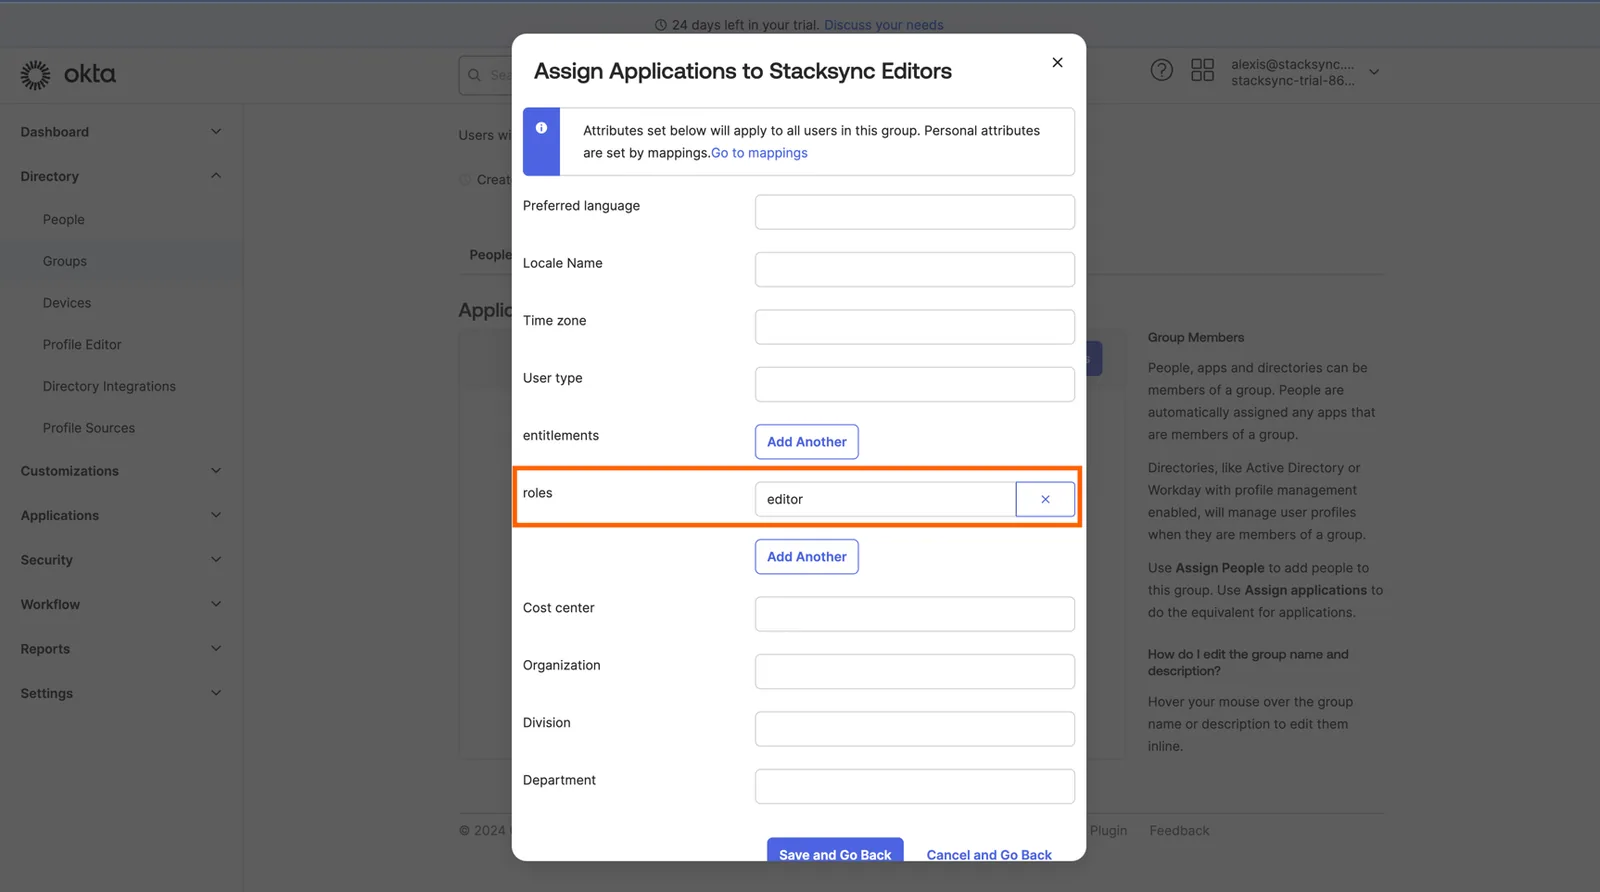
Now that you are connected to the Stacksync SCIM server, you can create a Group for the users that will have the role
editorin Stacksync and then provision that group to the app you just created.
Note that there are 2 roles you can set for you group:vieweroreditor.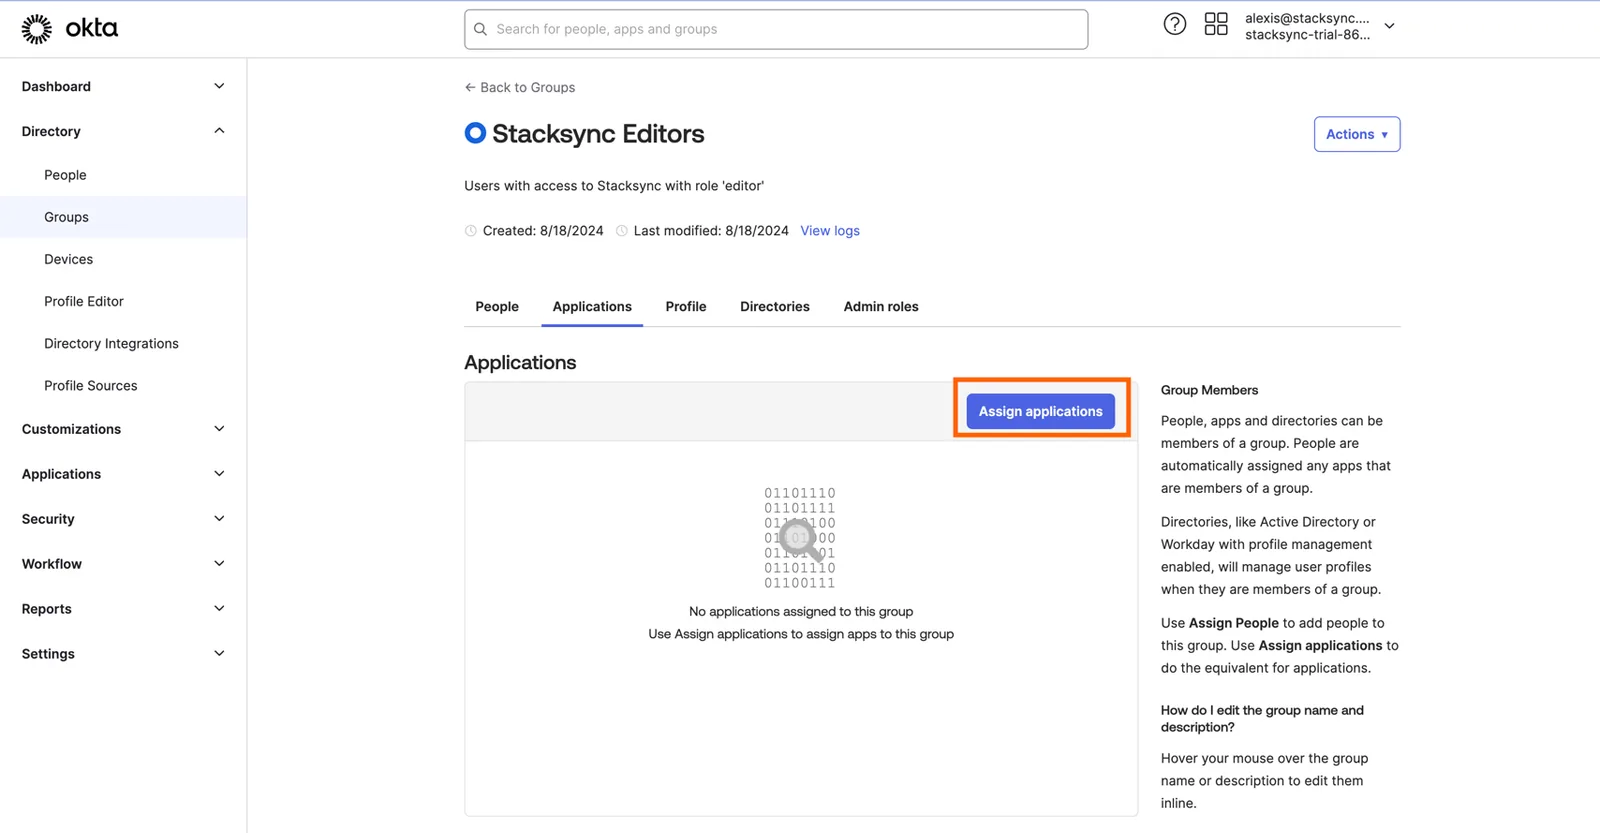
-
Now you can assign users to this group
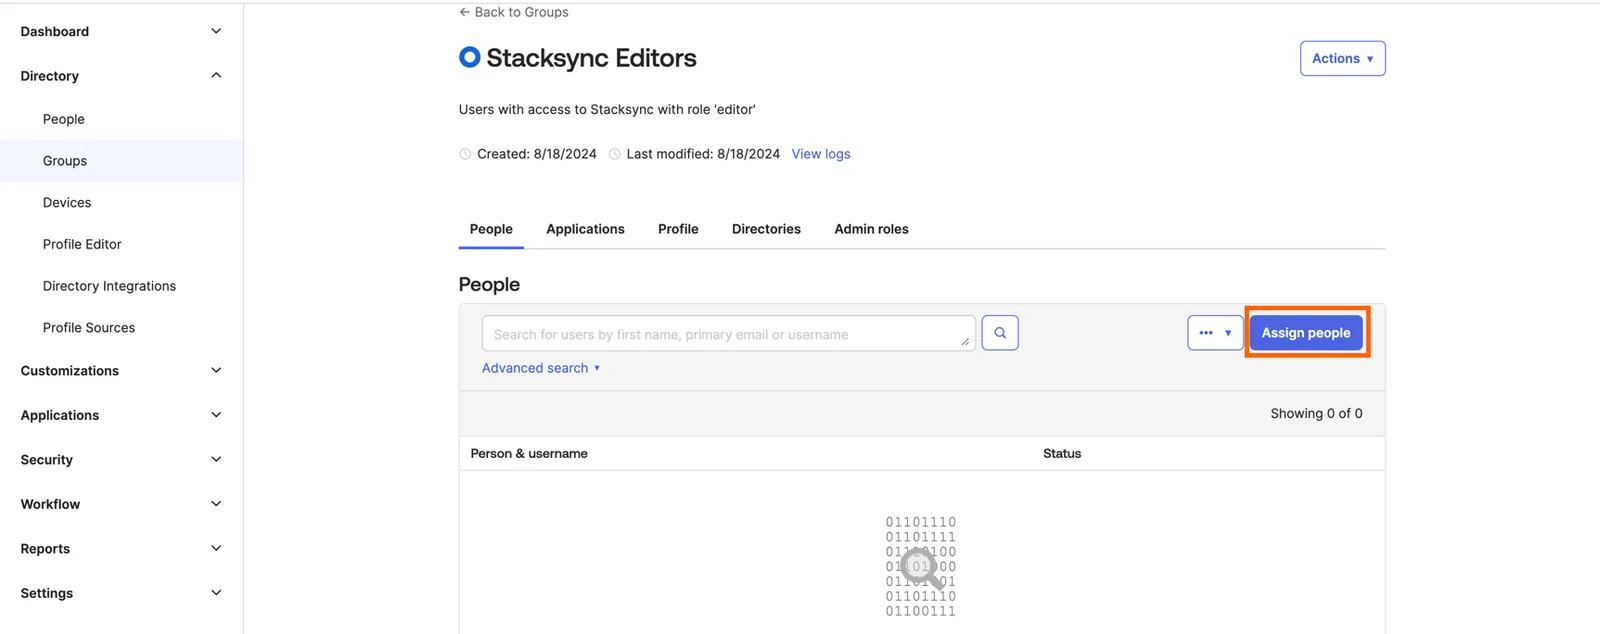
Congrats' you just automatically provisioned users to the Stacksync app!