
> For the complete documentation index, see [llms.txt](https://docs.stacksync.com/llms.txt). Markdown versions of documentation pages are available by appending `.md` to page URLs; this page is available as [Markdown](https://docs.stacksync.com/two-way-sync/connectors/bigquery/authorize-bigquery.md).

# Authorize BigQuery

## Enabling Required Google APIs <a href="#id-1367fe36-76e9-430d-a949-7b538bc2ab00" id="id-1367fe36-76e9-430d-a949-7b538bc2ab00"></a>

The following APIs are required by the Stacksync services in order to access the data and create a sync in BigQuery:

1. [Cloud Run API](https://console.cloud.google.com/marketplace/product/google/run.googleapis.com) (to create a secure portal for real-time notification service in your space)
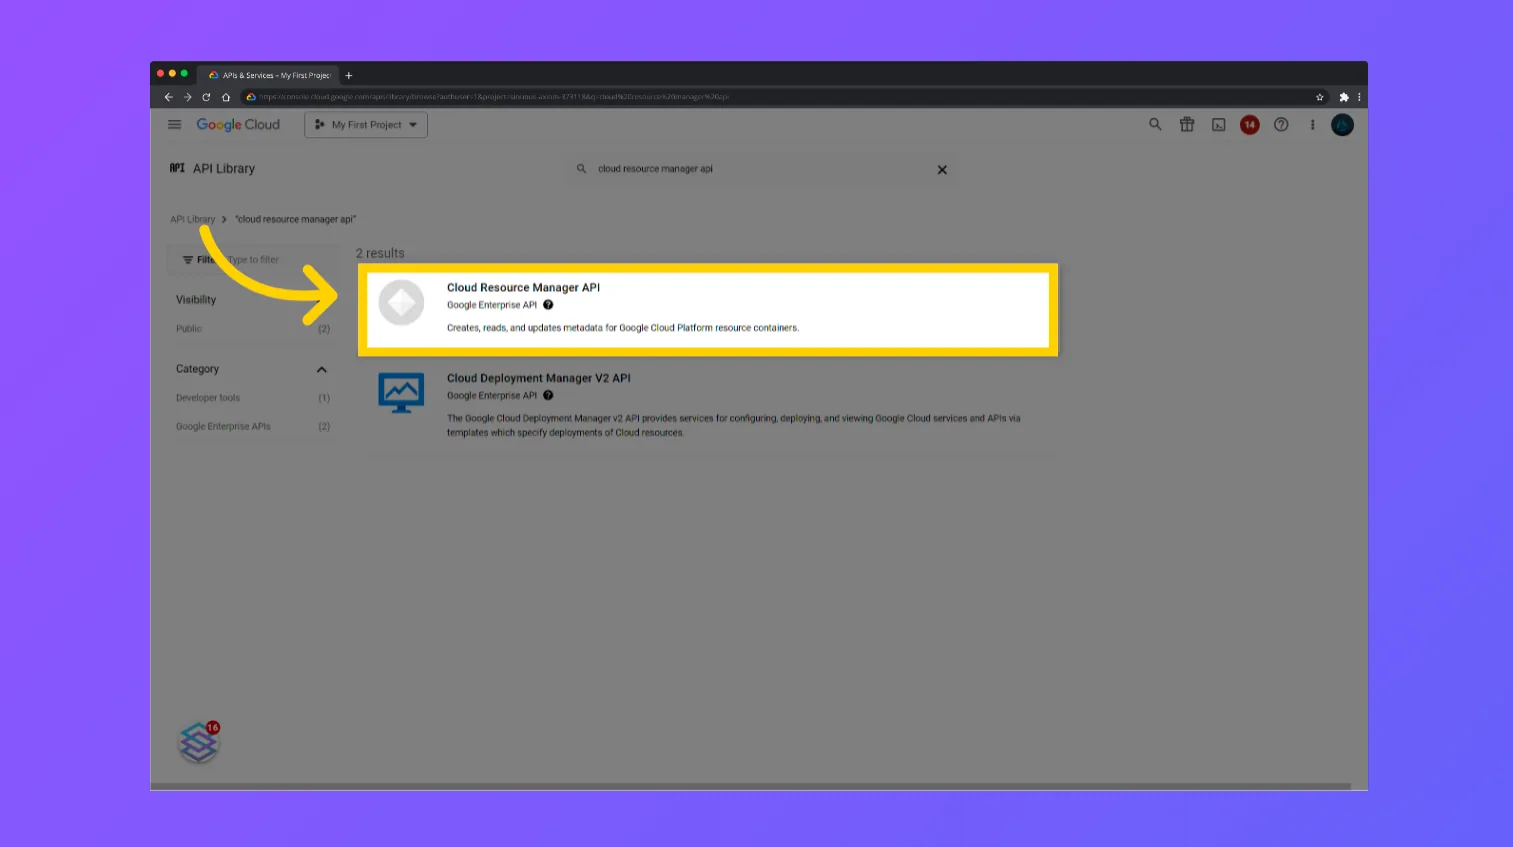
2. [Cloud Resource Manager API](https://console.cloud.google.com/marketplace/product/google/cloudresourcemanager.googleapis.com) (to set up all services)
3. [BigQuery API](https://console.cloud.google.com/marketplace/product/google/bigquery.googleapis.com) (this is where your data resides)
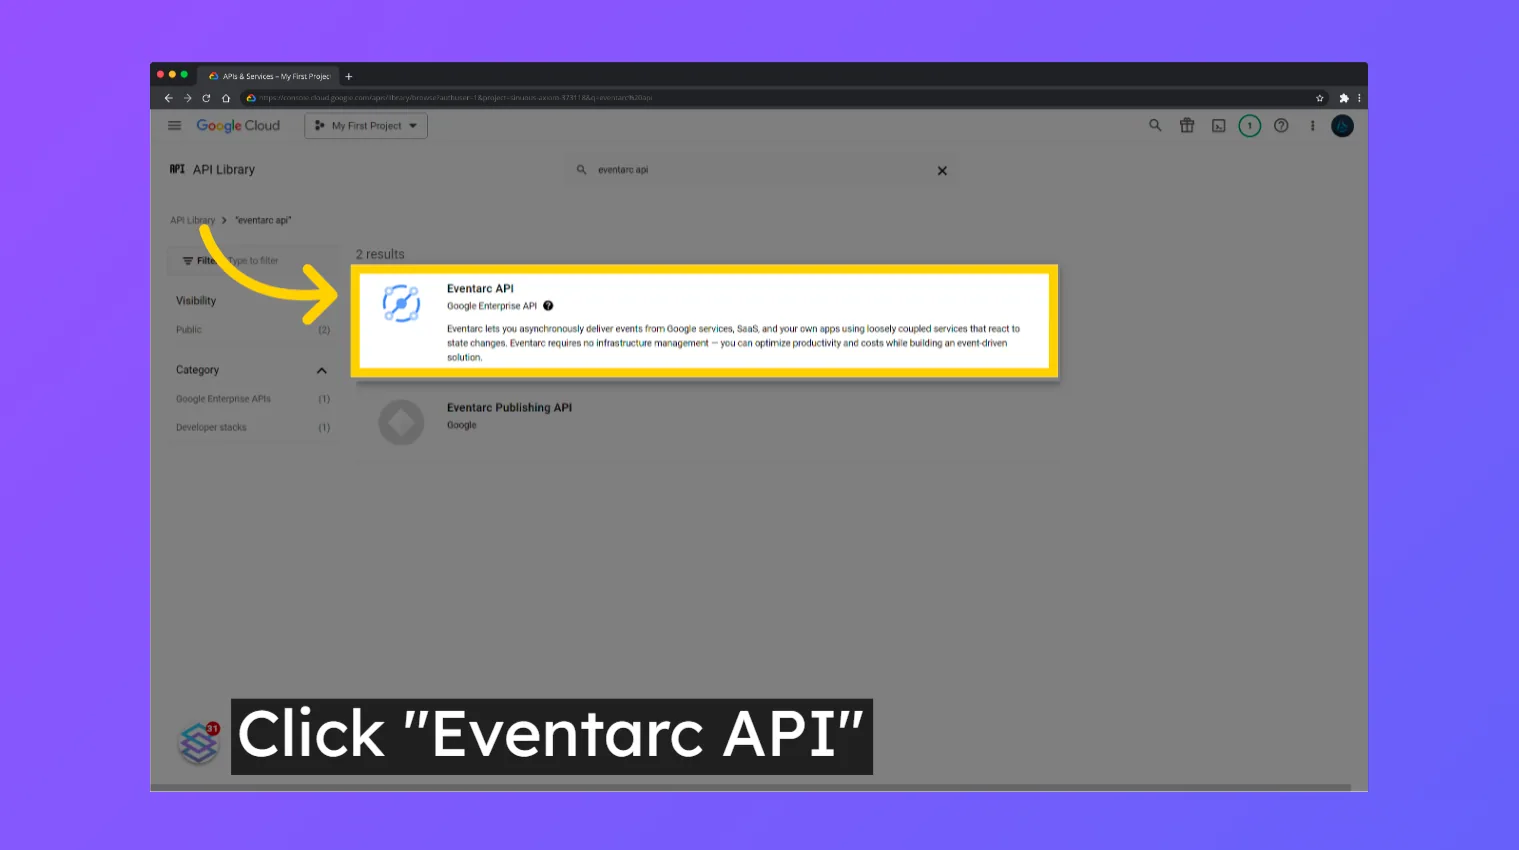
4. [Eventarc API](https://console.cloud.google.com/marketplace/product/google/eventarc.googleapis.com) (a notification service that enables real-time updates to happen)

#### 1. Open <https://console.cloud.google.com/apis/library>

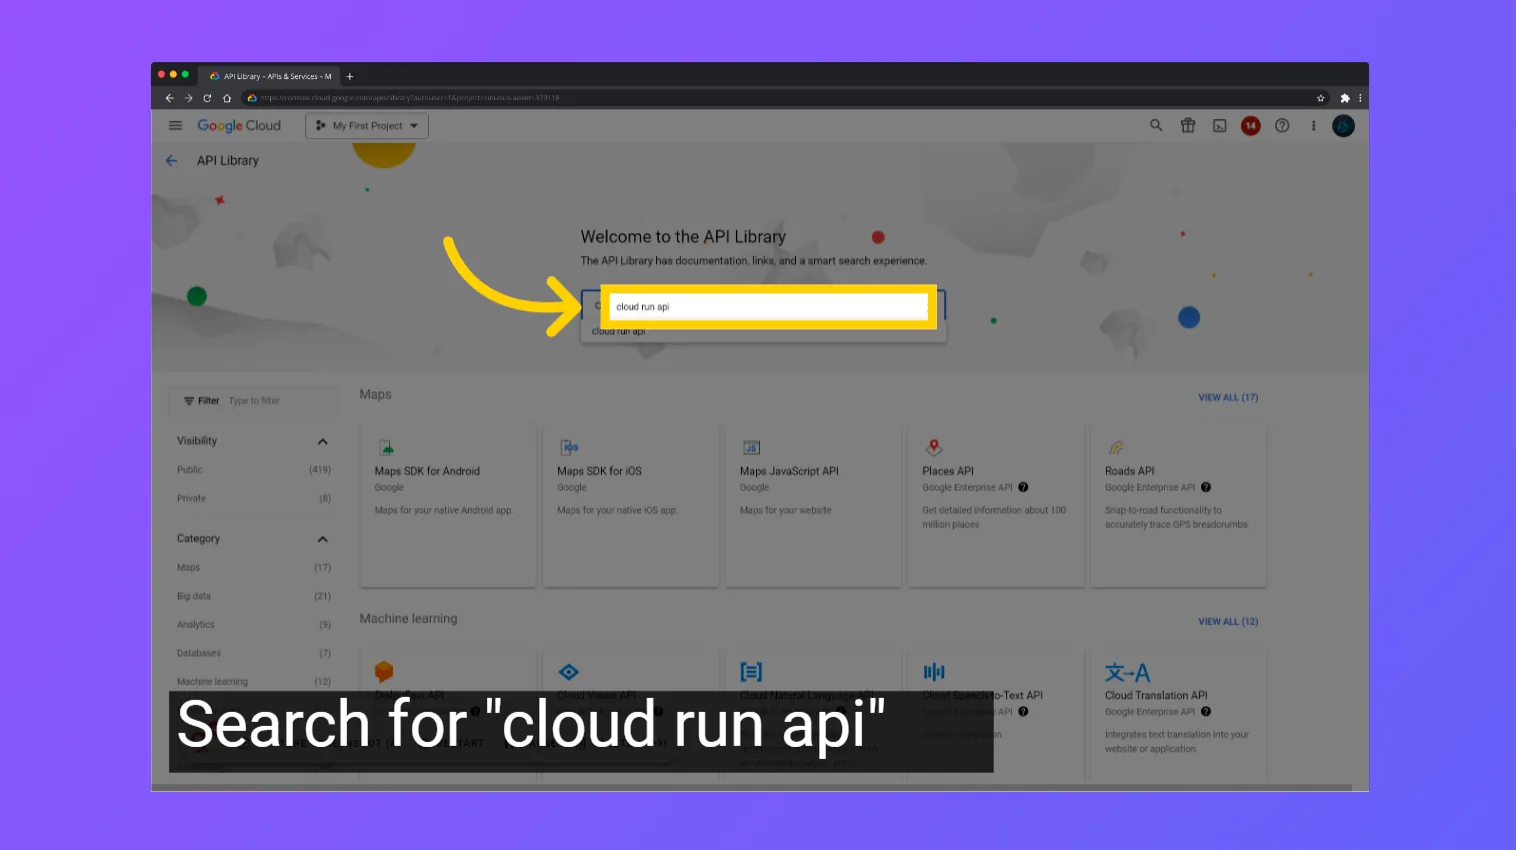
#### 2. Search for the API "cloud run API"

<figure><img src="/files/k6GAVClpU7bl6WczHMo3" alt=""><figcaption></figcaption></figure>

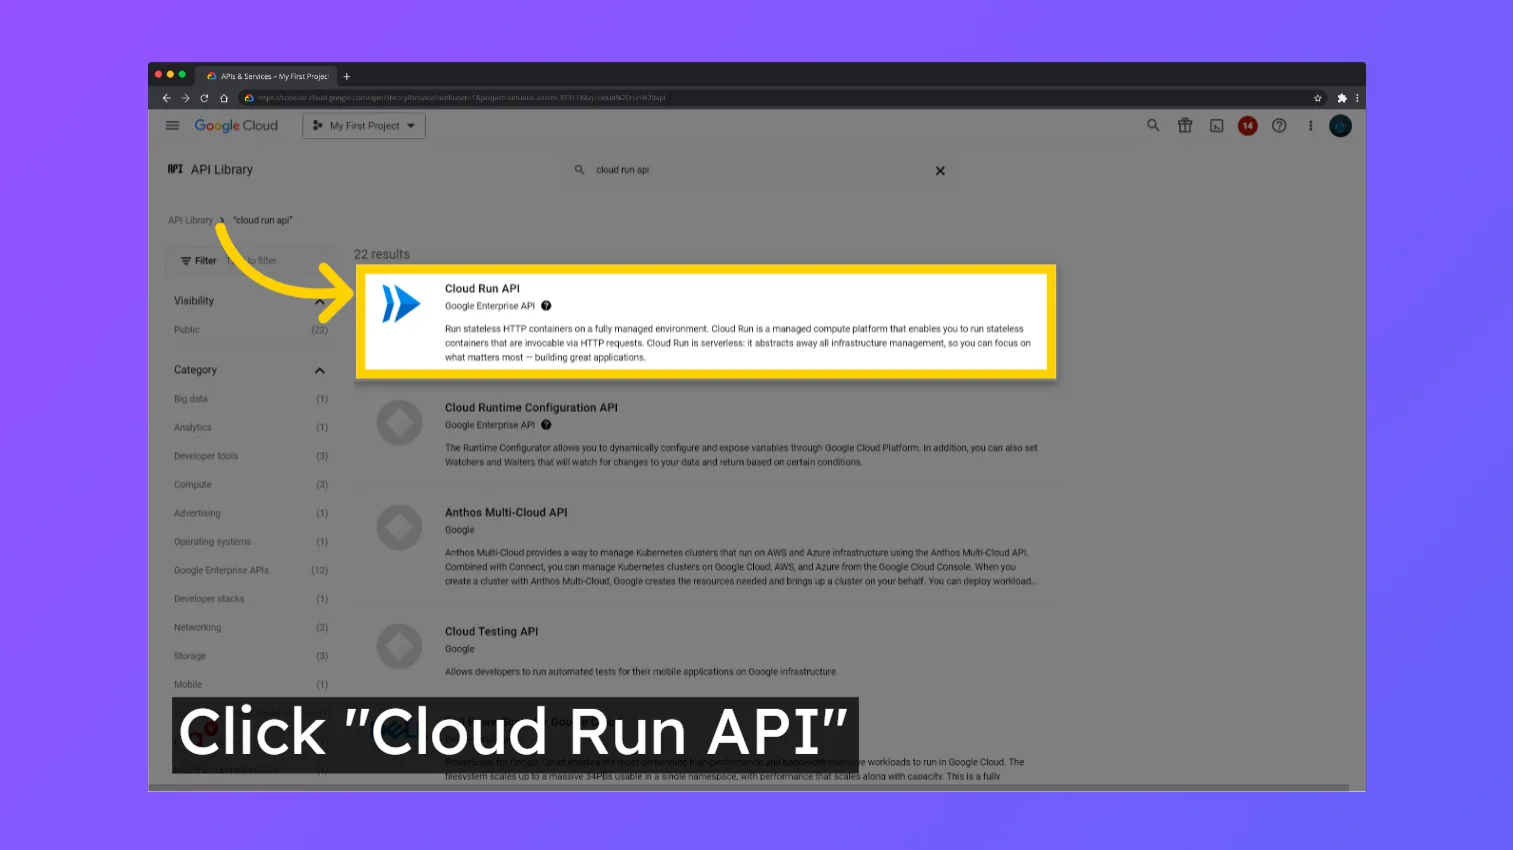
#### 3. Click on the API "Cloud Run API"

<figure><img src="/files/RCAH9oXtjENgauTfJa6a" alt=""><figcaption></figcaption></figure>

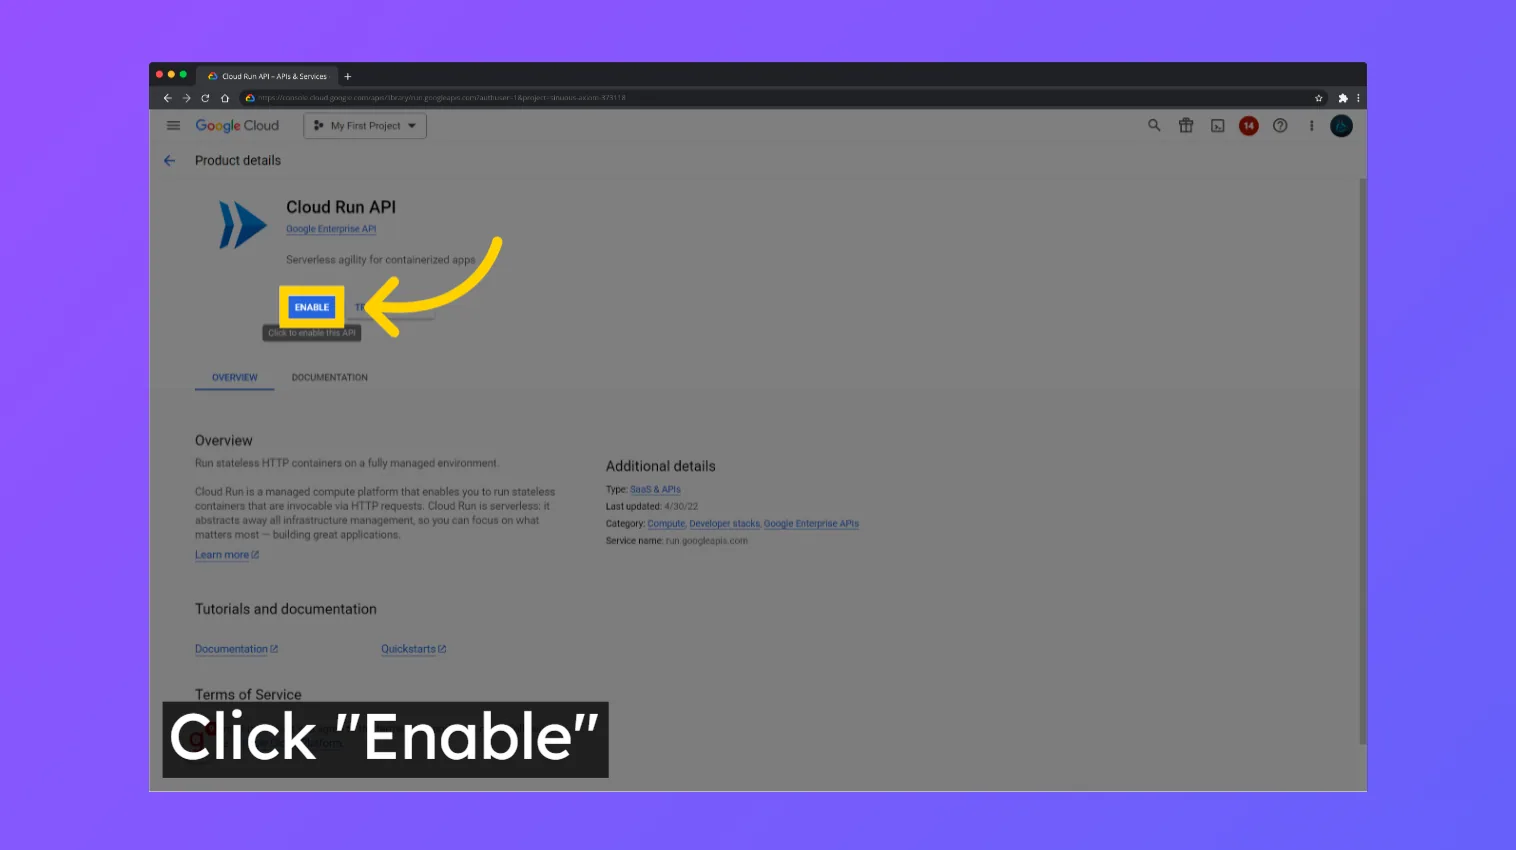
#### 4. Enable the API

<figure><img src="/files/Uc932g6zfgH9INQZHBis" alt=""><figcaption></figcaption></figure>

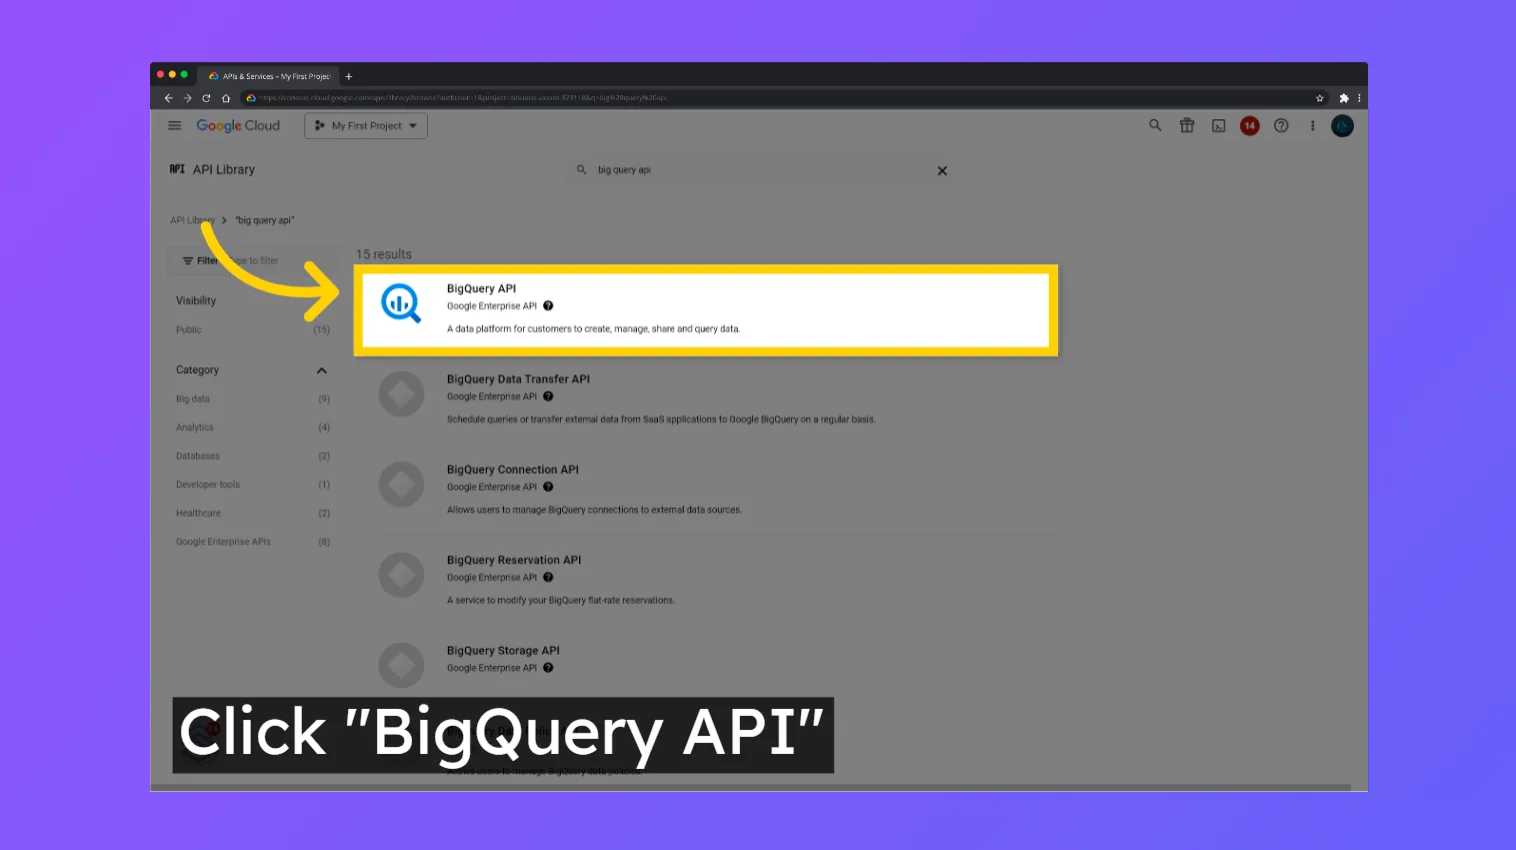
#### 5. Repeat Steps 2-3 for the following APIs

Cloud Resource Manager API
<figure><img src="/files/zAk0kMh9g5tmHQgaW3zX" alt=""><figcaption></figcaption></figure>

BigQuery API

<figure><img src="/files/yukpG6TuJdEXgQWKf4dP" alt=""><figcaption></figcaption></figure>

Eventarc API

<figure><img src="/files/vaz7EDKqAQqgZ1iez6Ut" alt=""><figcaption></figcaption></figure>

## Create Service Account

The Service Account gives access to Stacksync to your data for it to be synced. It is used to set up all the necessary Stacksync Services in your Google Cloud Project. You will need to create one Service Account dedicated to Stacksync which will enable you with better access control.

#### 1. Open <https://console.cloud.google.com/iam-admin/serviceaccounts>

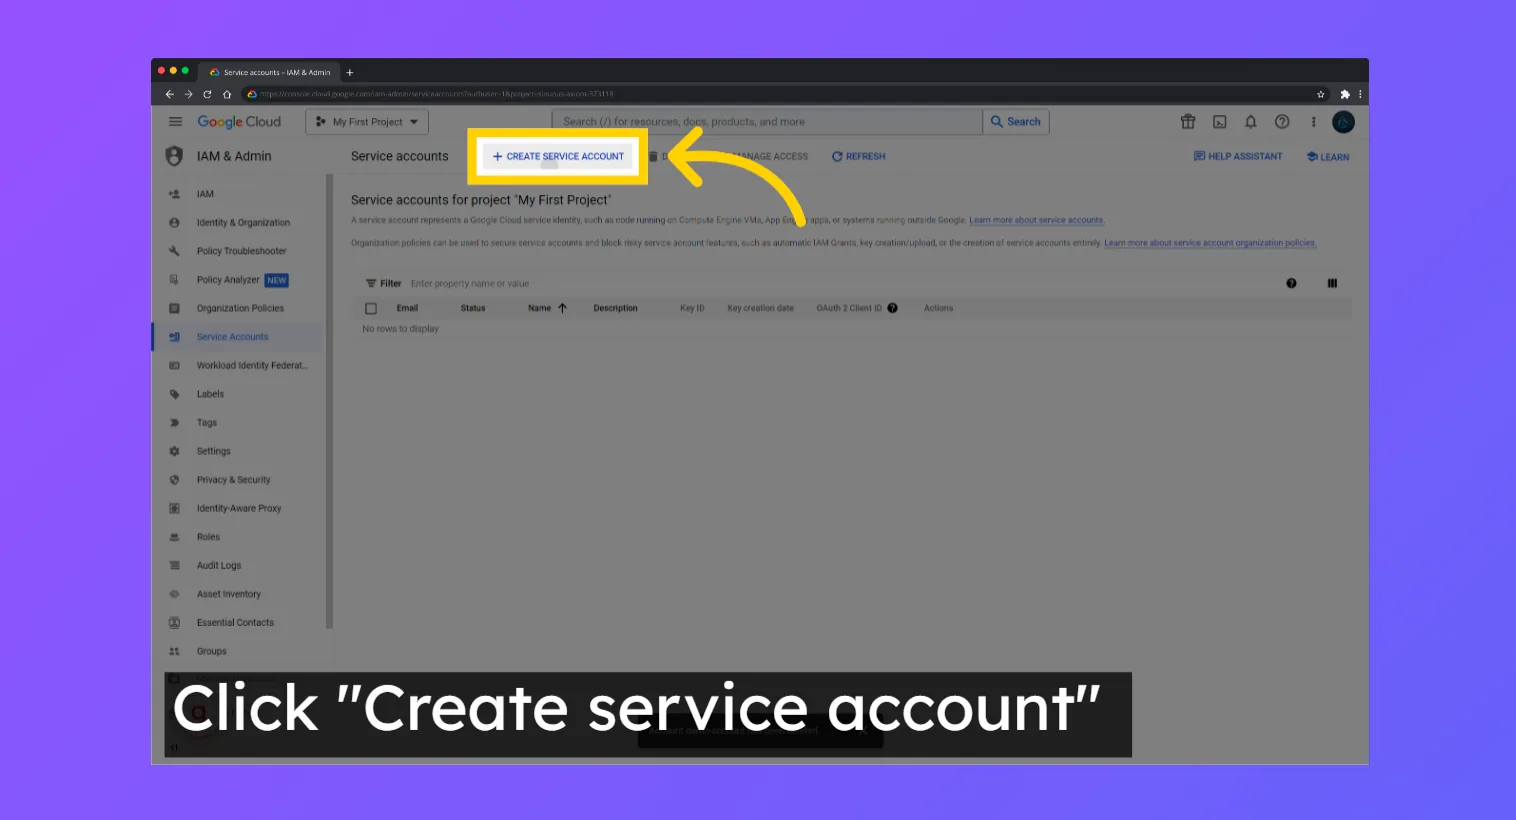
#### 2. Click "Create Service Account"

<figure><img src="/files/Ty5r7Cr3Z7uqGn7WUqG3" alt=""><figcaption></figcaption></figure>

#### 3. Fill in the Service Account details
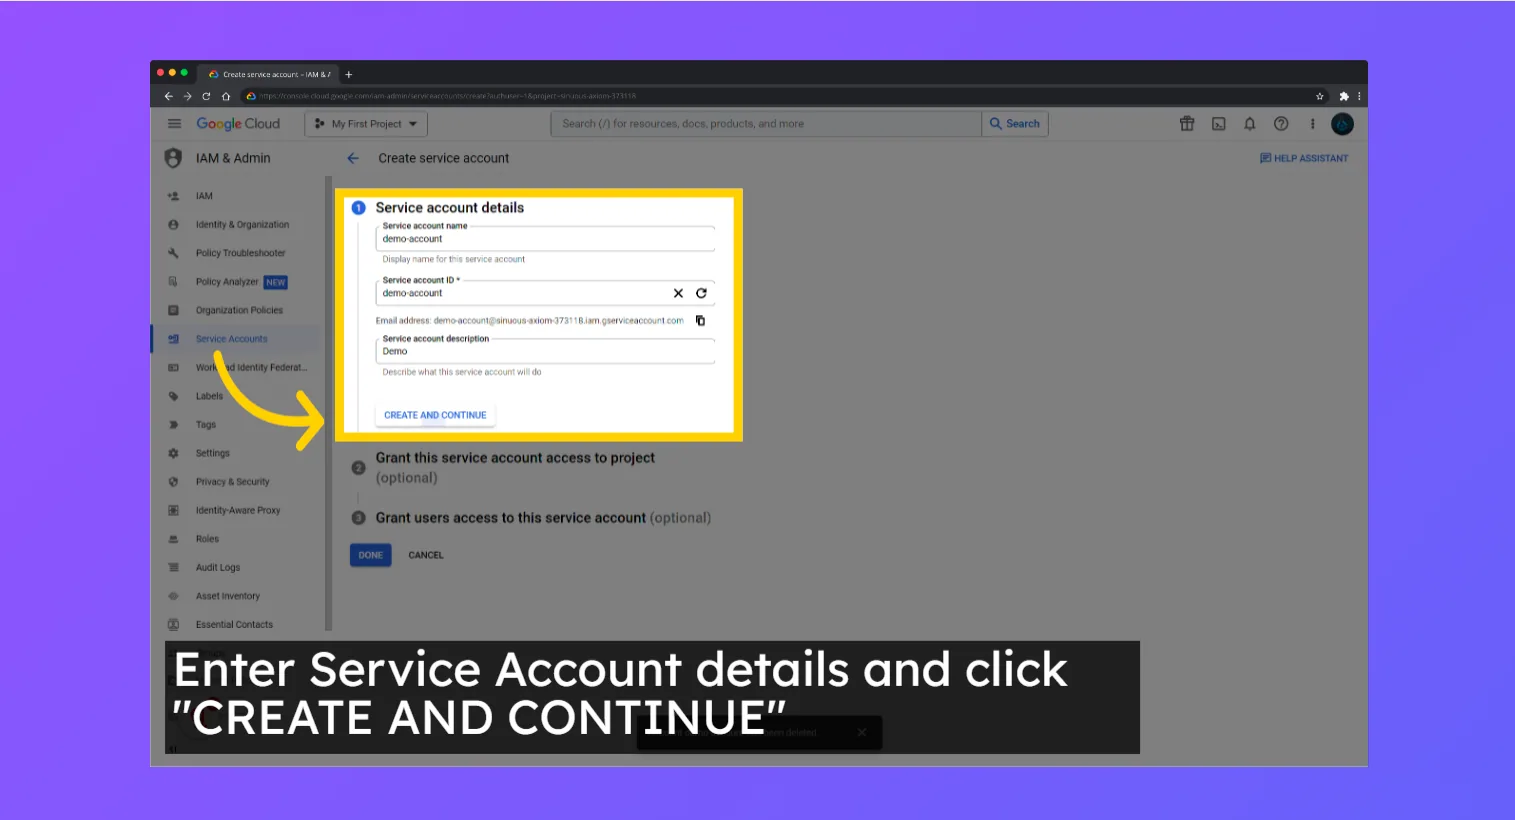
<figure><img src="/files/IFjsEJV7DyMDLF7FRpuQ" alt=""><figcaption></figcaption></figure>

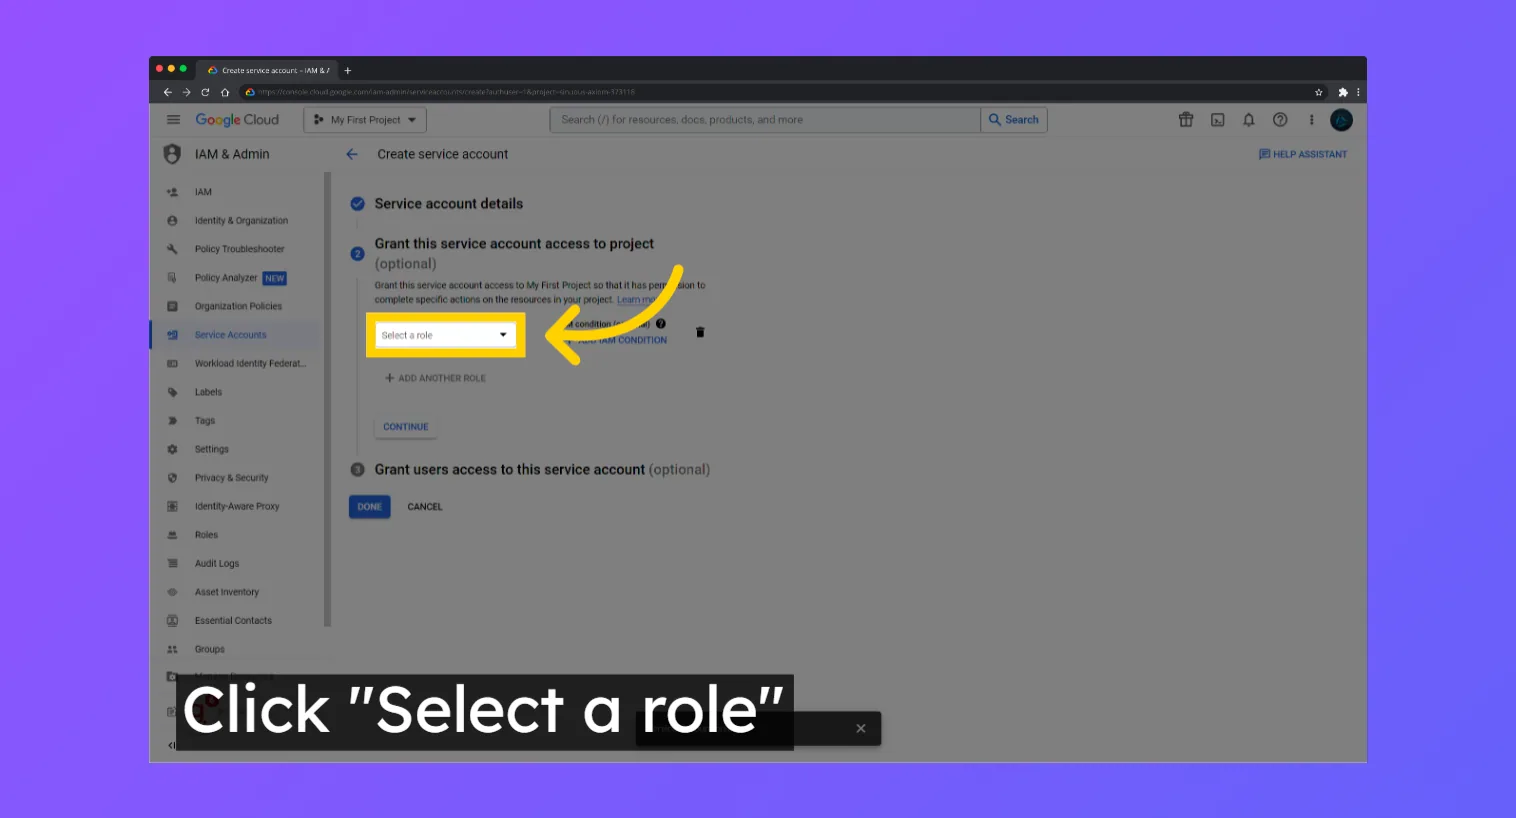
#### 4. Click "Select a role"

<figure><img src="/files/xdia99GHJ5aAqKGwBLDT" alt=""><figcaption></figcaption></figure>

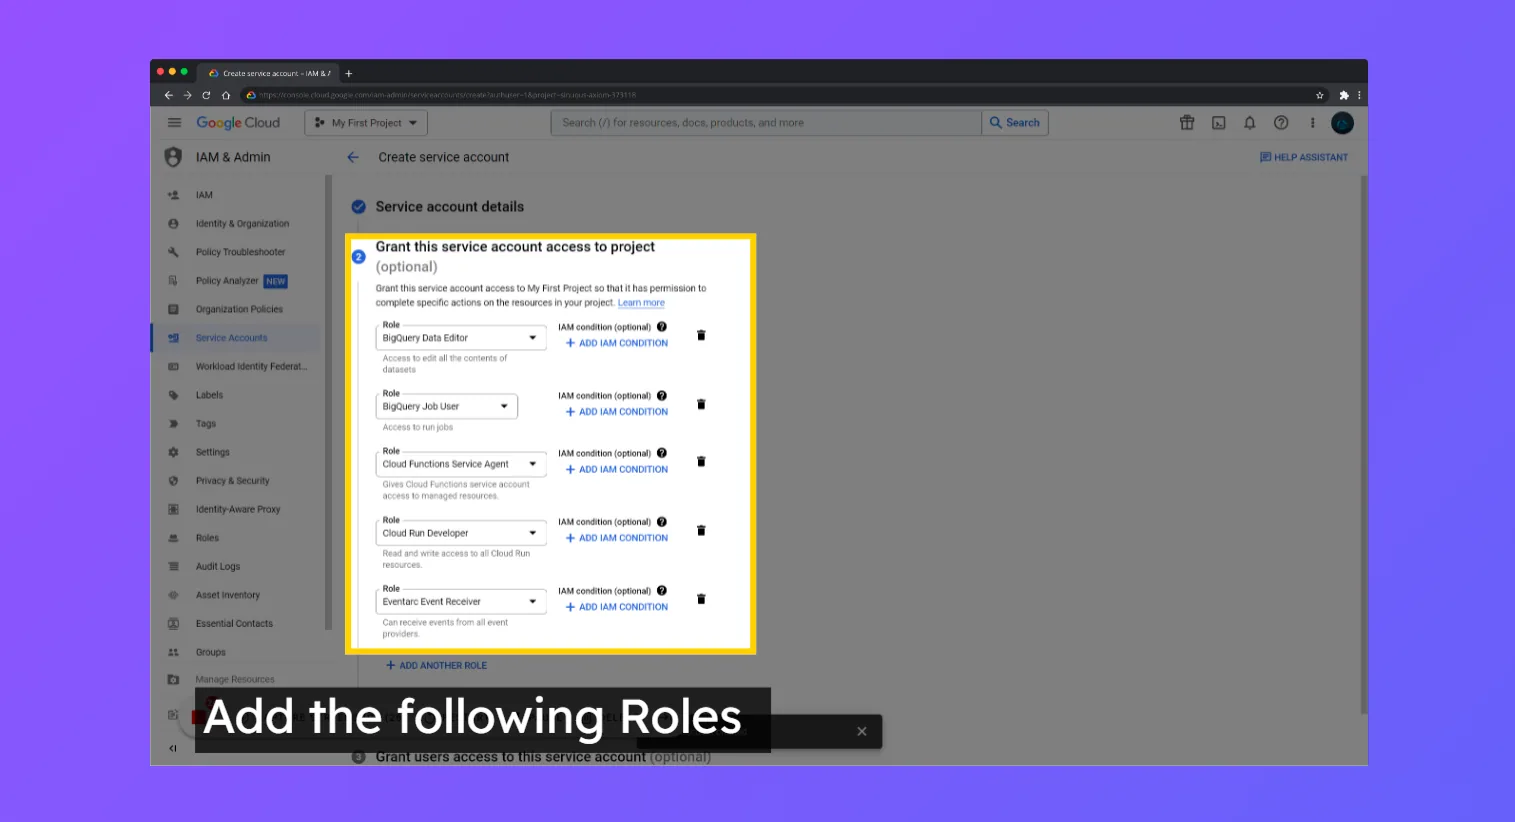
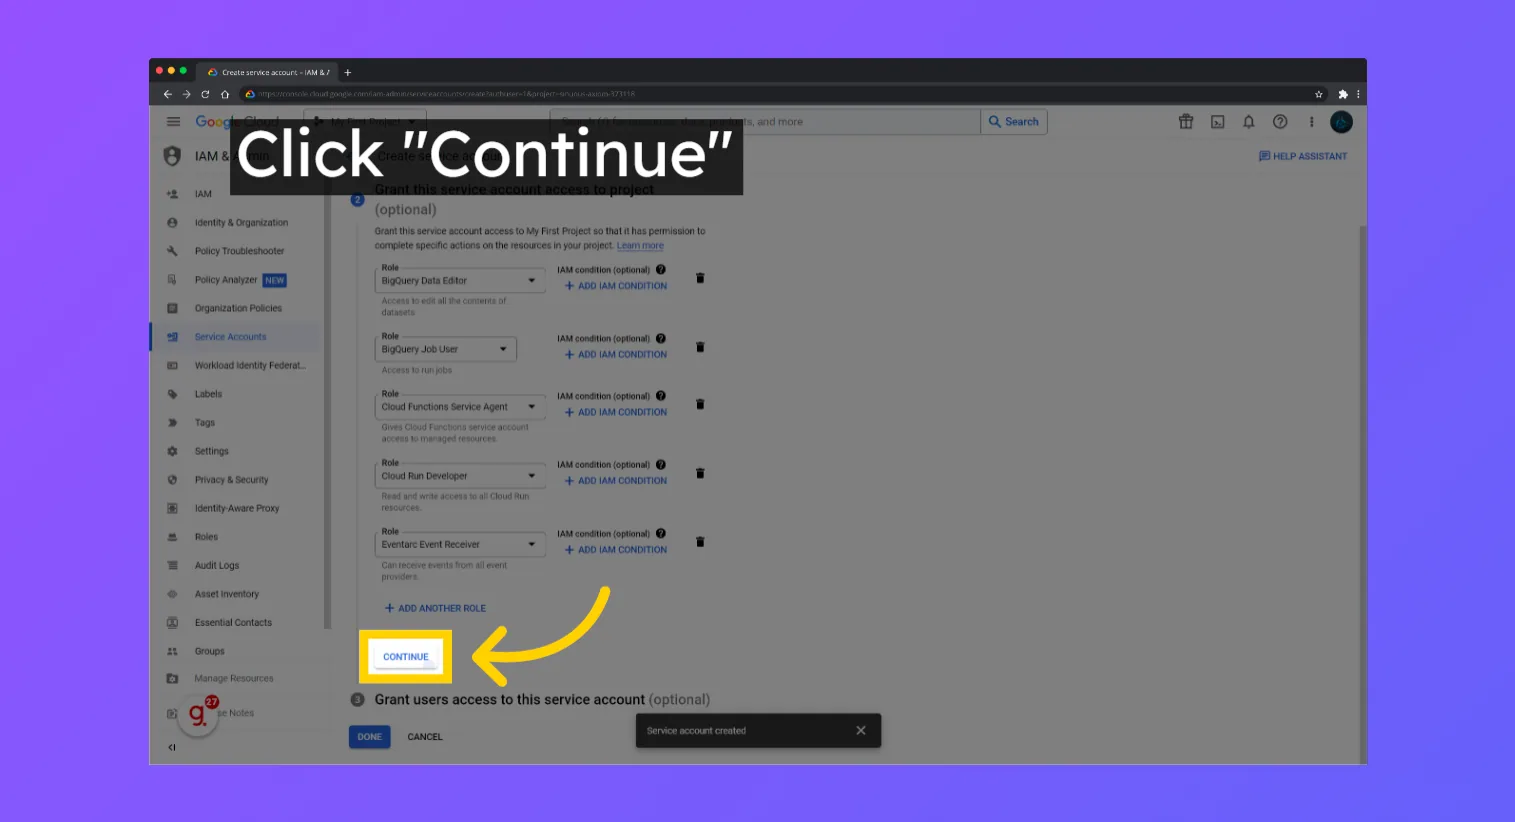
#### 5. Add the following Roles to the Service Account

These roles are necessary for Stacksync to get data access and set up the required services to make the data sync happen.

1. BigQuery Data Editor
2. BigQuery Job User
3. Cloud Functions Service Agent
4. Cloud Run Developer
5. Eventarc Event Receiver
6. Eventarc Service Agent

<figure><img src="/files/OANvdZdMG1MT8HocF8cE" alt=""><figcaption></figcaption></figure>

#### 6. Click "Continue"

<figure><img src="/files/nAIPBPlTQKGm9EbHrgEC" alt=""><figcaption></figcaption></figure>

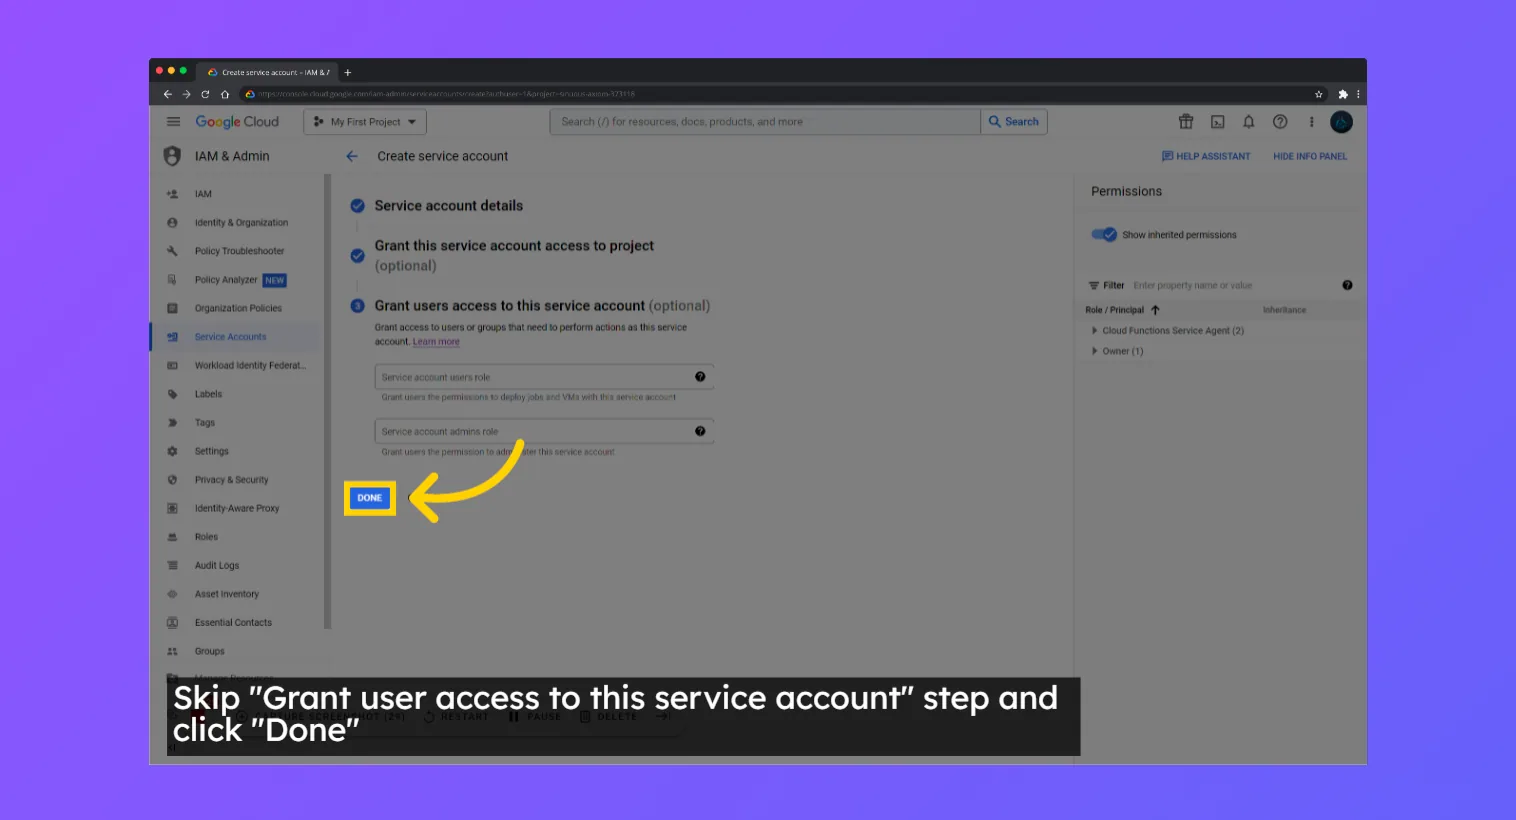
#### 7. Click "DONE"

<figure><img src="/files/Ry44a60Xv5muNhwxXoEW" alt=""><figcaption></figcaption></figure>

## Adding Credentials to Stacksync

#### 1. Go to <https://console.cloud.google.com/iam-admin/serviceaccounts>

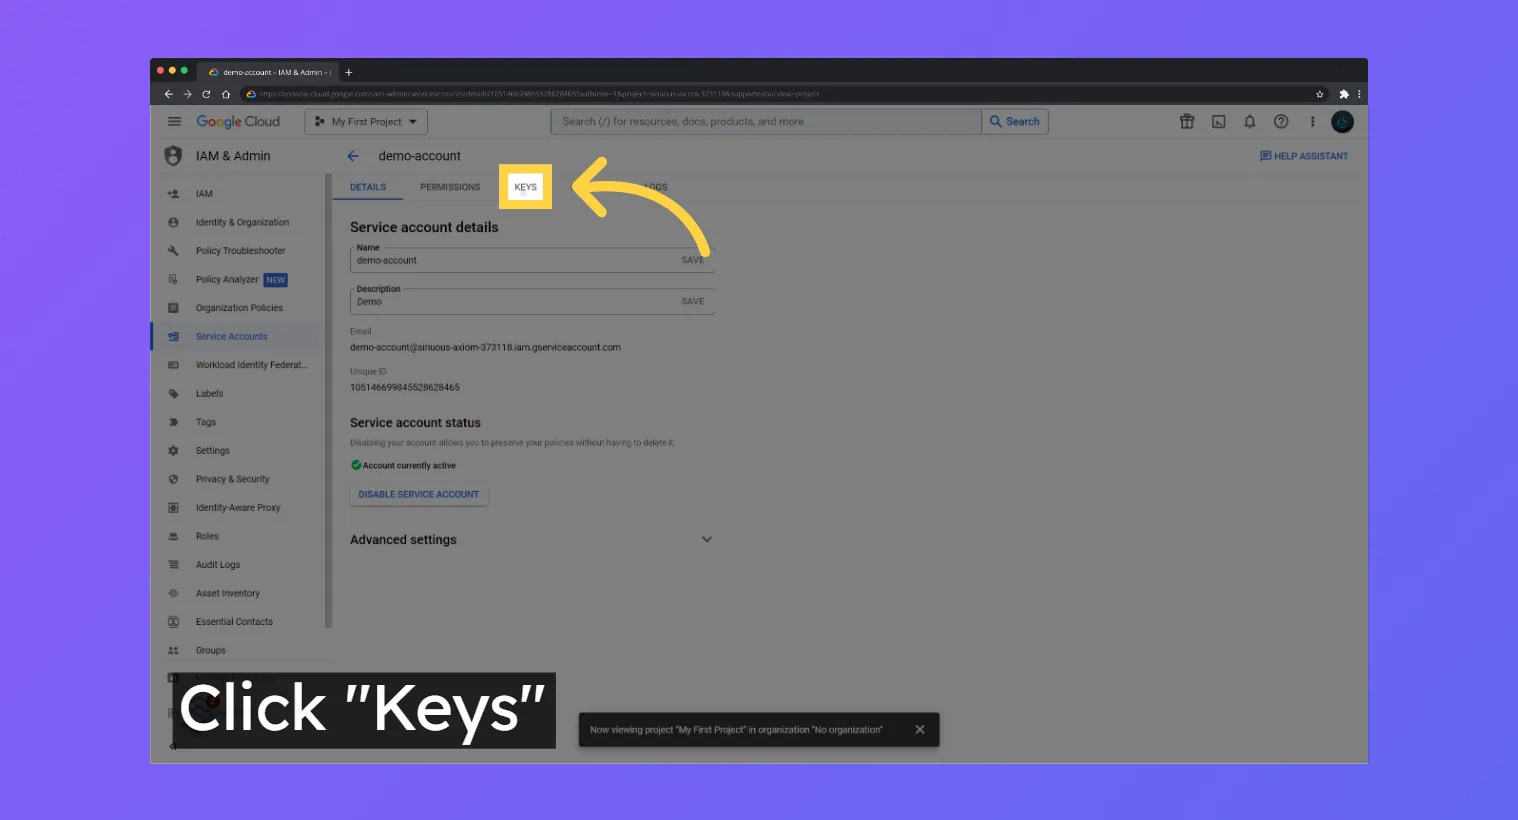
#### 2. Click "Keys"

<figure><img src="/files/DZwPh0SX5sxMEIWLLKD4" alt=""><figcaption></figcaption></figure>

#### 3. Click "Add Key" and Select "Create New Key"
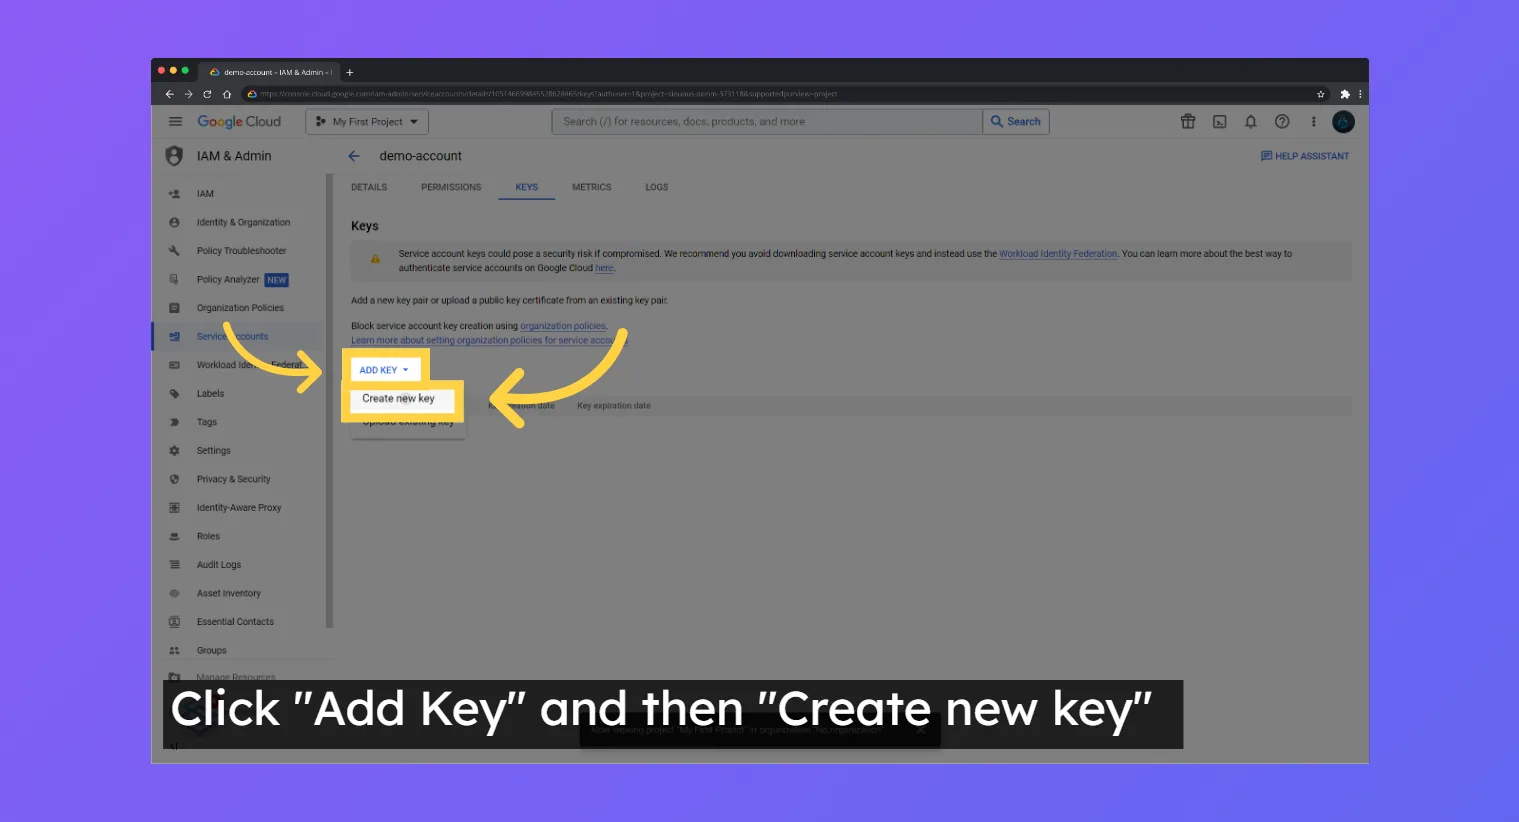
<figure><img src="/files/1fcJZkVRzVgyGEVwhDqs" alt=""><figcaption></figcaption></figure>

#### 4. Select Key Type "JSON" and click "Create"

After clicking "Create", the JSON file will be downloaded.
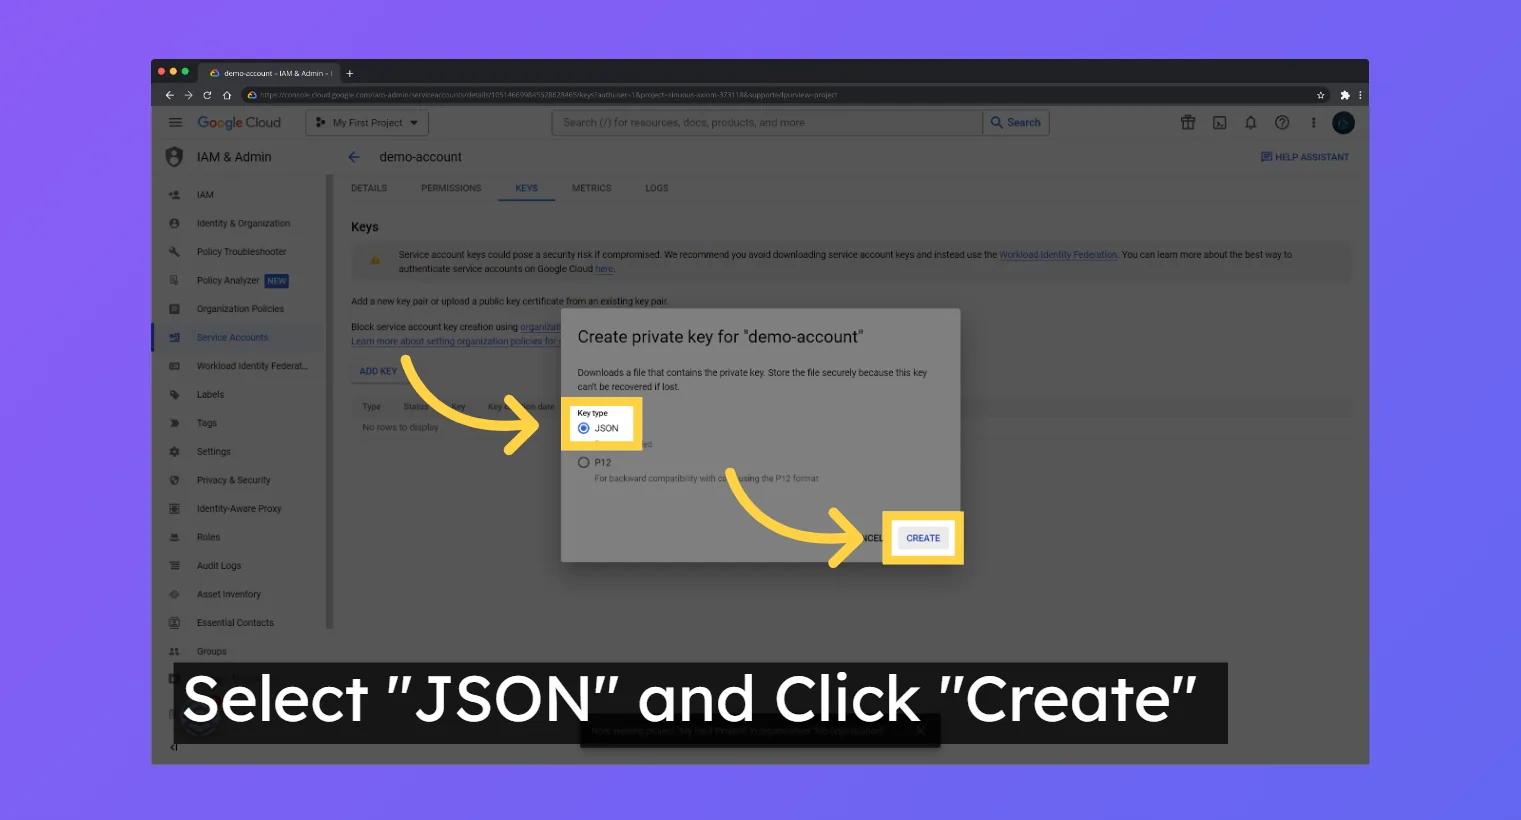
<figure><img src="/files/bAtPtjEOWMNSpRWVqclt" alt=""><figcaption></figcaption></figure>

#### 5. Select BigQuery in the Create Base page in Stacksync
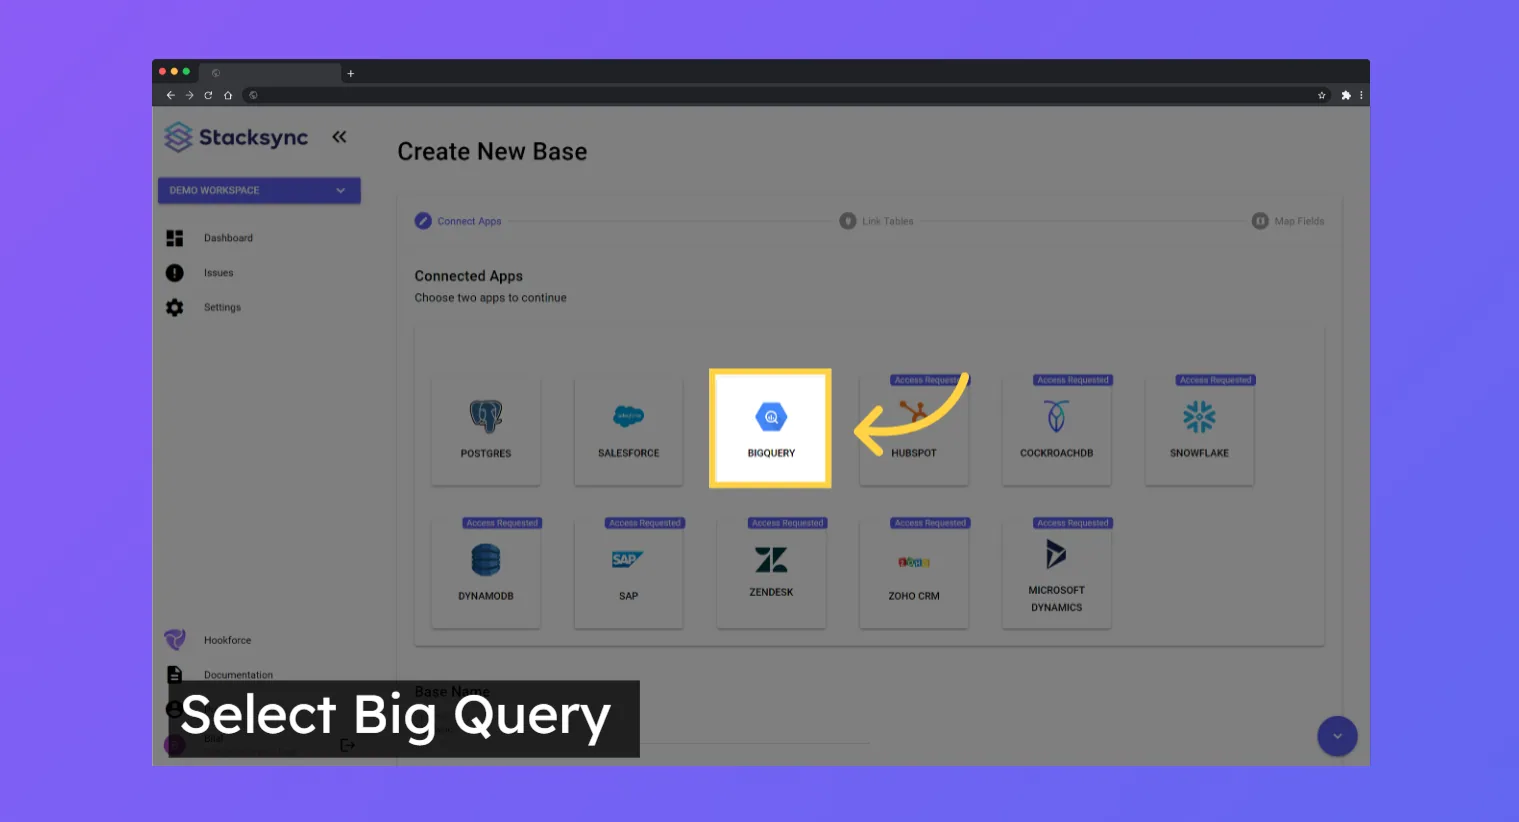
<figure><img src="/files/rICHEl5xY9o4Kpe1HxAQ" alt=""><figcaption></figcaption></figure>

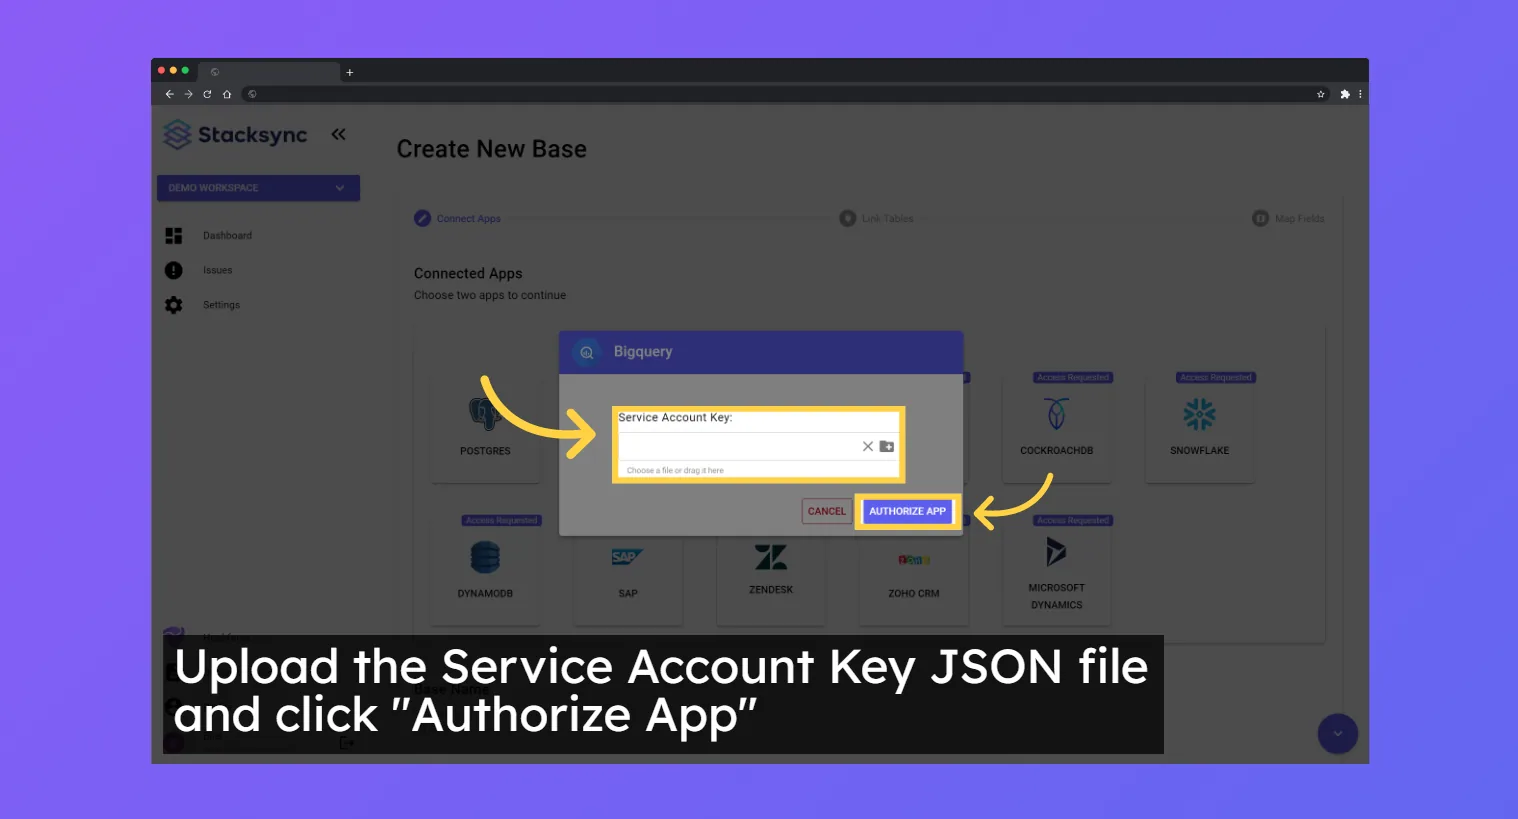
#### 6. Upload the JSON file from Step 4 and Click "Authorize App"
<figure><img src="/files/fTtZpqobzHD47OuqRvBR" alt=""><figcaption></figcaption></figure>