# Authorize Amazon Seller Central
{% hint style="info" %}
#### Prerequisites:
1. Primary account access to Amazon Seller Central
2. An SP-API app in Amazon Developer Central
3. Required credentials: LWA client ID/secret, application ID, Merchant ID/Seller ID, refresh token.
{% endhint %}
## Setup instructions
#### STEP 1: Find merchant token
1. Sign in to your [Amazon Seller Central account](https://sellercentral.amazon.com/).
2. In the top-right corner, open **Settings** and select **Account Info**.
3. In the left navigation, select **Business Information**.
4. Click **Your Merchant Token**.
5. Copy the Merchant Token for the marketplace you plan to sync and keep it for connector setup.
#### STEP 2: Create an SP-API app client
1. Sign in to your Amazon Seller Central.
2. Go to **Apps and Services > Develop Apps**.
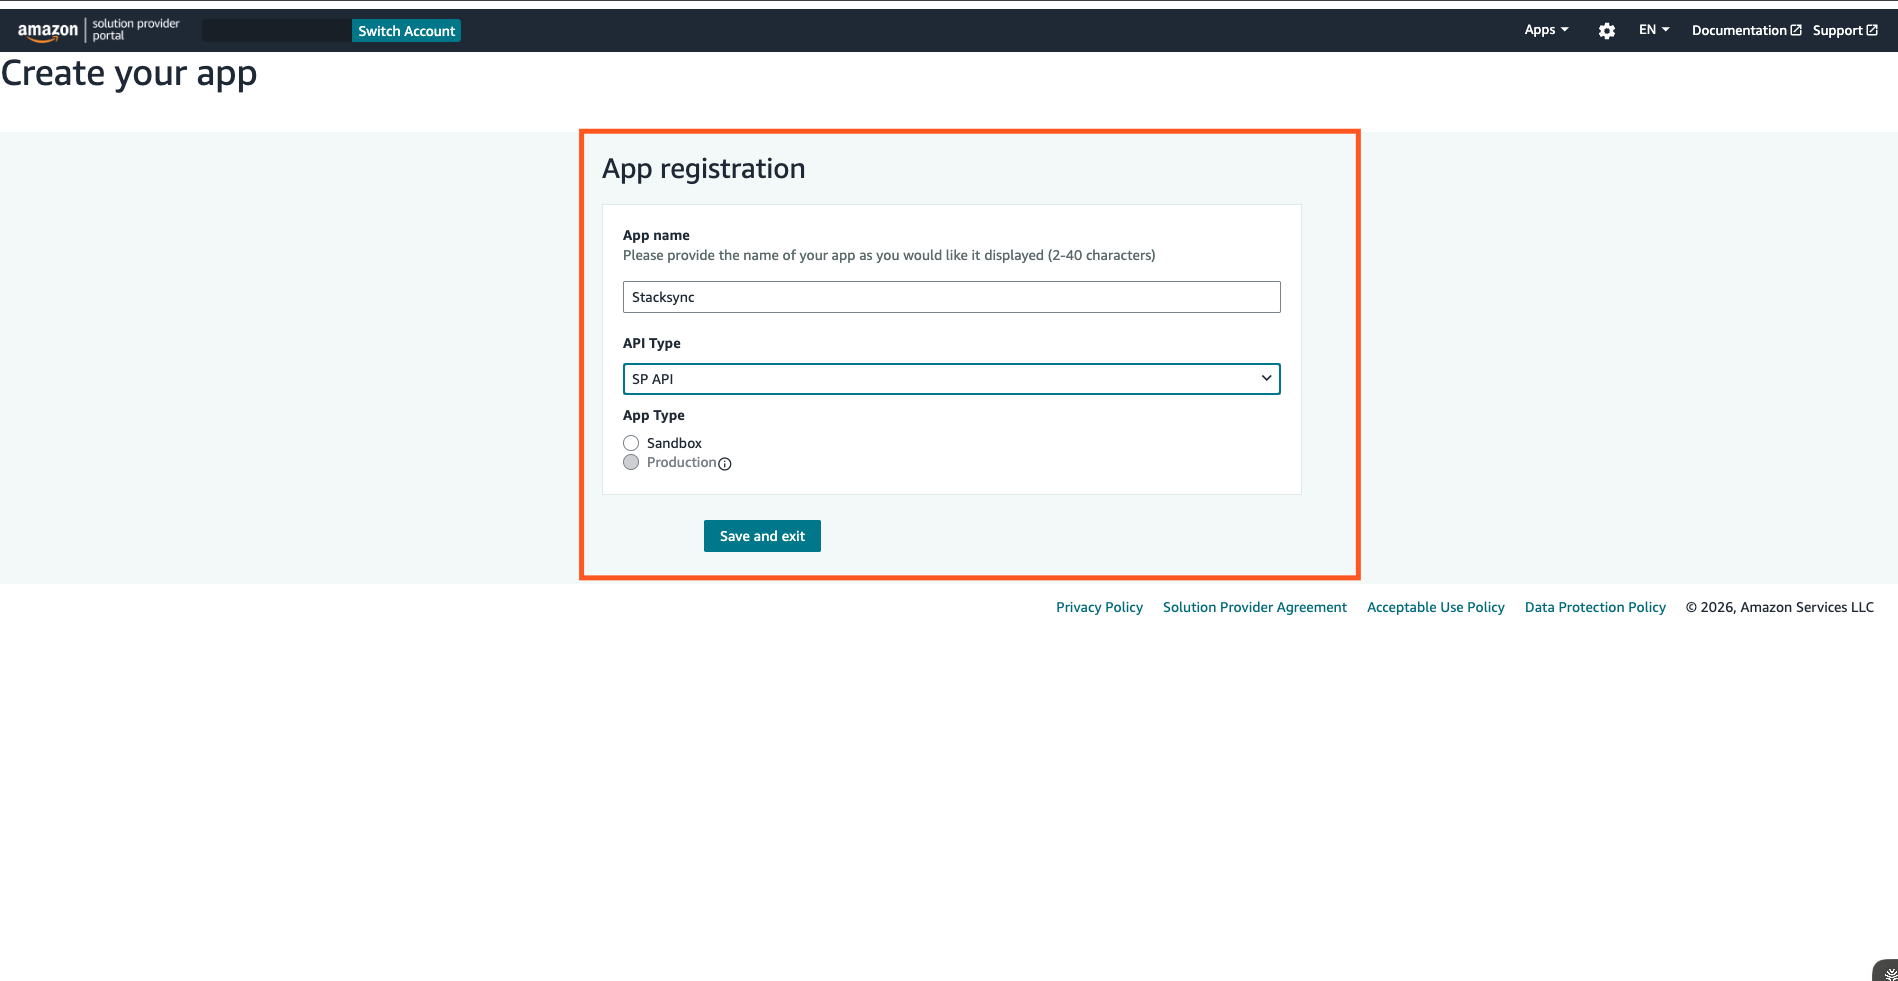
3. In Developer Central, click **+ Add new app client**.
4. Enter an **App name**.
5. Set **API Type** to **SP API and Select Production in the dropdown.**
6. Under **Business entities supported**, select your entity:
* **Sellers**
* **Vendors**
7. Assign the required roles for your entity.
For **Sellers**, select:
* Finance and Accounting
* Selling Partner Insights
* Buyer Communication
* Pricing
* Inventory and Order Tracking
* Brand Analytics
* Amazon Fulfillment
* Buyer Solicitation
* Product Listing
For **Vendors**, select:
* Brand Analytics
* Amazon Fulfillment
* Product Listing
8. In **Restricted Data Token (RDT)**, select:\
**Yes, I will delegate access to PII to another developer's application**.
9. Click **Save and exit**.
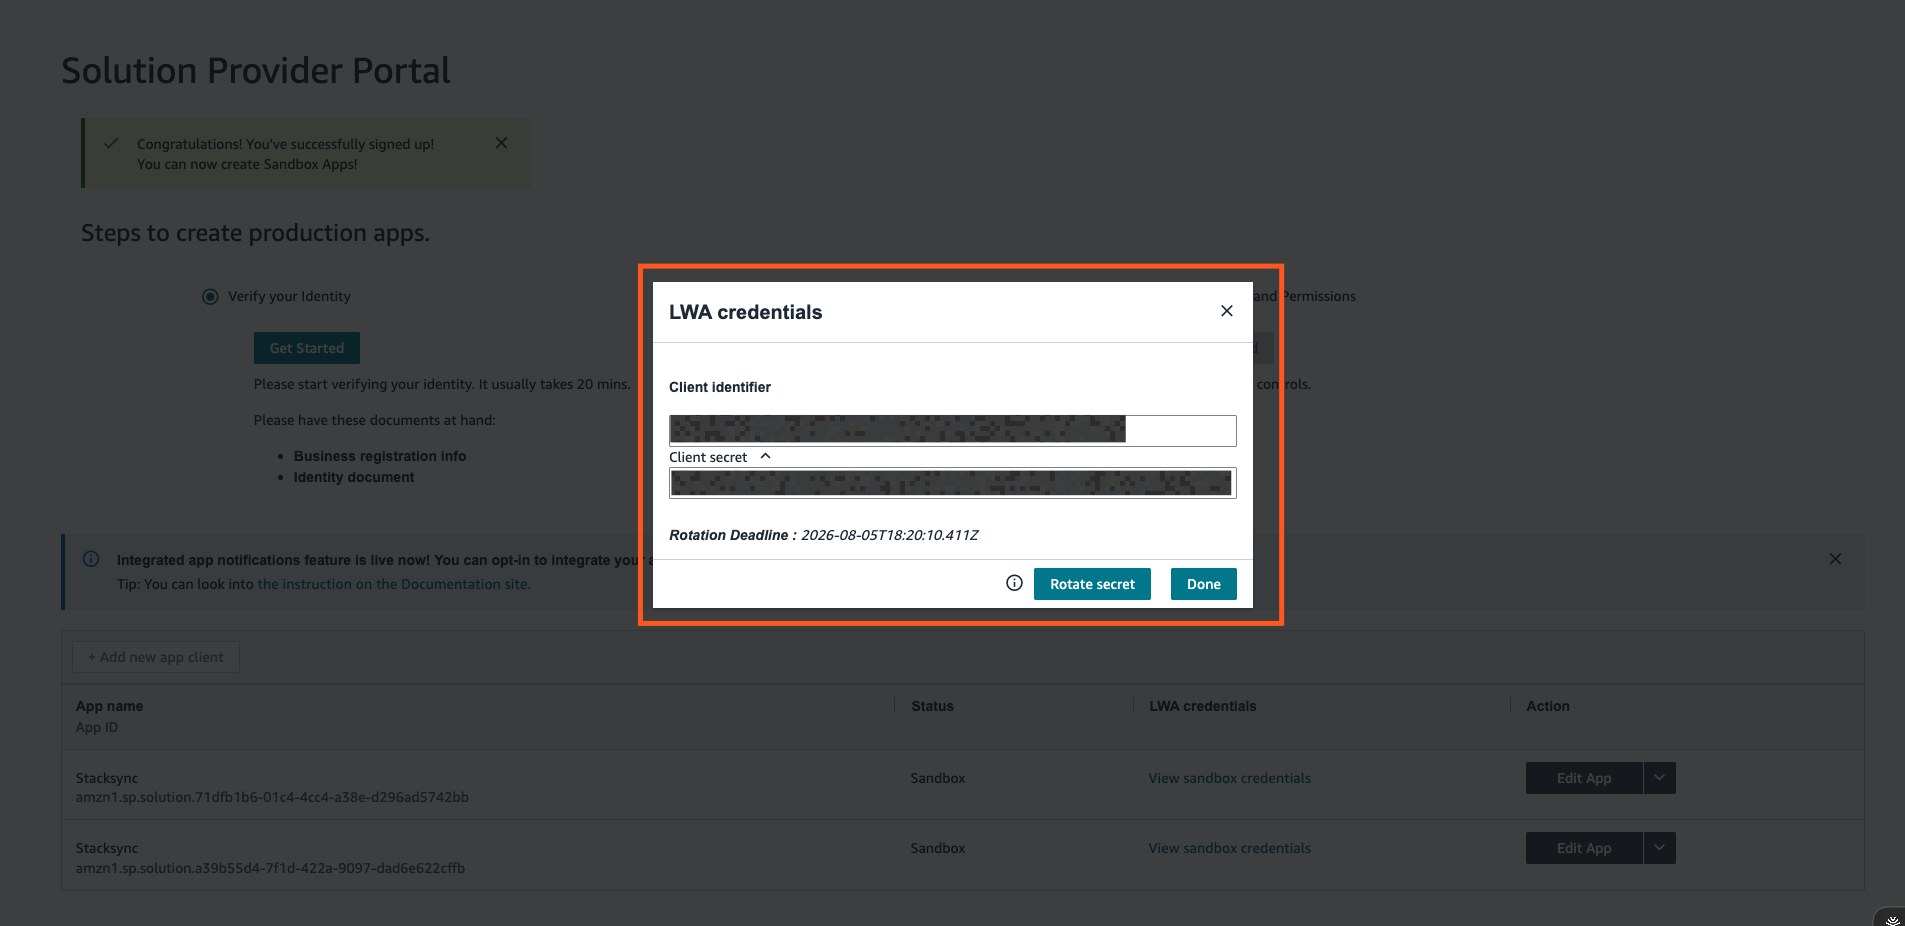
10. In the app list, click View for your app.
11. Make a note of the Client identifier and Client secret, and then click Done. You will need them to configure Connection on Stacksync.
{% hint style="info" %}
Do **not** set an OAuth Login URI or OAuth Redirect URI for this setup.
{% endhint %}
{% hint style="info" %}
Amazon sets a 6-month expiration on client secrets. To avoid sync interruptions, regenerate the client secret every 6 months and update the connection to use the new secret.
{% endhint %}
#### STEP 3: Generate refresh token
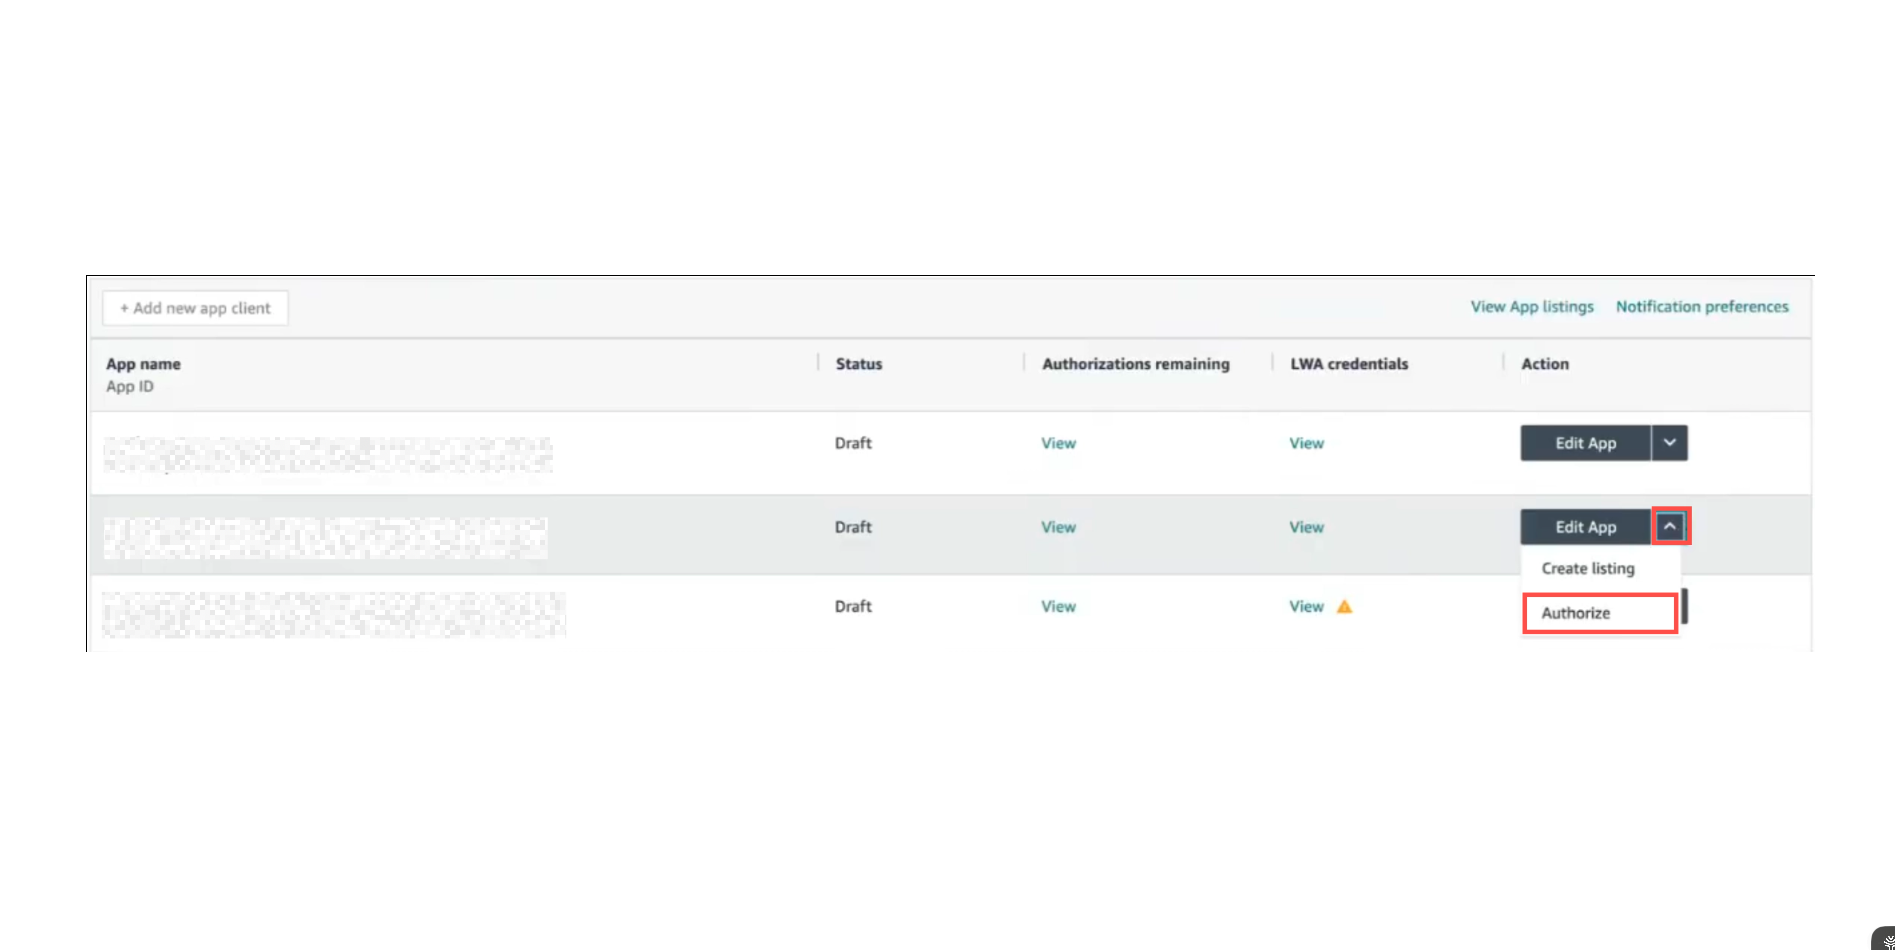
1. In Developer Central, open your app’s action menu and select **Authorize**.
2. In **Add Authorizations**, click **Authorize app** for the marketplace you want to sync.
3. Copy and securely store the generated **Refresh Token** for use during Stacksync configuration.
#### STEP 4: Finish Stackync Connection configuration
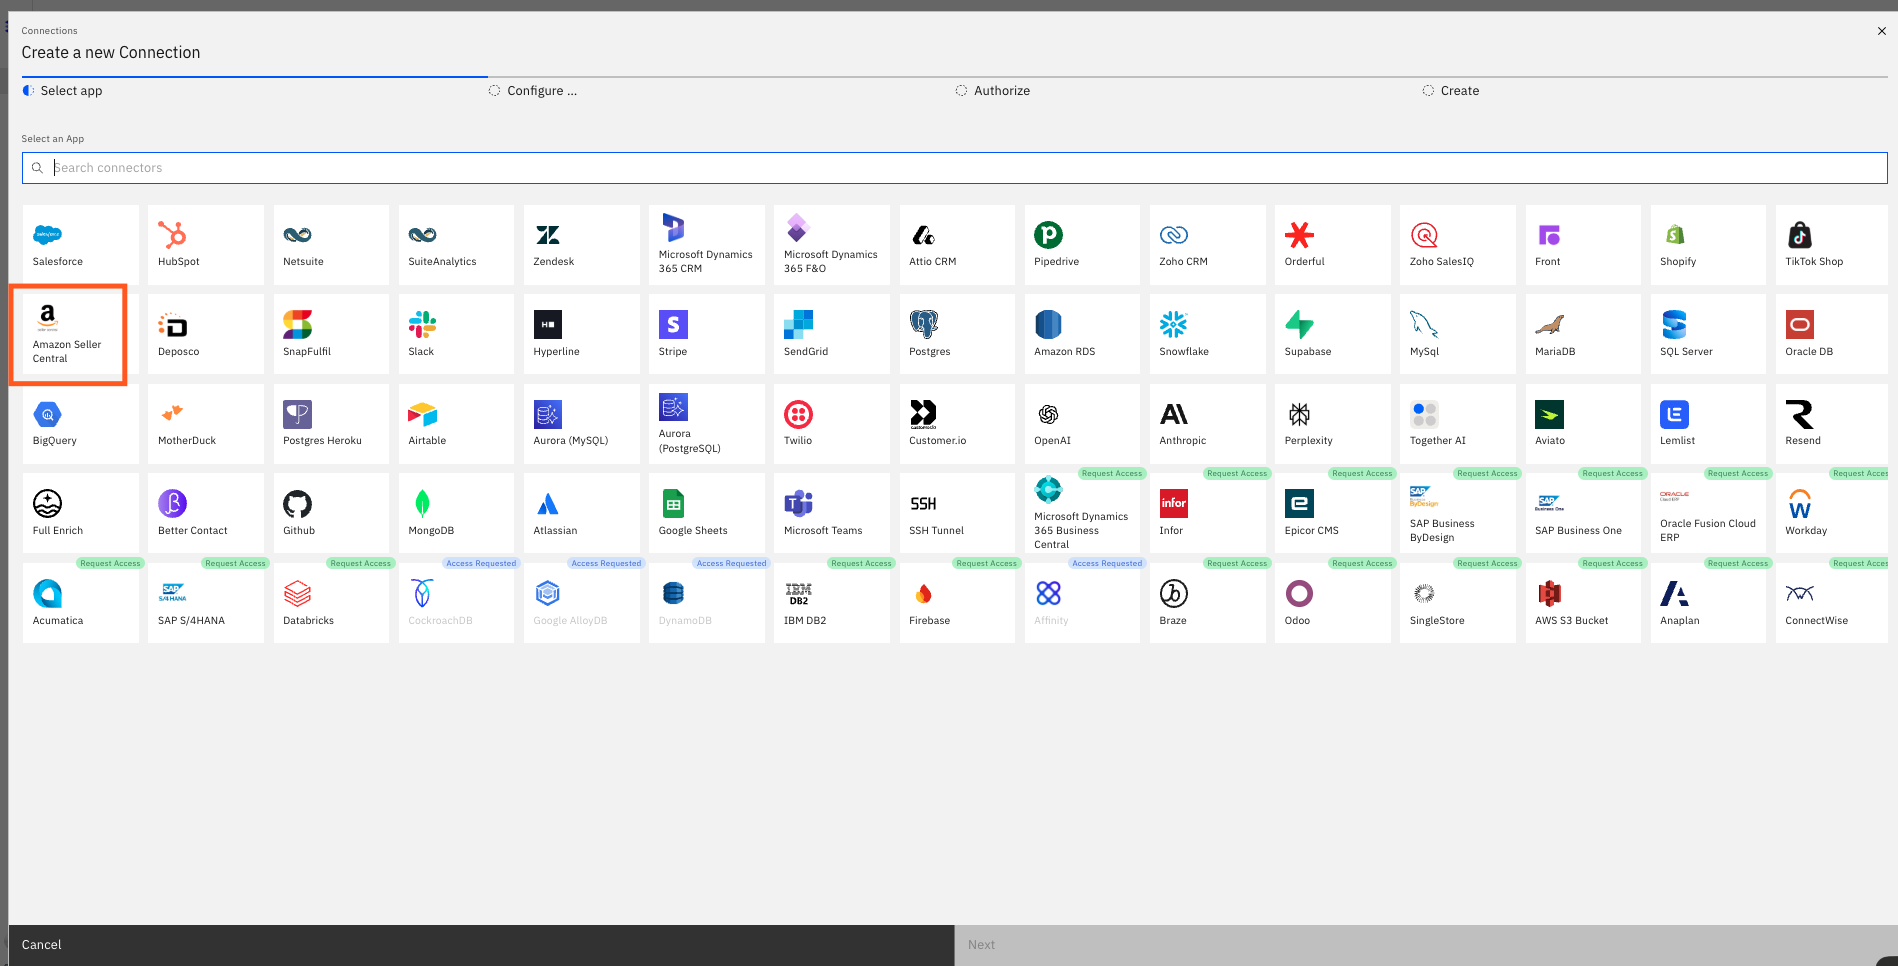
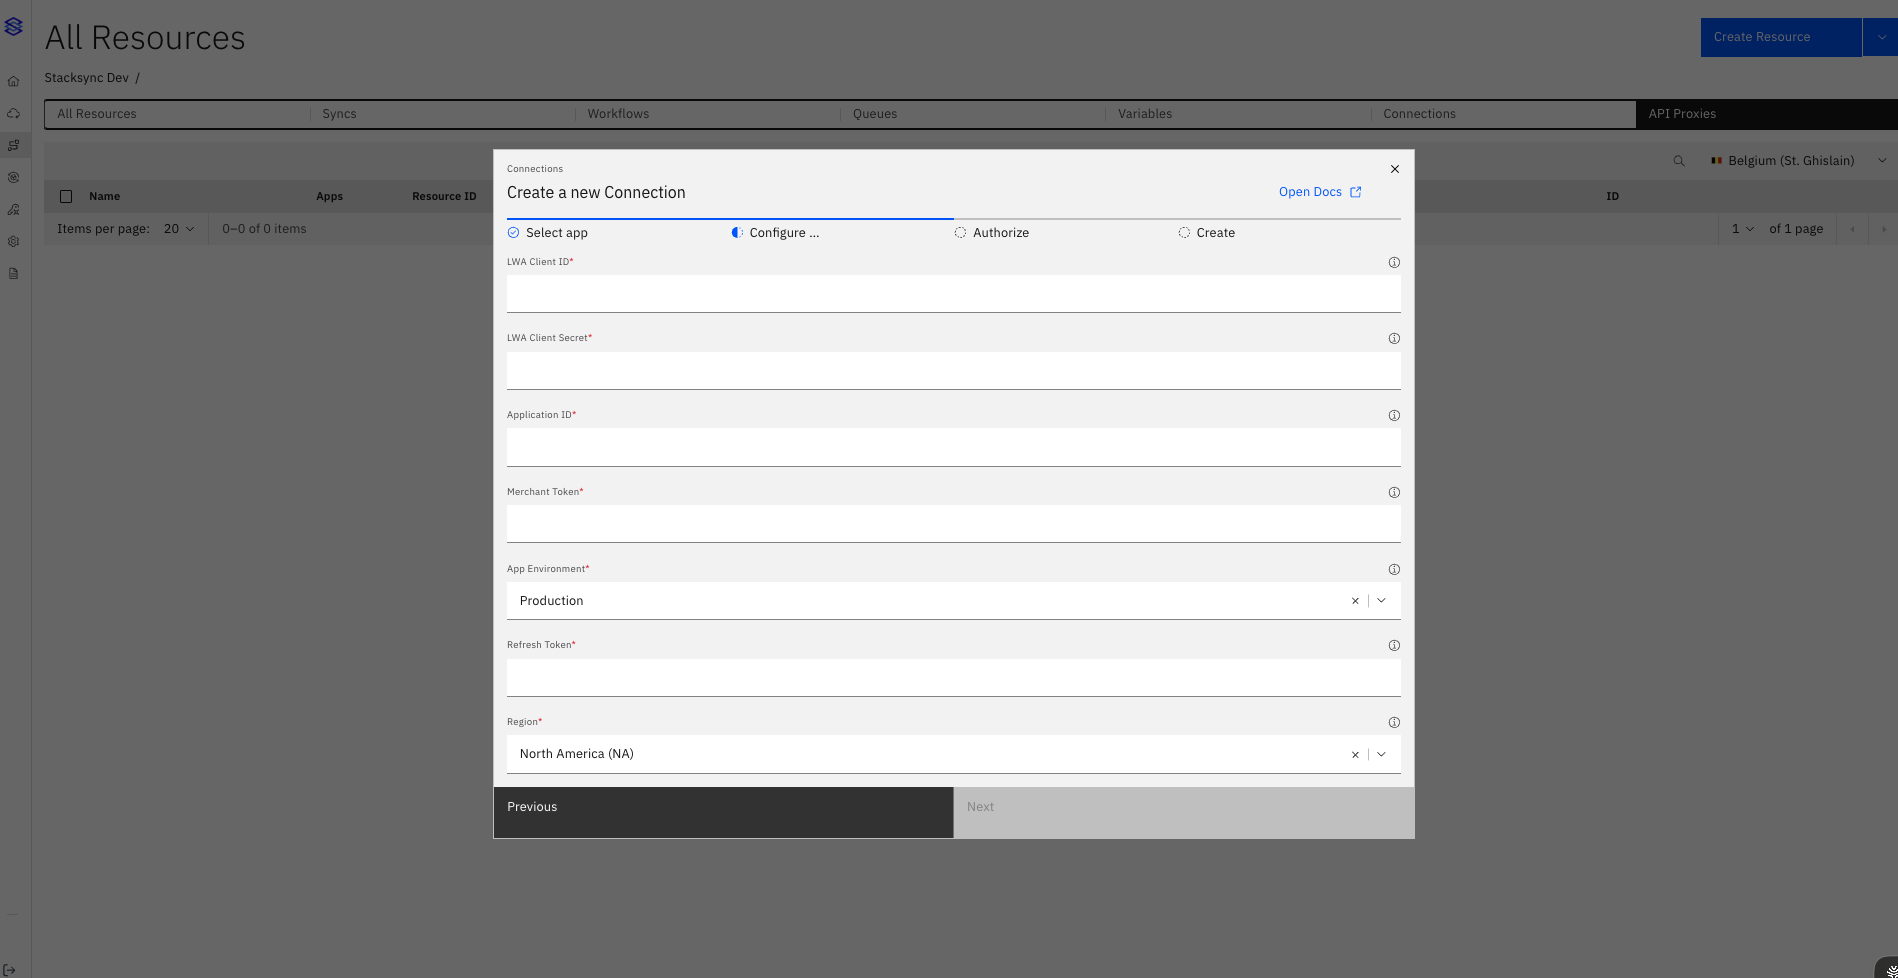
1. Login to [Stacksync](https://app.stacksync.com/) -> **Create Resource** -> **Connections** -> Select **Amazon Seller Central**
2. Enter the connection details collected in the previous steps into the form.\
a. Client ID\
b. Client Secret\
c. Merchent Token\
d. Select Production / Sandbbox Account\
e. Refresh Token\
f. Select the Region where the App is created in previous steps
3. Click **Next**, then **Authorize Connection** to complete setup.
The connector is now ready to start syncing data.
If you have any questions or run into any blockers, reach out anytime at and the Stacksync team will be happy to help.