# Agentic Workflows Quick Start

Source: https://docs.stacksync.com/agentic-workflows

Welcome to Stacksync Agentic Workflows!

Agentic Workflows go beyond simple automation, they allow you to build intelligent, multi-step processes that can reason, branch, and act based on real-time data. Combine triggers, actions, logic, and AI to automate complex business operations end-to-end.

<YouTube id="CoqVSClHhqg" title="Video" />

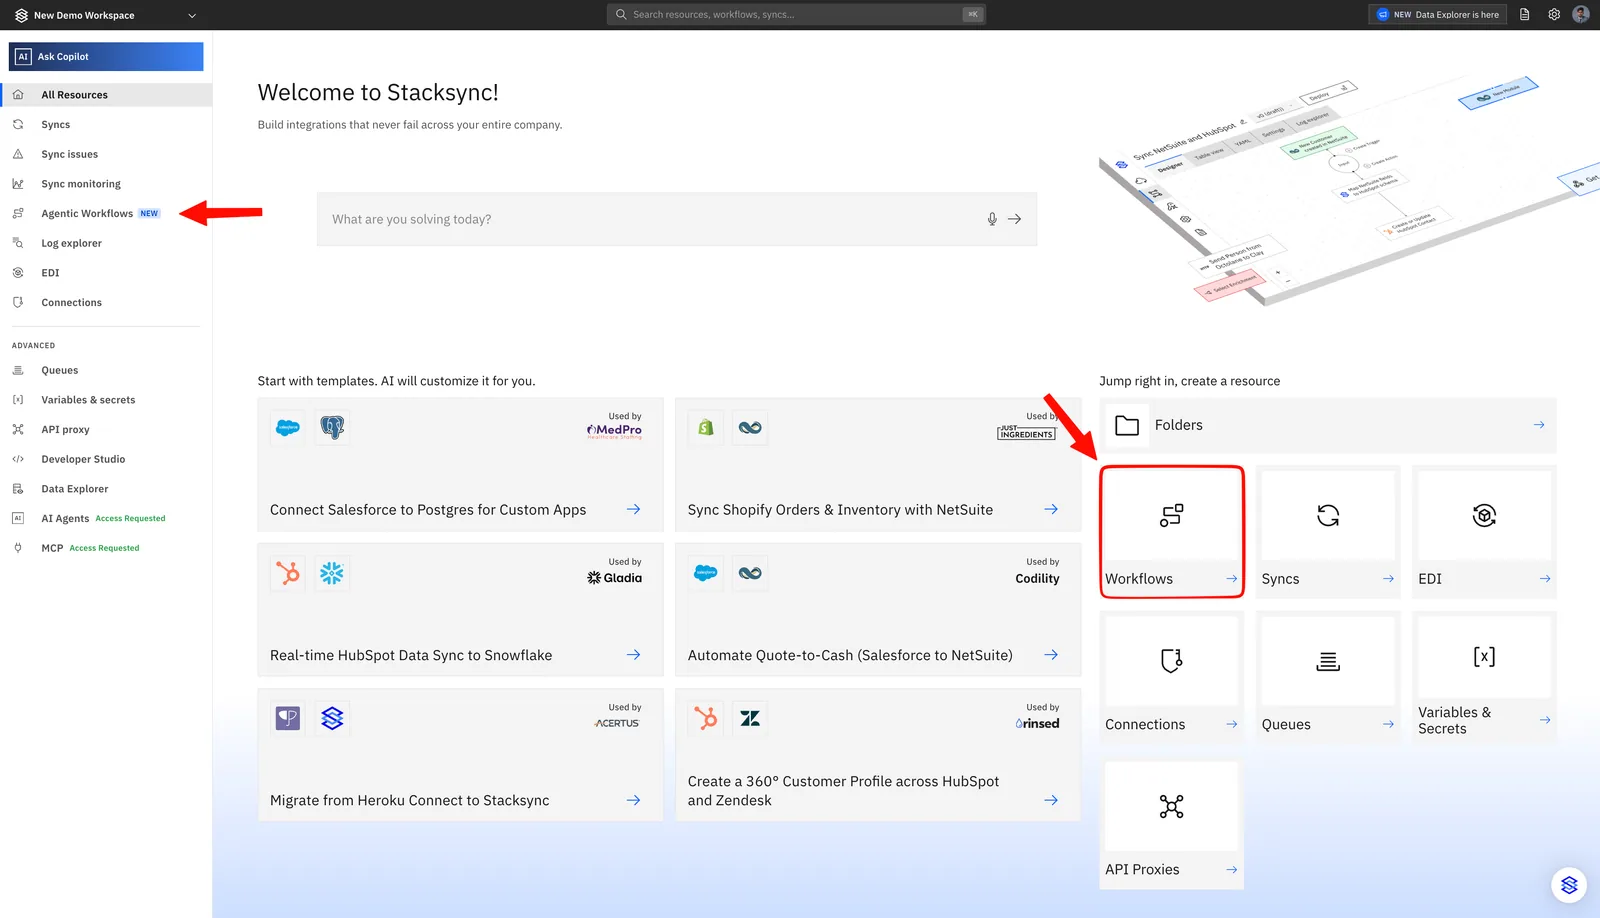
## 1. Select "Agentic Workflows" under "All Resources"

<figure>
  <img src="/images/agentic-workflows/all-resources-agentic-workflows-entry.webp" alt="Stacksync All Resources home page with arrows pointing to &#x22;Agentic Workflows&#x22; in the sidebar and the Workflows tile under &#x22;Jump right in&#x22;." width="1600" height="918" loading="lazy" decoding="async" />

  <figcaption />
</figure>

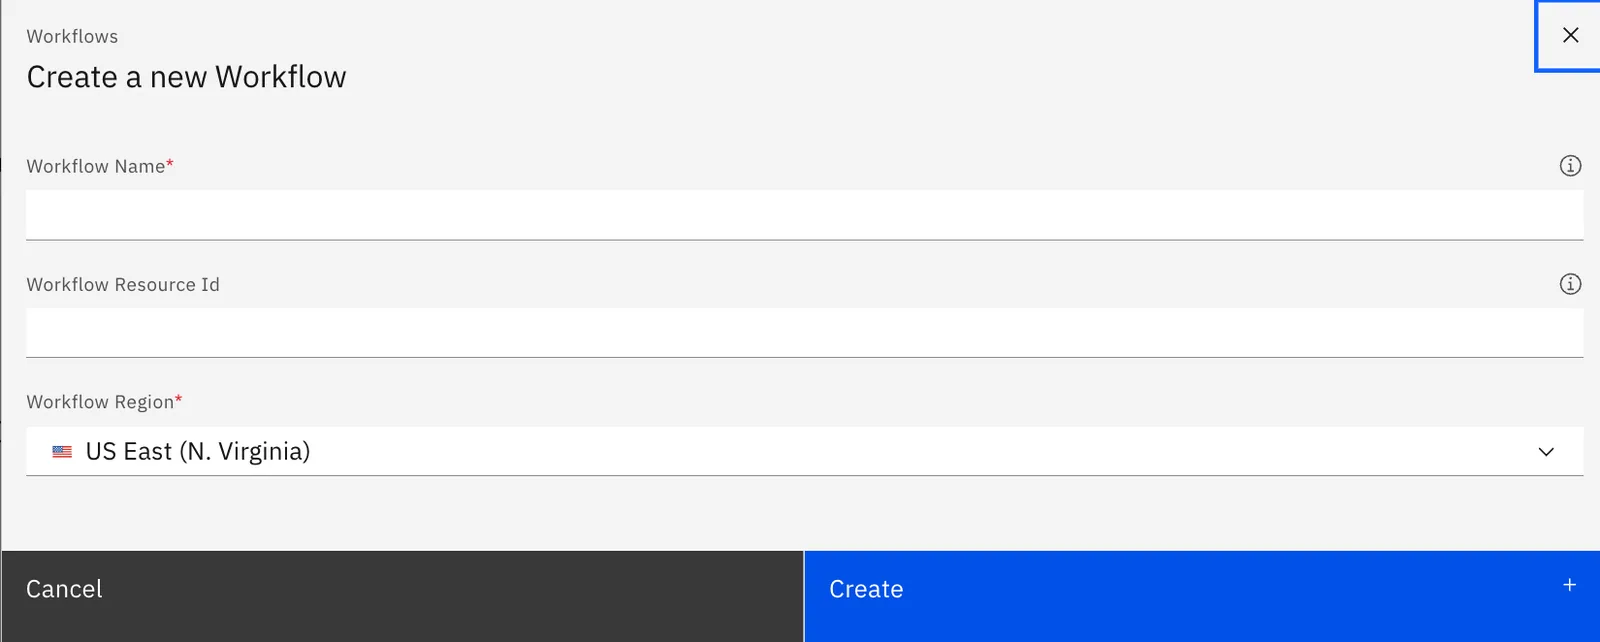
## 2. Create a workflow by adding a unique name and choosing the region.

We recommend you choose the region closest to you and / or the server(s) and service(s) the Workflow will be interacting with.

<figure>
  <img src="/images/agentic-workflows/create-new-workflow-name-region.webp" alt="&#x22;Create a new Workflow&#x22; dialog with Workflow Name, Workflow Resource Id and Workflow Region set to US East (N. Virginia)." width="1600" height="642" loading="lazy" decoding="async" />

  <figcaption />
</figure>

Once created you will see the Workflow designer with an empty workflow and a default POST Trigger. This trigger may be used to run your workflow from a terminal or through an API request.

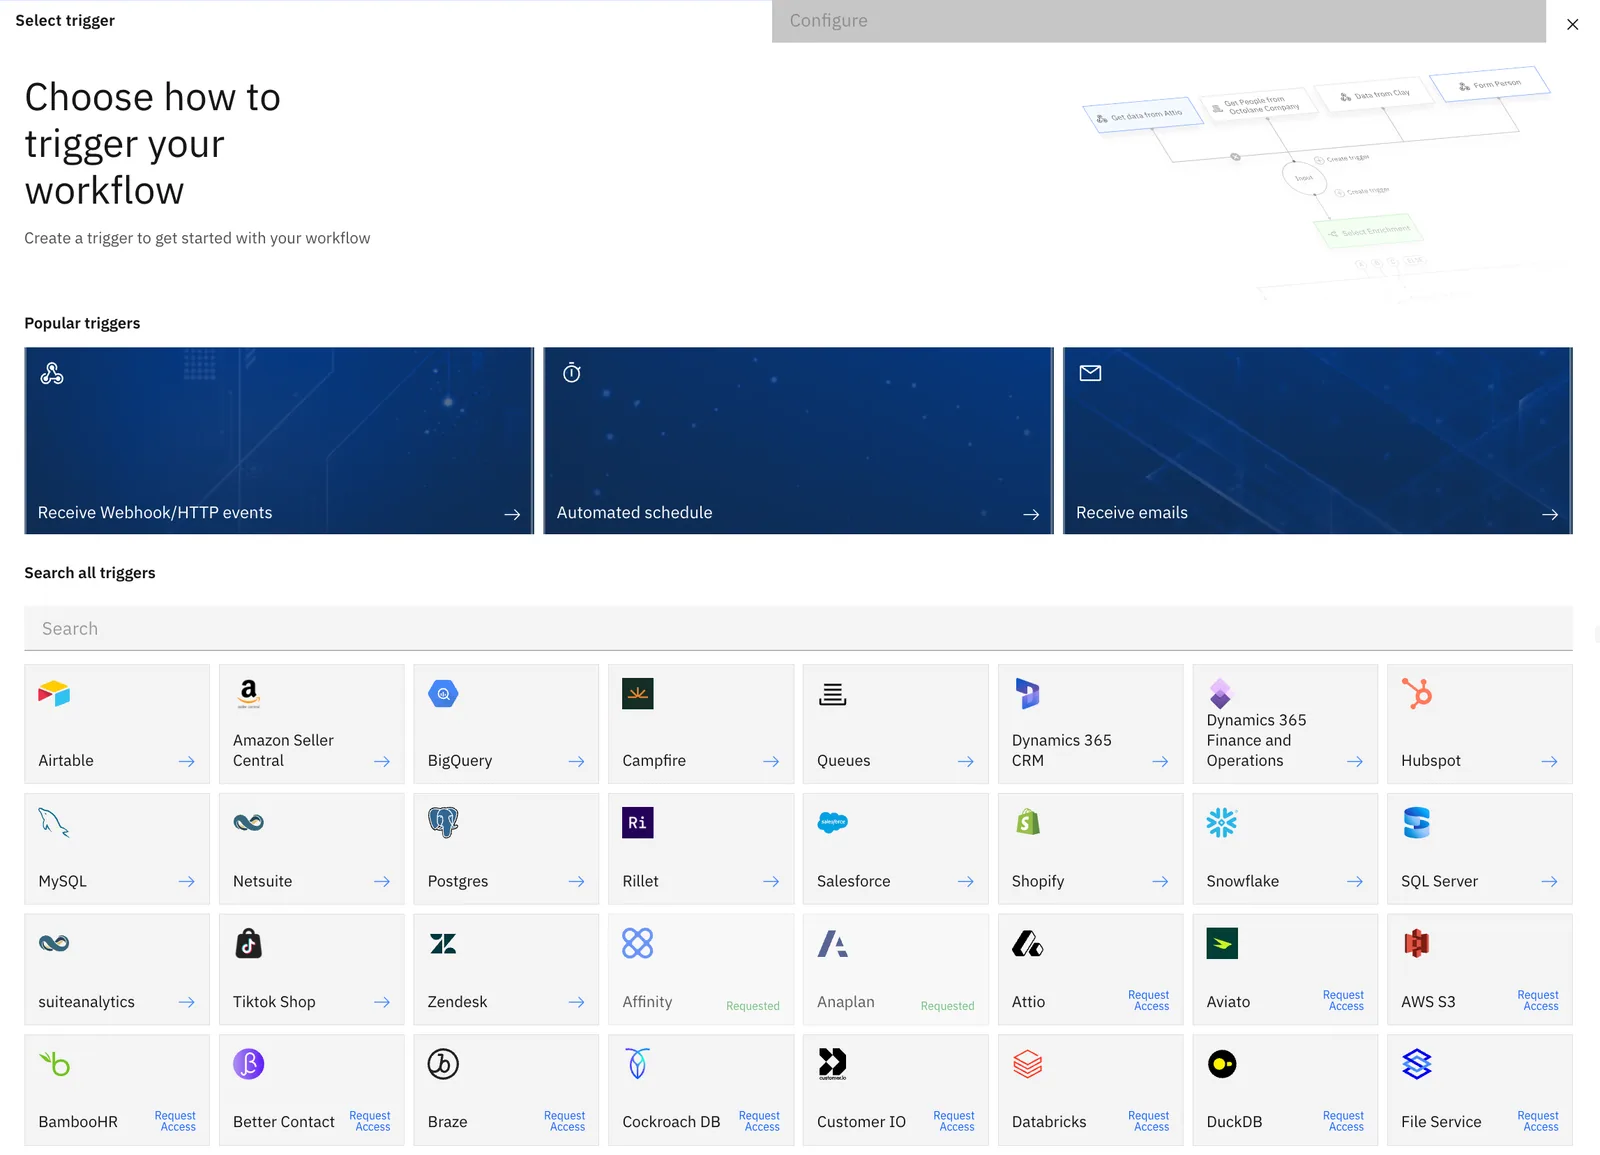
## 3. Create your Trigger

You will see a menu with all of the currently available Trigger types. By default the POST trigger is already configured

<figure>
  <img src="/images/agentic-workflows/workflow-select-trigger-catalog.webp" alt="&#x22;Choose how to trigger your workflow&#x22; screen with popular Webhook/HTTP, Automated schedule and Receive emails triggers plus an app trigger grid." width="1600" height="1155" loading="lazy" decoding="async" />

  <figcaption />
</figure>

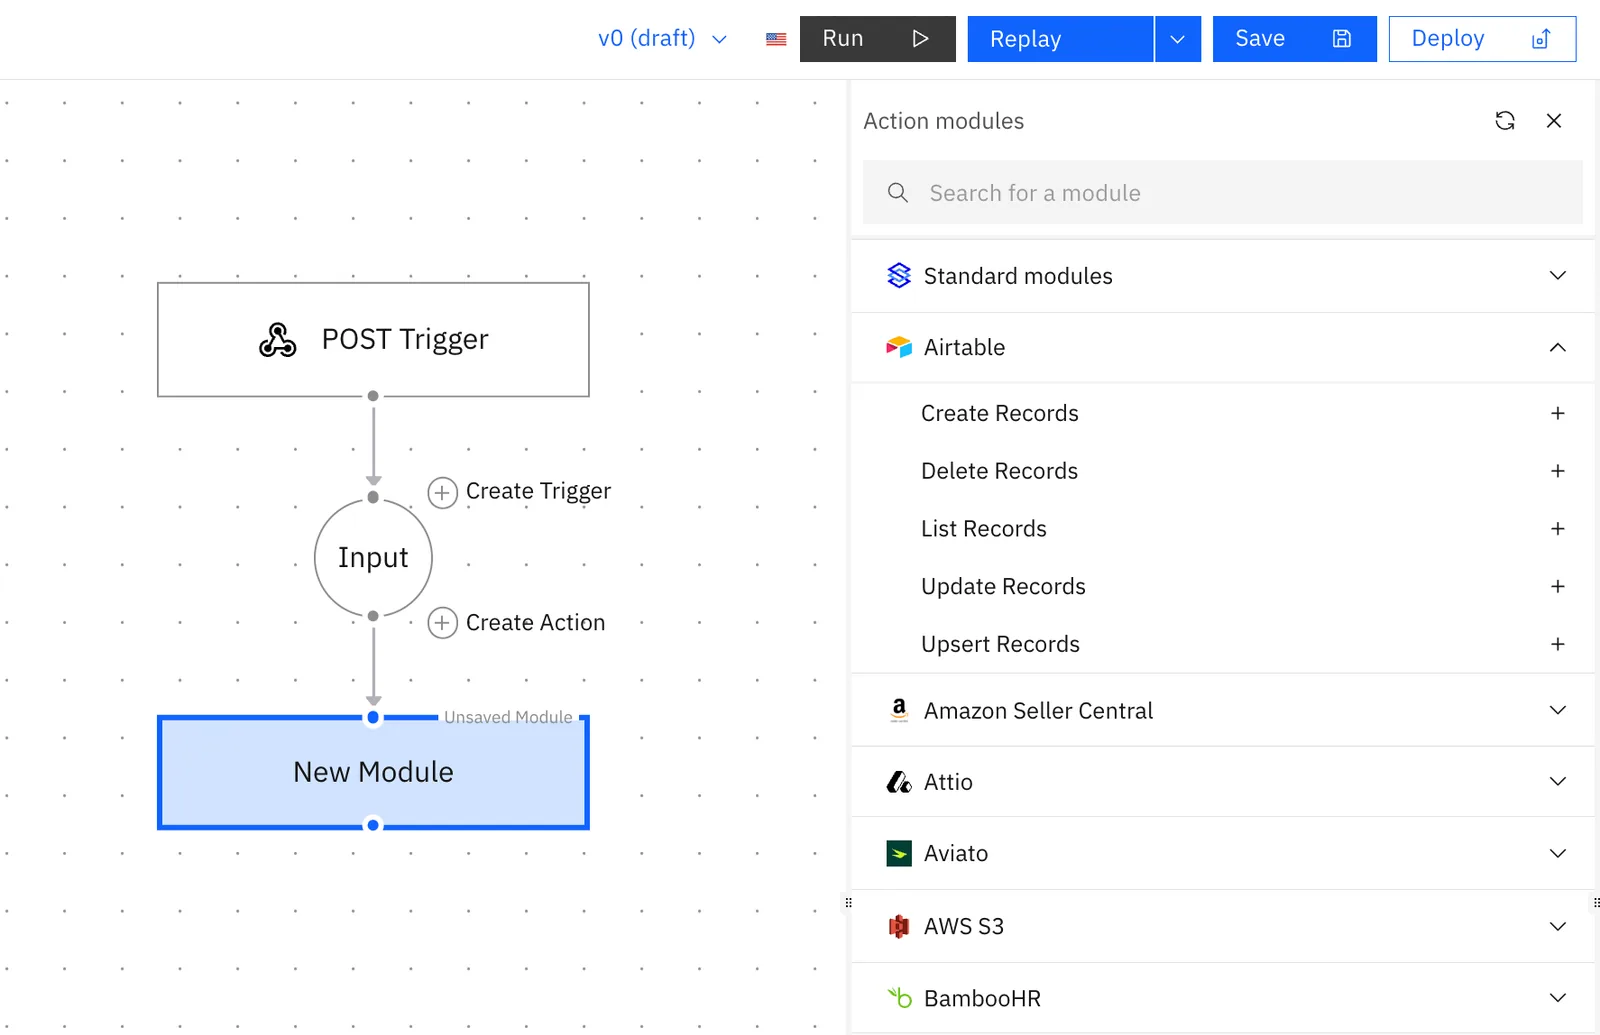
## 4. Create your first action.

Click on the ➕ Icon to create a new action and you will see a menu with all of the currently available Action Modules.

<figure>
  <img src="/images/agentic-workflows/workflow-action-modules-menu.webp" alt="Workflow editor with a new module after the POST Trigger and the Action modules menu open, showing Airtable actions like Create Records." width="1600" height="1035" loading="lazy" decoding="async" />

  <figcaption />
</figure>

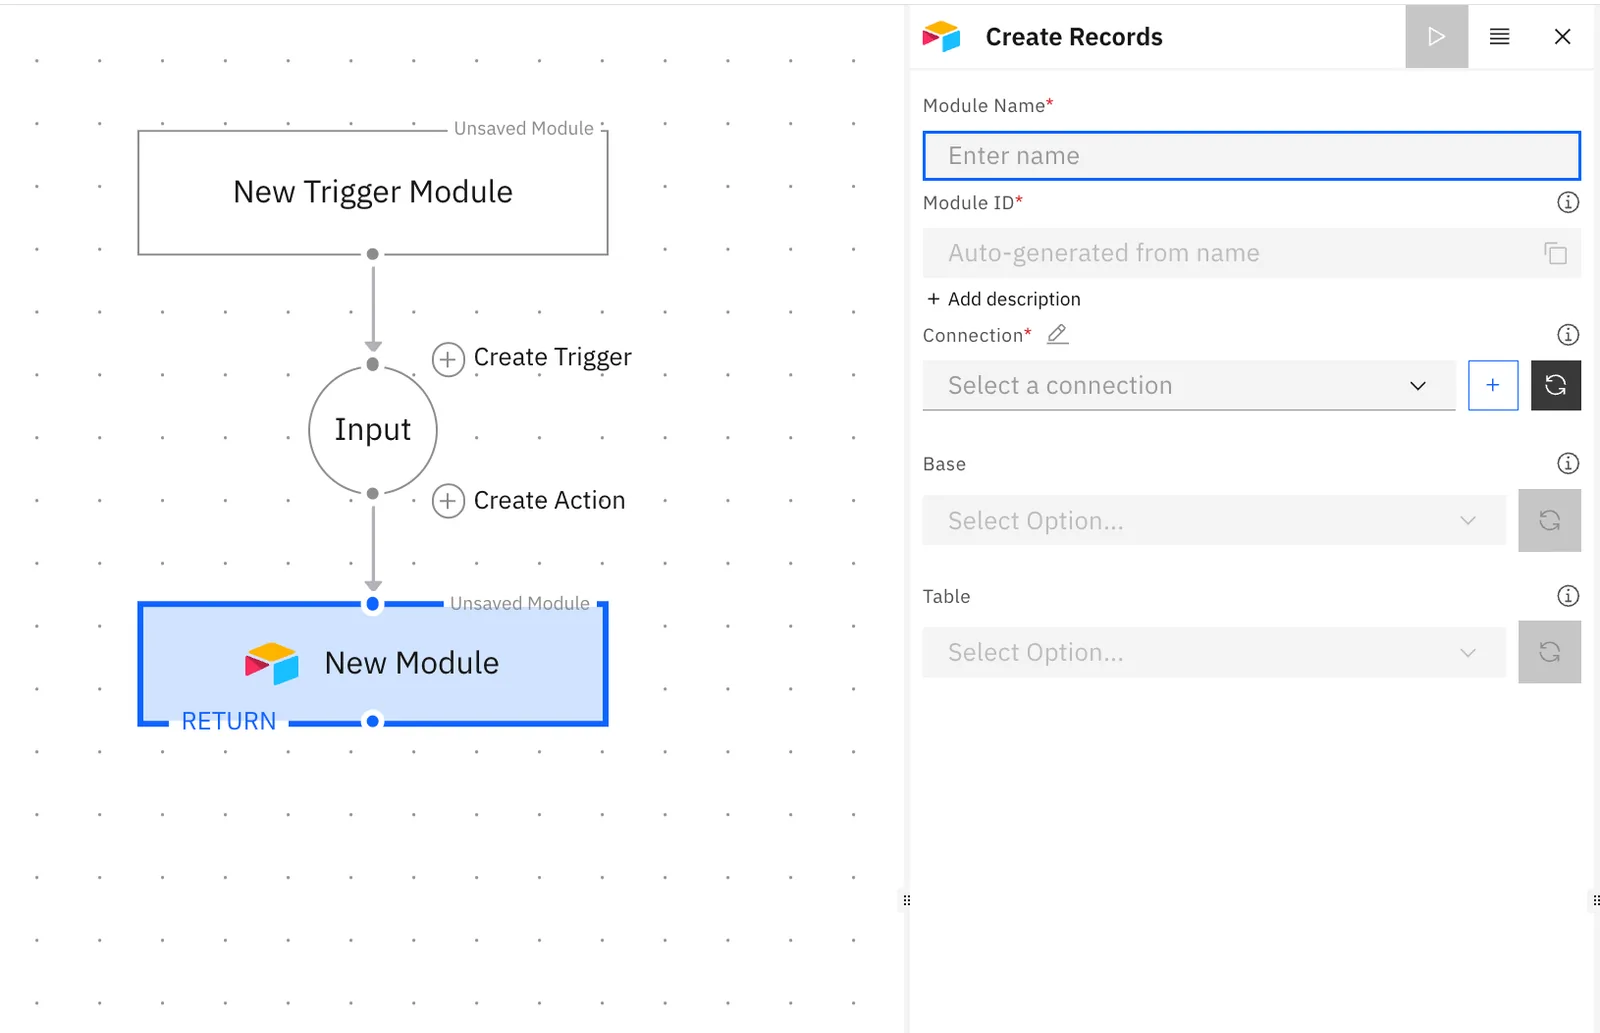
In this example we will be using the "Create Record(s)" module of Airtable.  Stacksync allows you to create batches of records with one simple to use action.

## 5. Configure your action.

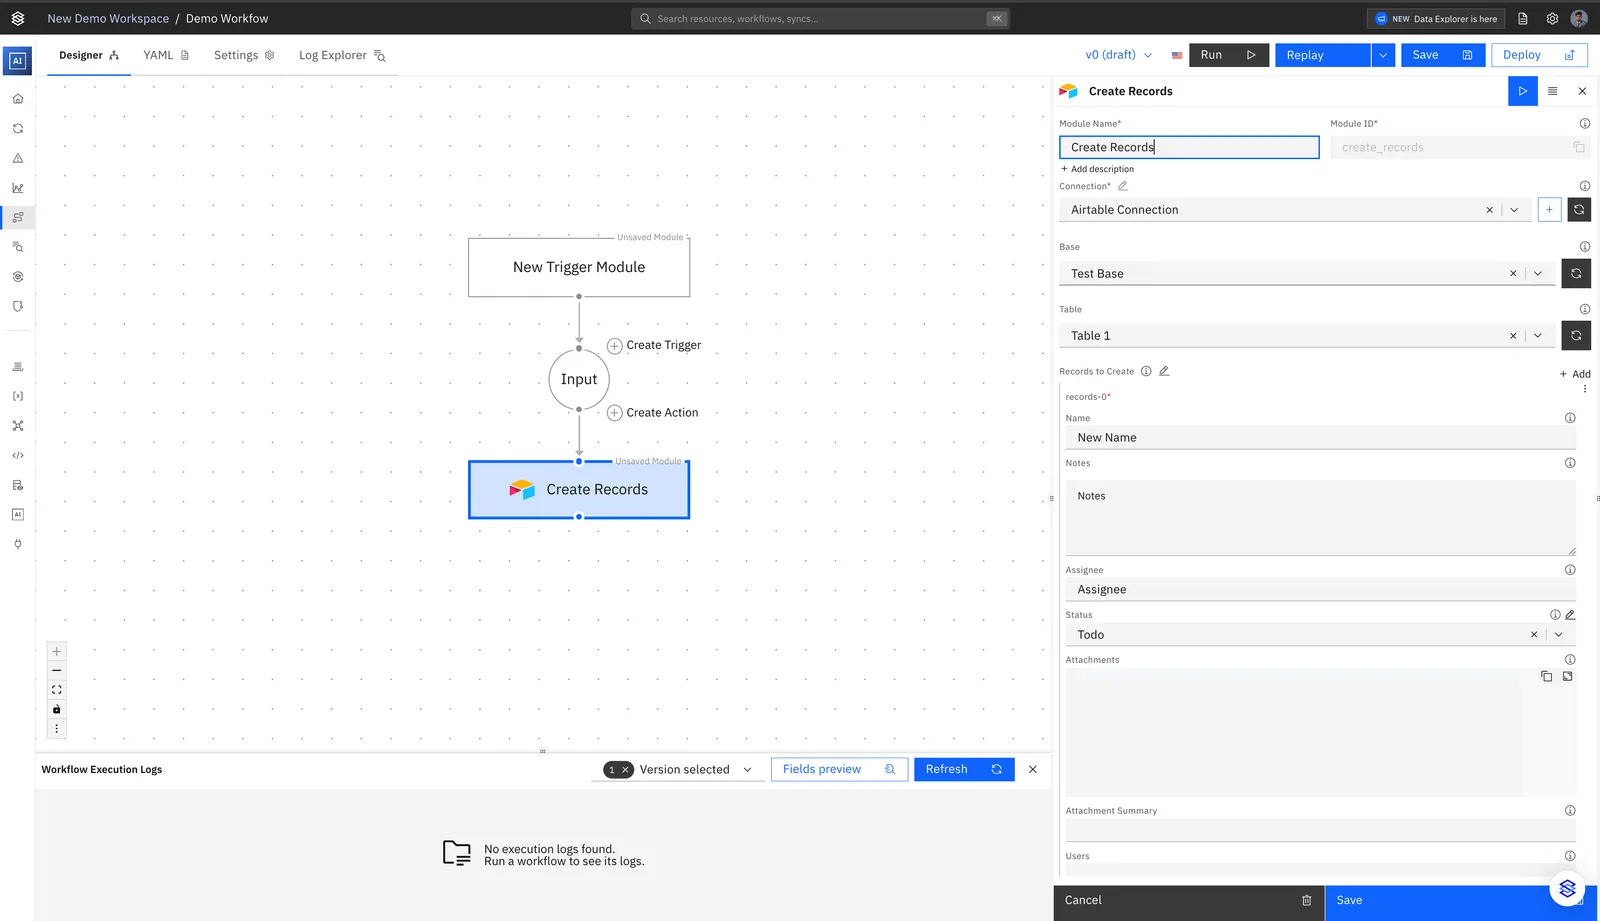
After having set a preferred Display Name for your Action, you will need to add a **Connection**. If you have currently have no connections simply click on "➕ Add New Connection".

<figure>
  <img src="/images/agentic-workflows/airtable-create-records-action-config.webp" alt="Airtable Create Records action panel with Module Name, Connection &#x22;Select a connection&#x22; and the + button to add a connection, Base and Table." width="1600" height="1033" loading="lazy" decoding="async" />

  <figcaption />
</figure>

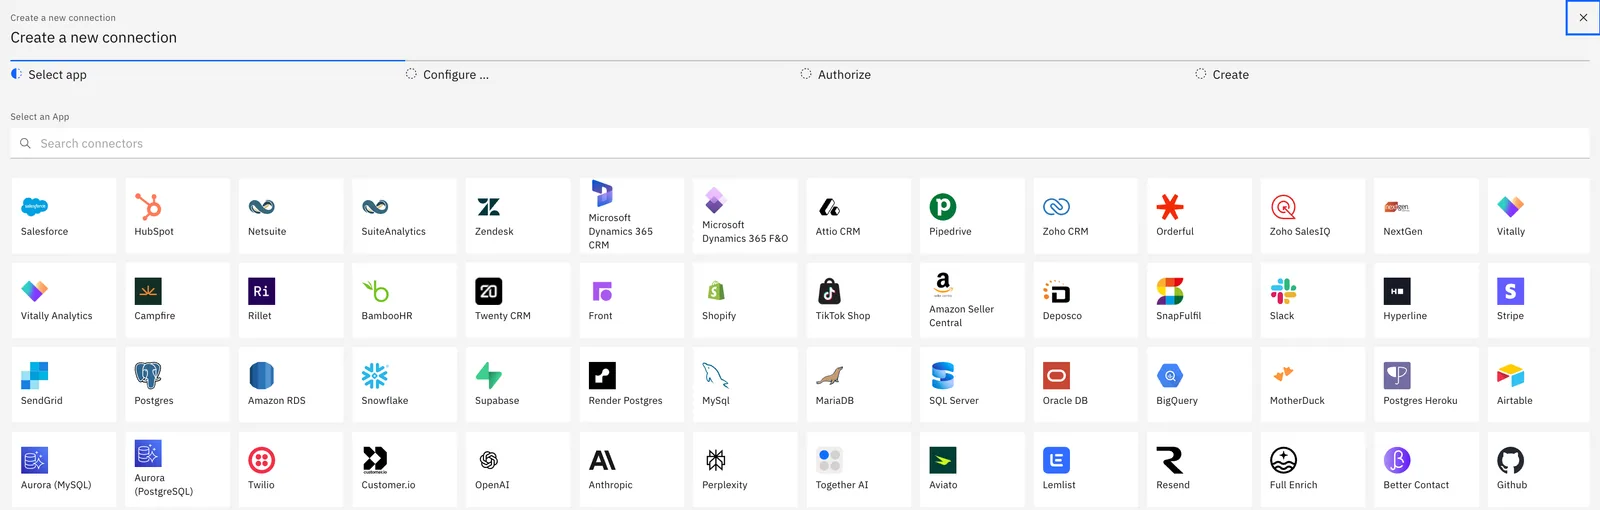
After clicking on "Add new connection" you'll be redirected to the page to Create a Connection.

<figure>
  <img src="/images/agentic-workflows/create-connection-select-app.webp" alt="&#x22;Create a new connection&#x22; Select app step showing a grid of connectors such as Salesforce, HubSpot, NetSuite, Postgres and Snowflake." width="1600" height="510" loading="lazy" decoding="async" />

  <figcaption />
</figure>

Follow the instructions for your selected Application. Once you have finished adding your connection, go back to your Workflow's page.

<figure>
  <img src="/images/agentic-workflows/airtable-create-records-configured-action.webp" alt="Demo Workflow with a configured Airtable Create Records action: Airtable Connection, Test Base, Table 1 and record fields like Name and Status." width="1600" height="921" loading="lazy" decoding="async" />

  <figcaption />
</figure>

## 6. Run and Deploy your workflow!

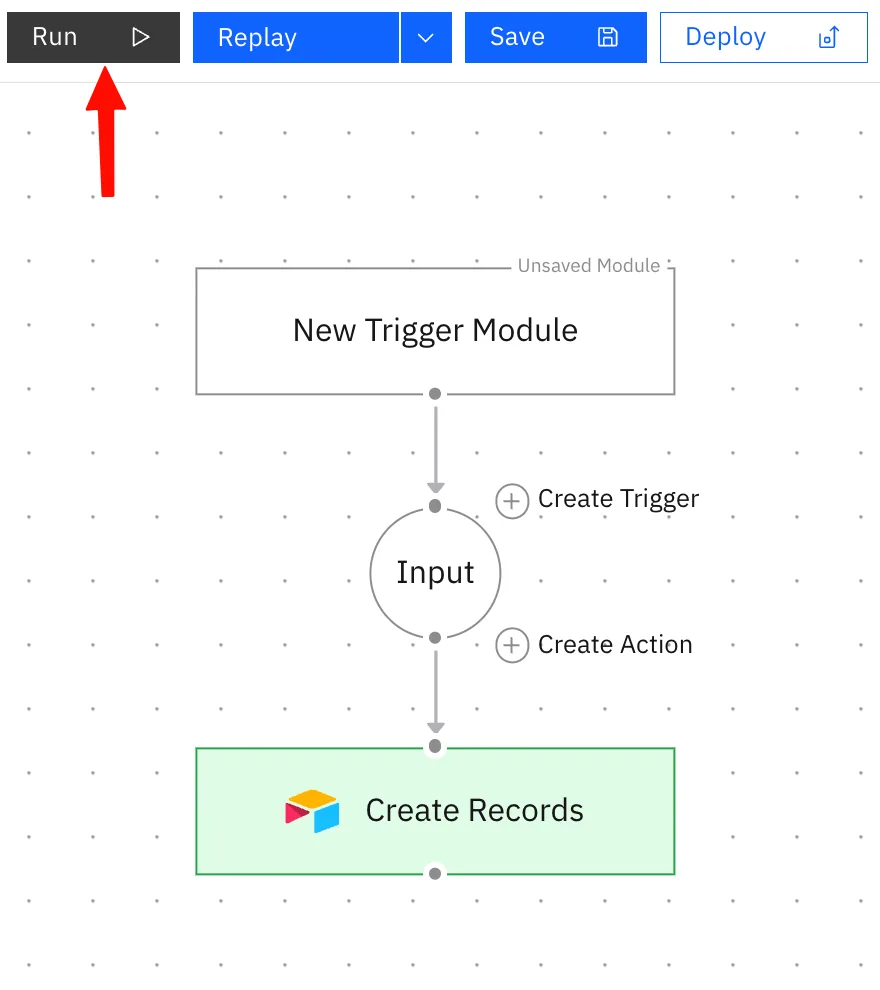
Click "Run" to trigger the workflow manually using the POST trigger. A green execution status confirms the workflow completed successfully.

<figure>
  <img src="/images/agentic-workflows/workflow-run-button-create-records.webp" alt="Workflow editor with an arrow pointing to the Run button above a workflow ending in a green Airtable Create Records node." width="880" height="990" loading="lazy" decoding="async" />

  <figcaption />
</figure>

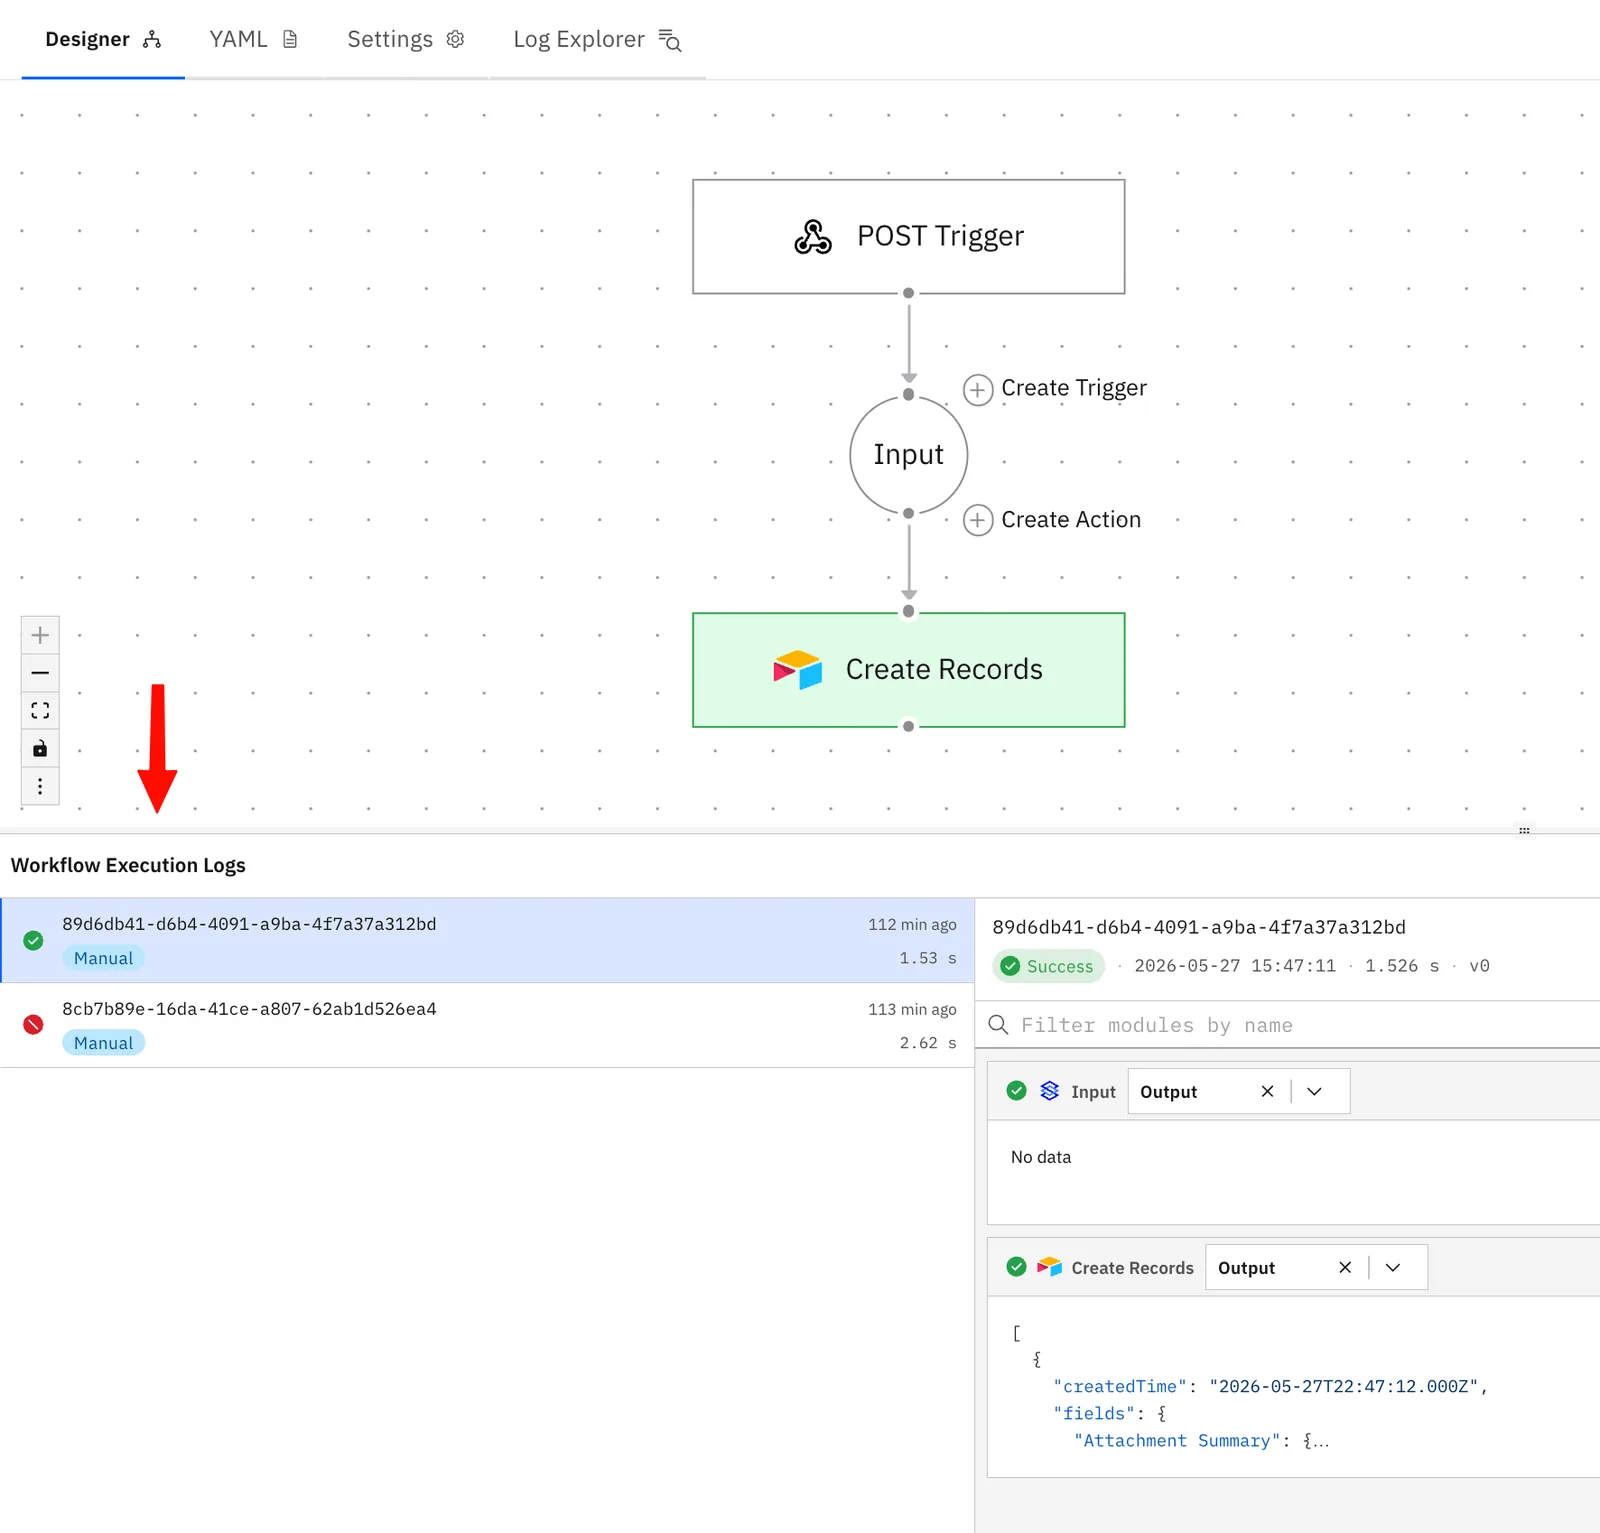
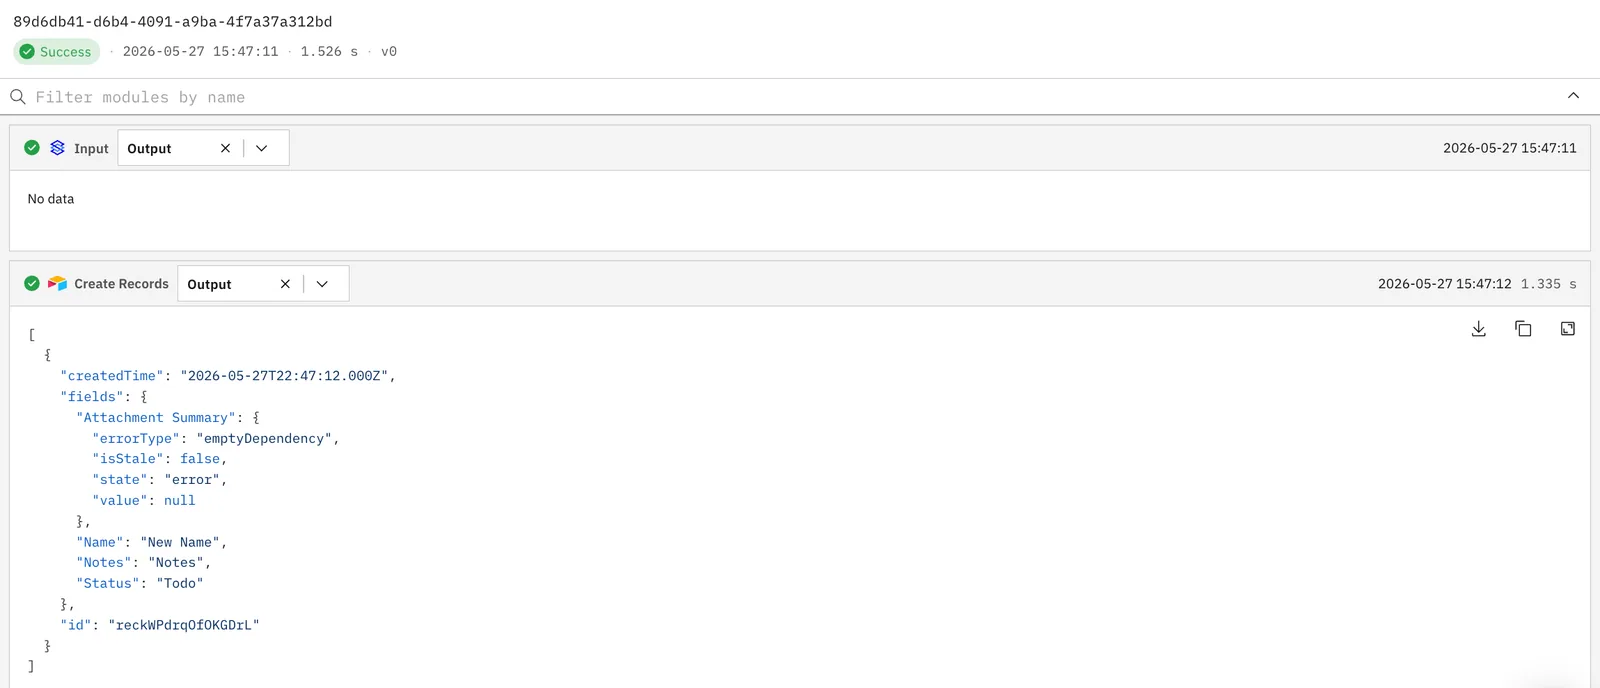
## 7. Monitor your execution logs.
<figure>
  <img src="/images/agentic-workflows/workflow-execution-logs-panel.webp" alt="Workflow Execution Logs panel below the canvas, listing manual runs with a successful run's Create Records output shown on the right." width="1600" height="1533" loading="lazy" decoding="async" />

  <figcaption />
</figure>

<figure>
  <img src="/images/agentic-workflows/execution-log-create-records-output.webp" alt="Successful execution detail showing the Create Records output JSON with createdTime, fields such as Name &#x22;New Name&#x22; and Status &#x22;Todo&#x22;, and record id." width="1600" height="688" loading="lazy" decoding="async" />

  <figcaption />
</figure>